INTRODUCTION:
A Power BI dashboard uses visualizations to tell a story, that comes from reports which are based on the datasets. In this article, i will be discussing and demonstrating as on how to integrate a report by using Power BI Embedding also known as Power BI Embedded into an Application.
Power BI Embedded is a Microsoft Azure service that helps the ISV (independent software vendor) and developers that quickly embed reports, dashboards, and visuals into an application through a capacity-based, hourly metered model.
This Tutorial will help you understand the use of Power BI .NET SDK with the help of Power BI JavaScript API to em.bed Power BI reports into an application for your organization.
How to Embed reports in Power BI?
In Power BI, you can embed reports, power bi dashboards, or tiles within an application by using user owns data.
Jump to Section
Embed your reports by using the .NET sample application
To embed your reports by using a sample application, follow these steps given below:
- Firstly, click on the link: https://github.com/Microsoft/PowerBI-Developer-Samples
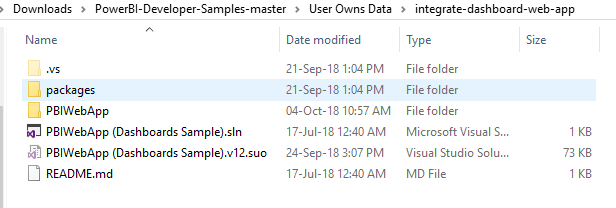
- Then, download the User owns data sample from GitHub.
- There you would see 3 different types of sample applications: one is known for reports,, another is known for dashboard and the third one is known for tiles.
- This article is used for the reports of application in the dashboard.
- If you select to set up the environment manually then you need to follow certain steps as guided below.
Set up your Power BI environment
Create an app workspace
- In order to embed reports or dashboards for your customers in the application, then you have to publish your report within an app workspace on web power BI app.
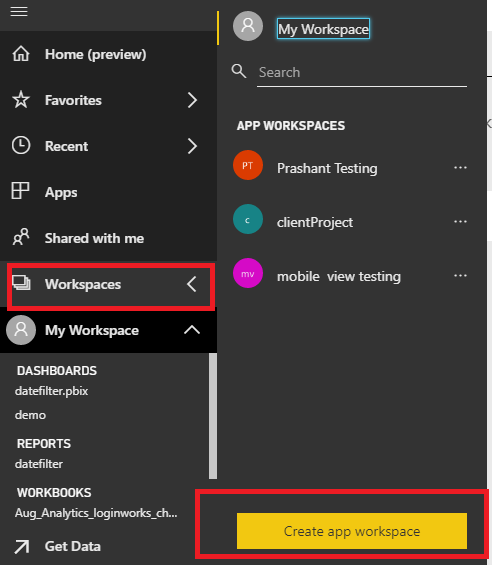
- Here, we have to create the workspace on web app.
- Then Select Workspaces > Create app workspace.
- The ‘workspace’ is the column where you can place the content or reports that your application needs to access.
 Define the name of workspace.
- If Workspace ID isn’t available then edit it to come up with a unique ID.
- The name of workspace has to be the same name as mentioned on the app in power BI.
 Now, You need to set some permissions.
- If you selected Public, then anyone in your organization or user can see the workspace.
- Else, if you will select Private, then the members of the workspace can see its content
- The members of the workspace would be the one you have defined in the email.
- Always remember that once you have made the desired changes in the settings while creating the workspace group then afterwards you cannot make any further changes in public or private settings.
- You can also give permission for editing or view-only access to the members of the workspace accordingly.
- Select Add for adding the email ID’s of people you want to give access for the workspace
- You can’t add group aliases, just individuals.
- Define role for each user as a member or an admin.
- An Admin will have full authority to edit the workspace by itself, also can add other members.
- Members have full access to edit the content in the workspace unless they have view-only access.
- All users can be admin and therefore, can publish the app in power bi workspace.
- Now, open the Power BI workspace .
- The list of workspace displays the name of all the members that you have added in the list.
- If you want to make any further changes again then you just need to select the three dots (…) to go back and make the required changes. Like adding new members or changing their permissions.
 Define the name of workspace.
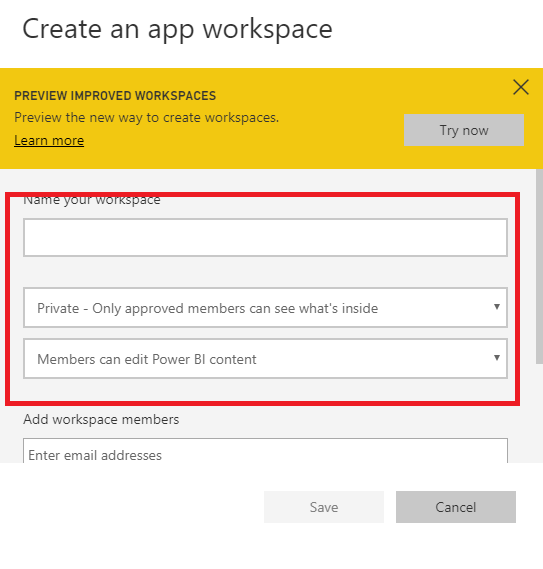 Now, You need to set some permissions.
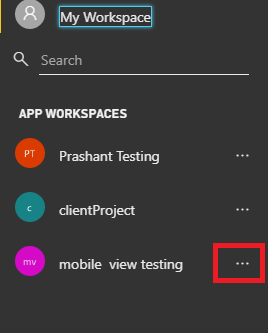
Publish your reports:
- You can create reports and datasets by using Power BI Desktop, However, if don’t have any dataset or report then, you can download the sample report, datasets file Microsoft official website.
- Now, you can publish the reports to an app workspace.
- Microsoft Power BI initially gives 60 days trial for a new user.
- Then, after 60 days for publishing the reports, you need to have a Power BI Pro license to publish the report to an app workspace.
- Download the sample file .pbix demo from GitHub. Here is the link: https://github.com/Microsoft/powerbi-desktop-samples/tree/master/2018.
- Open the sample .pbix report in Power BI Desktop.
- These reports are Published to the app workspace.
.NET SDK SETUP:
- Now, Setup your downloaded project in visual studios then, select .sln file
- Then open the web.config file in the sample application.
- There are a few fields that you must fill and setup.
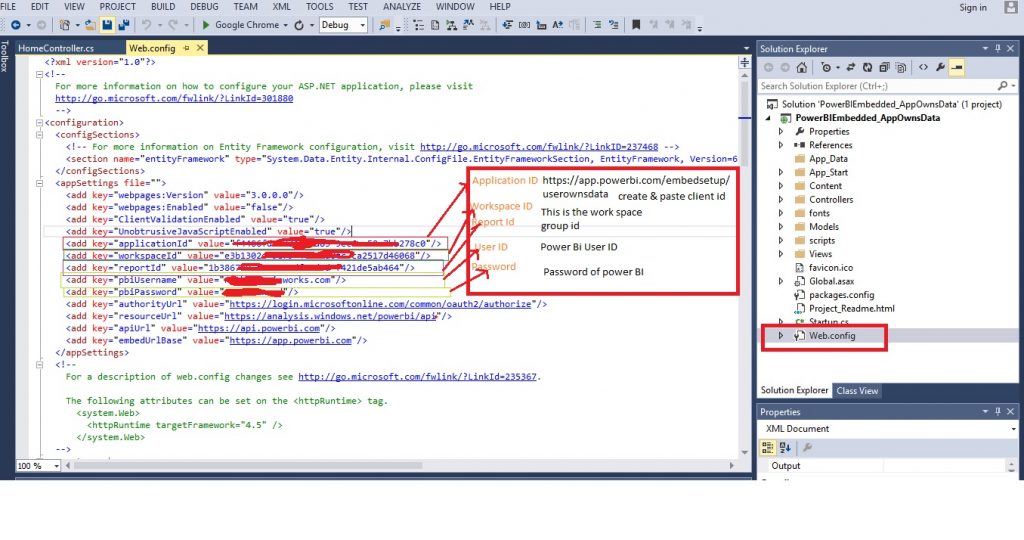
- Application Id:
- This is the client id which is created on the link: https://dev.powerbi.com/app.
- Copy the link and paste it in application id value in the web.config
- Workspace Id:
- Go on web workspace then, Copy group id as shown in the image.
- Copy and paste the group id in workspace id in the web.config file.

- ReportId:
- Click on any report open in full size then copy report id from url then copy and paste in the code.

- User Name:

Enter the user name of Power BI login which was created at the time of registration.
- Password:
Enter the password of power bi login which was created at the time of registration.
- After configuring these details in .NET SDK then, run build code in visual studios.
- Then, after the successful compilation of code, we need to verify the records and then, log in.
- It will now show 3 tiles like Show embed dashboard, report etc.
- when you click on the report then it will display all the reports of the workspace.
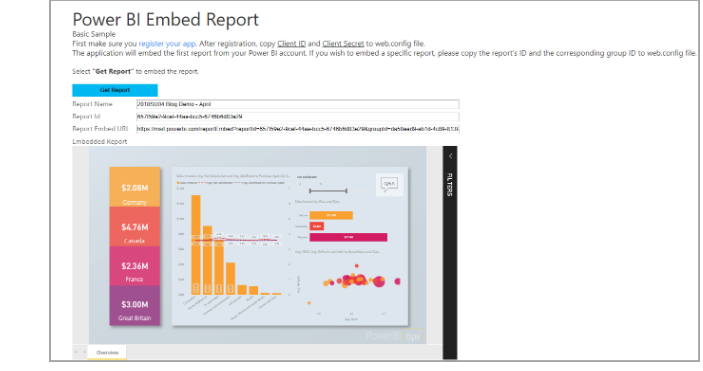
This report can now return as REST API response, so, you can embed this report in the website/organization anywhere.
Summary
In the above article, you have learned how to embed the report into Power BI application by using your Power BI organization account. With this, we come to the end of tutorial on Topic “How to embed Power BI report into your application using .NET SDK”. I hope this will help you to improve your knowledge to work on embedding Power BI content for your customers.
However, suggestions or queries are always welcome, so, do write in the comment section.
Thank You for Learning!!!
- What Products Should You Sell on Amazon? - November 18, 2020
- 10 Reasons Why You Should Start Selling on Amazon - October 22, 2020
- Comparative Study of Top 6 Web Scraping Tools - September 3, 2020