
Hello Readers! Here, we have many ways to build a chat application in Ionic Framework by using Firebase as a real-time database or using Node JS server with Socket.io.
In this post, I am going to guide you on how to create a real-time chat app in Ionic using Node JS server with Socket.io. Here, we will be using the Node JS app for the backend and the Ionic app as frontend. So let’s build your own chat application in ionic. Before going to this, let’s have a look at sockets.
Jump to Section
Sockets
Sockets will help us to enable a real-time bi-directional event-based communication channel between two or more machines. This means sending messages back and forth will happen in real-time between two or more machines. Here we are not saving the user data on the server. In this app, we have two parts.
1. Chat Server/Backend
2. Chat Client /Frontend
Let’s get started with creating a backend in Node JS
Chat Server/Backend
First of all, we need to create a new folder with the name of chatServer. Open your command prompt and type the below text.
mkdir chatServer && cd chatServer.
Initialize the Node JS by using the below command.
npm init
When it prompt give the following values.
name: (chatServer)

version: (1.0.0)

description:

chat app entry point: (index.js) index.js

test command: node index.js

git repository:

keywords:

author: ashok license: (ISC)
Confirm the server creation by putting ‘yes’.
Now will install Socket.io to our node server by using the below command.
npm install socket.io --save.
Here the package.json file looks like this.
package.json:
{

"name": "chat",

"version": "1.0.0",

"description": "chat app",

"main": "index.js",

"scripts": {

"test": "node index.js"

},

"author": "ashok",

"license": "ISC",

"dependencies": {

"socket.io": "^2.0.4"

}

}
After installation is done, create a new file called index.js in chatServer folder which contains the logic of our server. Here, we are just implementing the basic socket functions. So, place the below code in that file and save it.
index.js:
var socket = require('socket.io'), http = require('http'),

server = http.createServer(), socket = socket.listen(server);

socket.on('connection', function(connection) {

console.log('User Connected');

connection.on('message', function(msg){

socket.emit('message', msg);

});

socket.on('add-message', (message) => {

io.emit('message', {text: message.text, from: socket.nickname, created: new Date()});

});

socket.on('disconnect', function(){

io.emit('users-changed', {user: socket.nickname, event: 'left'});

console.log('User Disconnected');

});

});

server.listen(3000, function(){

console.log('Server started');

});
Now go back to the command prompt and start the server by running the following command. Here all the functions are wrapped on socket.on(‘connection’) block, so these will happen only once a client connects to the server.
createServer() function is used to create the server and socket.on(‘connection’) function is executed when the user is connected to the server.
To run the server, please execute the below command.
node index.js
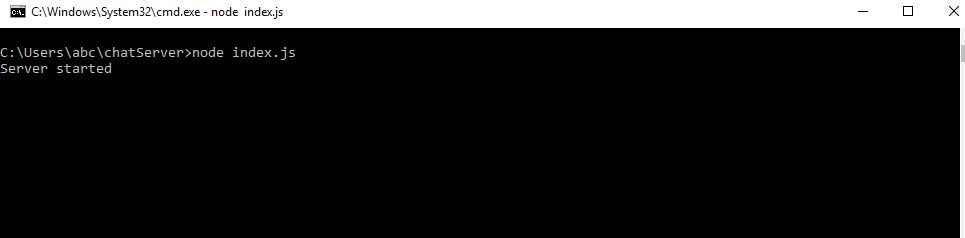
Once done, here server.listen function executes and you can see the message “server started” in the console. With that, we can confirm our chat server is running.
Now will create a Chat Client/Frontend app
Chat Client/Frontend
Now, go back to the command prompt and run the following commands as shown below to create the chat client app.
Create a new blank ionic application as chatClient by using the below command.
ionic start chartClient blank

Now get inside chatClient folder and install socket.io in our app. It will create the ionic application.
cd chartClient.
To install socket.io in our app by using the following command.
npm install socket.io-client --save.

Open home.ts file put the below code and save it.
home.ts
import { Component } from '@angular/core';

import { NavController, ToastController } from 'ionic-angular';

import * as io from 'socket.io-client';

import { Observable } from 'rxjs/Observable';

@Component({

selector: 'page-home',

templateUrl: 'home.html'

})

export class HomePage {

socket:any

chat_input:string;

chats = [];

messages = [];

nickname = '';

message = '';

constructor(public navCtrl: NavController, public toastCtrl:ToastController) {

this.socket = io('http://localhost:3000');

this.socket.on('message', (msg) => {

console.log("message", msg);

this.chats.push(msg);

});

this.getMessages().subscribe(message => {

this.messages.push(message);

});

this.getUsers().subscribe(data => {

let user = data['user'];

});

}

ionViewWillLeave() {

this.socket.disconnect();

}

send(msg) {
if(msg !=''){

this.socket.emit('message', msg);

}

this.chat_input ='';

}

getMessages() {

let observable =new Observable(observer => {

this.socket.on('message', (data) => {

observer.next(data);

});

})

return observable;

}

getUsers() {

let observable =new Observable(observer => {

this.socket.on('users-changed', (data) => {

observer.next(data);

});

});

return observable;

}

}
To use the socket.io library in our application, please import the library as import * as io from ‘socket.io-client’
Here in the constructor, we used socket = io(‘http://localhost:3000’) to connect to the server where the constructor is executed once in a lifetime. So, the connection is established once in a lifetime.
To disconnect the connection between the user and server, we will call socket.disconnect() function on ionViewWillLeave(). This is executed automatically when the user leaves a page
Create a function called send(msg) whenever a user clicks the send button. This function will execute and send the message to the server and then the server to the user.
To get new chat messages inside the room, we have a function getMessage() which returns an observable. Likewise, this message listens to Socket events of the type ‘message’ and repeatedly calls next() on the observable to pass the new value through.
home.html
Now open the src/pages/home/home.html file and place the below code.
<ion-header>

<ion-navbar color="primary">

<ion-title style="text-align:center">

Chat App

</ion-title>

</ion-navbar>

</ion-header>

<ion-content padding>

<ion-grid>

<ion-row *ngFor="let message of chats">

<ion-col col-9 class="message" [ngClass]="{'my_message': message.from === nickname, 'other_message': message.from !== nickname}">

<span>{{ message }}</span>

</ion-col>

</ion-row>

</ion-grid>
</ion-content>

<ion-footer>

<ion-toolbar>

<ion-row class="message_row">

<ion-col col-9>

<ion-item no-lines>

<ion-input type="text" placeholder="Enter Message" [(ngModel)]="chat_input"> </ion-input>

</ion-item>

</ion-col>

<ion-col col-3>

<button ion-button clear color="primary" (click)="send(chat_input)">

Send

</button>

</ion-col>

</ion-row>

</ion-toolbar>

</ion-footer>
For styling our application use the below code in home.scss file.
Open src/pages/home/home.scss file and place the below code and save it.
home.scss
page-home {

.message_row {

background-color: #fff;

}

.message {

padding: 10px! important;

transition: all 250ms ease-in-out !important;

border-radius: 10px !important;

margin-bottom: 4px !important;

}

.my_message {

background: color($colors, primary) !important;

color: #000 !important;

}

.other_message {

background: #dcdcdc !important;

color: #000 !important;

}

.time {

color: #afafaf;

float: right;

font-size: small;

}
}
Launch the App
Before launching the application, make sure your backend is up and running. Then, run the ionic application in the browser by opening the command prompt and run the following command.
ionic serve.

After the above command execution, the app will automatically open in the browser otherwise use this link as http://localhost:8100/

The Real-time chat App with one UI screen looks like this.
Conclusion
Thanks for reading this far. In this post, we have learned about how to create a real-time chat app in Ionic using Node JS server with Socket.io and we have seen the usage of sockets in real-time applications.
So, I hope this blog will be helpful to you to create a simple chat app in ionic. Keep reading for more updates.
- LinkedIn Scraper | LinkedIn Data Extractor Software Tool - February 22, 2021
- Is Web Scraping Legal? - February 15, 2021
- What Is Data Scraping? - February 10, 2021