The first application is always a leap for any developer, myself included! Analyzing things like keeping a check on the client’s requirement and framing an output as per the desired criteria may seem tough at first, but things were much sorted out when I was on the go.
So without any further ado, I’m going to provide a simple step by step guideline for Ionic application development and all its key ingredients within Ionic Framework. Believe me, it’s not that difficult. Rather, it’s more interesting and simple. Let’s get started.
Jump to Section
Prerequisites
This program requires some basic knowledge of the Ionic framework which I explained in my last post. First-timers can click here to understand the Ionic Framework. Another thing required is the installed Ionic platform along with node modules and Cordova on your machine.
You will also need an editor to write code and implement it. Visual studio code or Atom will be fine as they are compatible and user-friendly.
Create Your Ionic App
So, without wasting any time, let’s get started with the creation of an Ionic App. Below are the step-by-step guidelines for the same:
Step 1 – Locating the Project
Open your command line and choose the location where you want to put your first project. Placing it on the desktop is better, as it is easy to find it at any time.
Step 2 – Project Creation
Once the location is set, run the following command on the command line:
ionic start projectname
This command will load all the node modules and files along with the pages/screens required for the project. Open the created project in the editor. I prefer the visual studio code editor.
Once you open the project, it is time for running it and to see how it looks. So, the next step will tell you how to run it in the browser.
Step 3 – Running the Project in Browser
In order to view the app in the browser, run the following command in the command line
Ionic serve
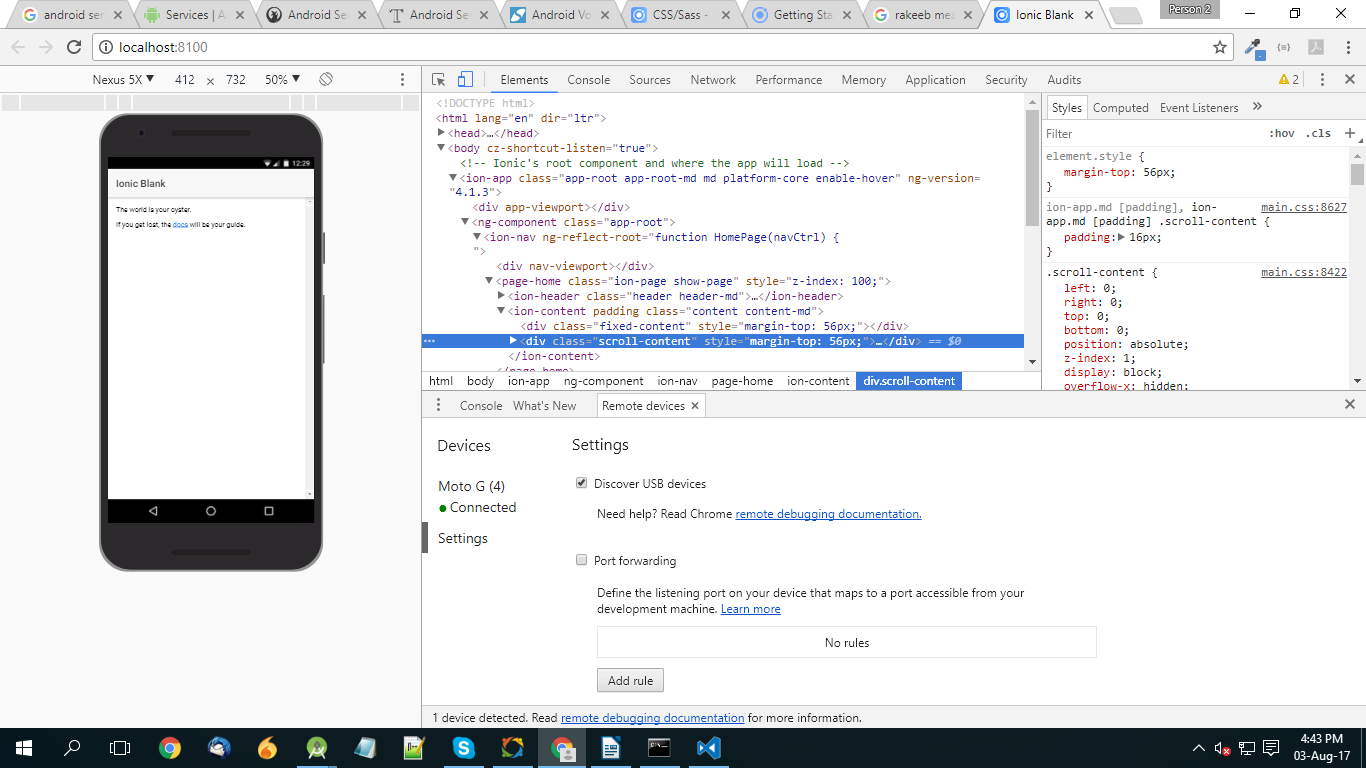
You can see the application on the browser and will look something like this
In case if you want to run the project on a real device, then Ionic got this covered for you too.
Step 4 – Running the Project on Device
To run the application on the real device, run the following command through the command line:
    ionic cordova run android (For Android)
    ionic cordova run ios (For iOS)
Make sure that you have the platforms installed for the project before running it on any one of them.
You can install them by running the following command:
    ionic platform add android (For Android)
    ionic platform add ios (For iOS)
This was all for creating and running an Ionic project on the device and browser. Now, I will explain the code written in Ionic tags and Angular 2.
The Pages Folder
When you go to look into the project in the visual studio code, you will find a folder named home has been created by the system under the folder named pages which further contains 3 files namely:
- home.html
- home.scss
- home.ts
Let’s see all these 3 types of files one by one.
home.html
This page consists of ionic tags and HTML styling which can also be said as the canvas for any screen in the application.
Here, the page starts with the ion-header tag which is the entry point of the page, and describes the header of the page.
Then comes the ion-navbar tag. This tag provides you space to put the image and text here as per your requirement in the header section of the page.
After that comes the ion-title tag which is where we write the text which comes on the page name in the header part. After completing the header part, it is time for the content part or we can say the body of the application where all the components required to interact within the applications are placed.
The ion-content tag is where we write all the components of the page. All the components like button, input, text, or list it goes here. For instance, here a simple line has been written which is system generated. Suit yourself with some different components.
html.scss
This file is called the style sheet for the HTML file support. All the custom styling required for the component in the HTML page is done here and referenced in the HTML page later. The code written here is in the CSS and it will look something like this.
html.ts
This is a typescript file which is used for implementing logic and programming module for the application. Angular 2 supports type-scripting which was not supported earlier and JavaScript was used instead. It consists of a constructor and the name of the class which is the same as the name of the page.
Coding in a *.ts file is easy and can be easily understood.
Starting from the top, it shows the providers imported for the application with their respective packages path. Then there is the selector tag and templateUrl tag which define the template name and selector name which is also the page name.
App folder
Apart from the page folder, there is this app folder which I discussed in my earlier post. This folder also contains 3 files which are responsible for the moment of the application and registry of the new pages in the application.
Resources Folder
The resource folder is also named as src in the project structure. This folder contains the splash screen and icon of the application. At the time of the creation of the project, there are default images for the splash screen and icon.
They can be changed with the following command on the command line. But before running the command, we need to add the icon and splash screen images specifically in the .png extension files. The steps go like this:
Step 1
Add two images namely icon and splash in the src folder with png extension of both the files.
Step 2
After adding images to the src folder, run the following command on the command line
ionic resources
This command will update the icon and splash screen of the application by generating both images for all the possible resolutions of the mobile phones and tabs as well.
Final Words
This is all you need for writing the first application in Ionic. Isn’t it interesting? A lot more will come in the upcoming posts. Stay connected for more updates!
- LinkedIn Scraper | LinkedIn Data Extractor Software Tool - February 22, 2021
- Is Web Scraping Legal? - February 15, 2021
- What Is Data Scraping? - February 10, 2021


