
Hello Everyone, in our previous tutorial we explained how one can create a sample application through which a user can send an Email using the MFMailComposeViewController. But if you remember, it was on Objective-C language.
As you know that in this modern era, technology is so advanced and new updates take place almost every day. So in this tutorial, we will discuss how to develop an application for sending Emails using Swift language. So, let’s get started.
Jump to Section
Setup Environment
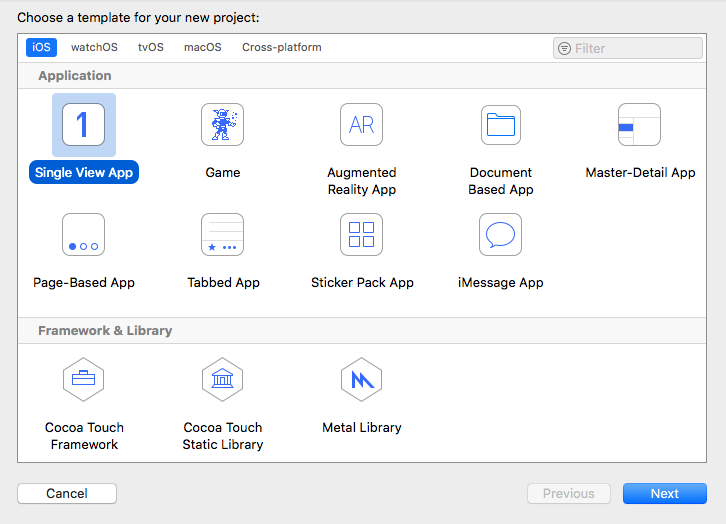
First of all, we need to head into the XCode tool and click on create new application shown on the left side of the screen.
Second, click on single view application and click next as shown in the below snapshot.
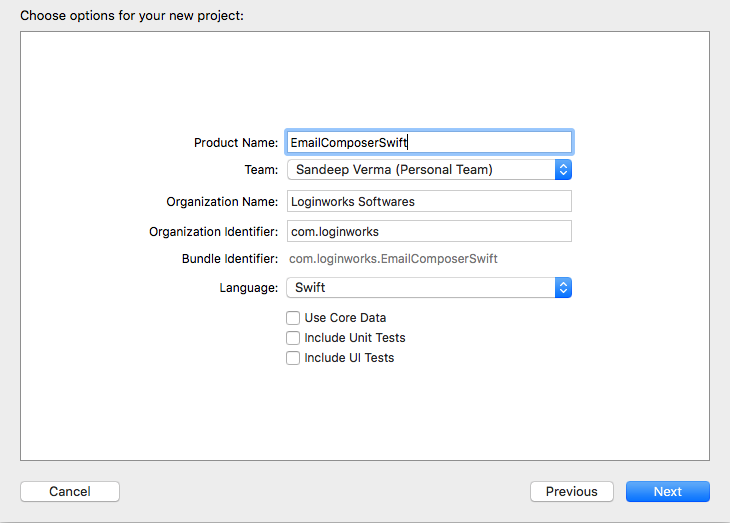
Now, later after doing this give a name to your application and select language as Swift from the language preference shown in the image below.
For my application, I am going to use the name as “EmailComposerSwift”.
Now, save your application to a particular place after giving a name to it.
Interface Designing
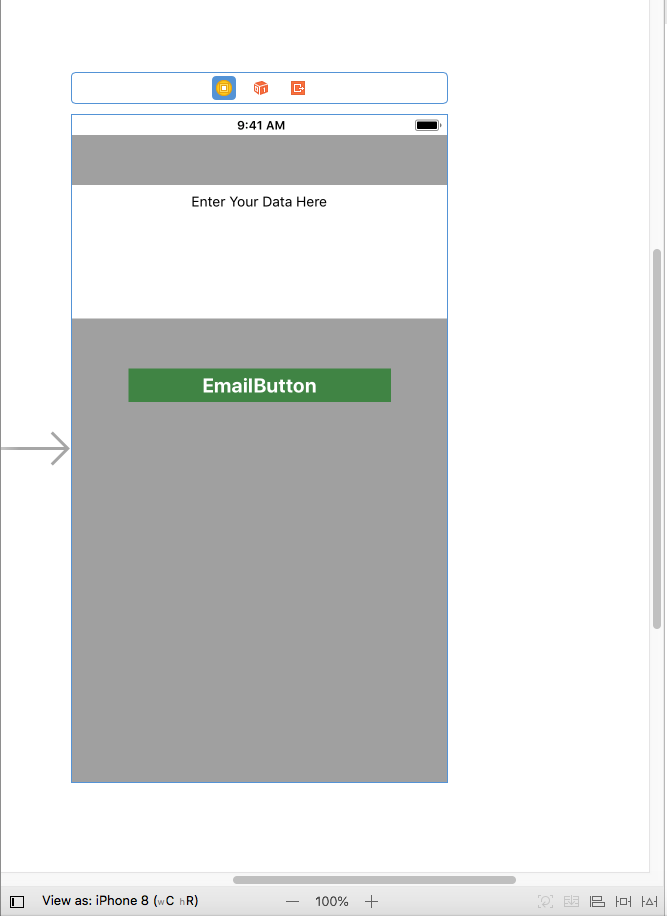
Now we are going to design the interface of our application and to do this, head into the view controller using Storyboard and later from the object library, add few things as mentioned below:
- A UITextView – Through this, we will be going to add the content from text view to our email directly.
- A UIButton – With the help of this button user will be able to open the default email functionality in the iPhone easily using swift.
Give the constraints to each of the objects and to do this first add the constraints to your textview which is top layout to view, center horizontal, equal width and give height in proportion to view with 0.2
Second, add the constraints to your button by adding vertical to text view, center horizontal to view, equal width and equal height in proportion according to you.
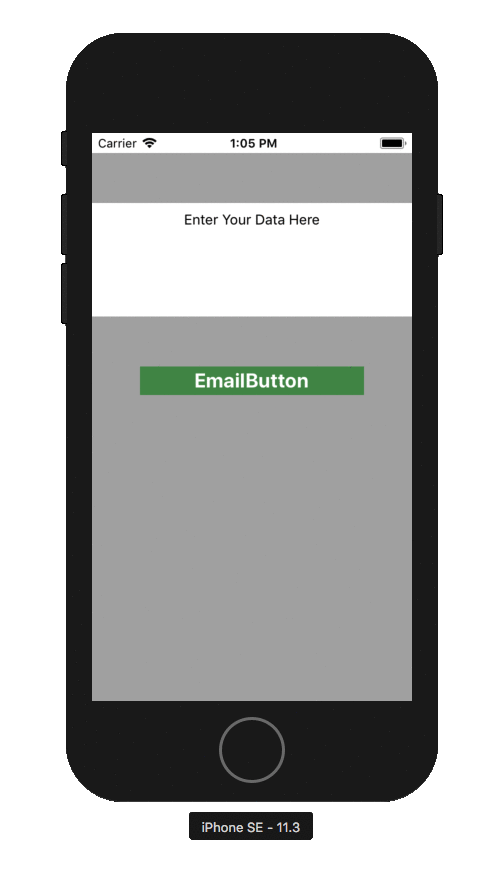
After doing all the steps above your design will look like this as shown below.
Connecting the Objects
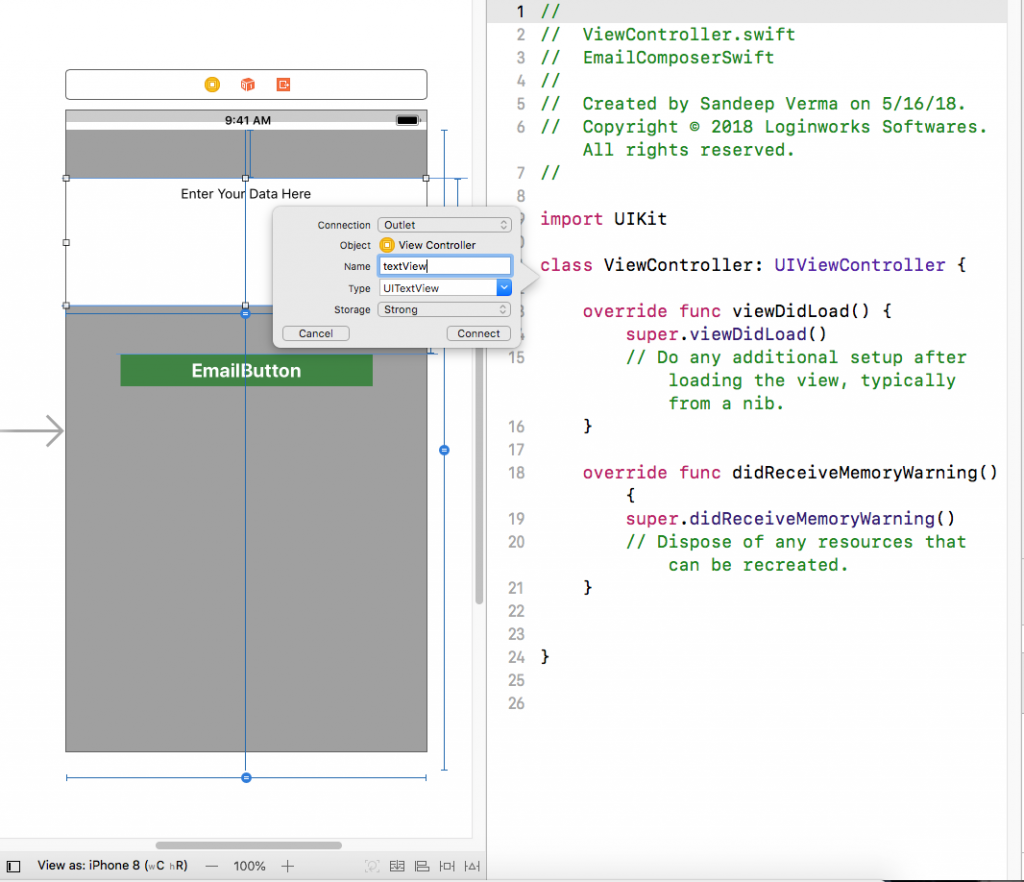
Now, let’s move to the next step and connect all the objects to the viewcontroller.swift file. Remember, that there is only one file used in swift which reduces the efforts to initialize it in other file and use it on other.
Now, drag and drop the UITextView first to your file and give it a name as textView as shown below.
Later, after doing it connect your button and add action to it so that we can show the email screen on the click of the button.
After that, you can add a background color to your application so that you can maintain the visibility of the objects in your application in a much better way. For now, I am using grey color as the background color of view and you can choose any color of your choice.
Adding the Framework
Now add the Important framework to your project by heading into the Linked framework and library section of the project.
Add MessageUI.framework to your project and then import MessageUI to your viewcontroller.swift file.
You can also make use of frameworks like – UIKit.framework, Foundation.framework and CoreGraphics.framework.
Adding Data
Here, we will be going to add the functionality to our application and to do this head into your viewcontroller.swift file and add two delegates which are:
-
MFMailComposeViewControllerDelegate
-
UINavigationControllerDelegate
We use MFMailCompose delegate to check the result of the email whether it is saved as a draft, failed to send, success or not.
And for this we use the delegate method which is DidFinishWithResult as shown below:
  func mailComposeController(_ controller:MFMailComposeViewController, didFinishWithResult:MFMailComposeResult, error:Error?) {

        switch result {

        case .cancelled:

            print("Mail cancelled")

            break

        case .saved:

            print("Mail saved")

            break

        case .sent:

            print("Mail sent")

            break

        case .failed:

            break


        }

        self.dismiss(animated: true, completion: nil)

    }
Through this, we can check that what happens to the email which a user wants to send.
Adding the Functionality to Button
In order to open the email screen of the default Email Sender, we need to call it in our button and to do this add the following code in your button action as shown below.
@IBAction func actionEmail(_ sender: UIButton) {

        if MFMailComposeViewController.canSendMail() {

            let message:String  = textView.text

         let composePicker = MFMailComposeViewController()

      composePicker.mailComposeDelegate = self

          composePicker.delegate = self

        composePicker.setToRecipients(["[email protected]"])

       composePicker.setSubject("Testing Email")

        composePicker.setMessageBody(message, isHTML: false)

           self.present(composePicker, animated: true, completion: nil)

        }

        else {

            self .showerrorMessage()

        }

    }
Now if you take a look at the code above then you will find that this is quite different as compared to the code we use in Objective-C due to its different syntax and methods.
In the ‘else’ statement you will find that I am calling an error method which we will be going to add now in our code as it will show the error message if the device does not have the support of email functionality in it.
    func showerrorMessage() {

        let alertMessage = UIAlertController(title: "could not sent email", message: "check if your device have email support!", preferredStyle: UIAlertControllerStyle.alert)

        let action = UIAlertAction(title:"Okay", style: UIAlertActionStyle.default, handler: nil)

        alertMessage.addAction(action)

     self.present(alertMessage, animated: true, completion: nil)

        }
This is a custom alert which you can change according to you. For now, I am using the custom message of my choice, you can set it in your way as well.
Initial Launch
If you now run the application in the simulator then after the button click it will be going to show you an alert message like this as shown below
This is because you are using a simulator and it does not support the email functionality of an iPhone.
Now, if you run it on a real device then it will be going to open the Mail composer of an iPhone and will send the email to a user.
Summing Up
I hope you would find this article helpful for your applications and it will help you to learn more about basic Swift technology in iOS. As these days, companies are making use of Swift language more as compared to Objective-C with less development time as well as efforts.
- LinkedIn Scraper | LinkedIn Data Extractor Software Tool - February 22, 2021
- Is Web Scraping Legal? - February 15, 2021
- What Is Data Scraping? - February 10, 2021