Jump to Section
Introduction
Hey guys! finding a solution for OTP verification? In this tutorial, I am covering user verification by phone number or Email by sending OTP to the mobile and verification link to Email ID.
Today there are a number of methods to achieve this which includes firebase authentication, Facebook’s Account Kit verification. Also, Google introduced its SMS retriever API (SMS gateway required).
In this tutorial, you can learn how to implement phone number & E-Mail verification | OTP Verification using Facebook account kit stepwise.
Facebook account kit
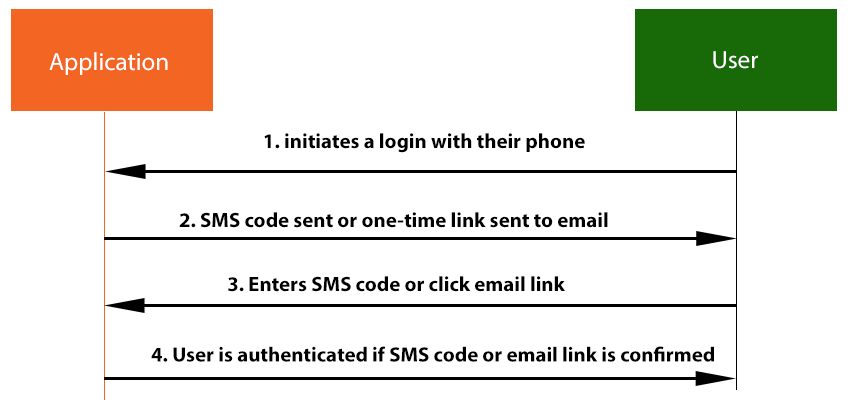
Recently, Facebook rolled out developer Account kit to make login and user verification easier for users. The user can verify himself by OTP or Email sent to user Email Address. Also, if the user is logged in to Facebook on the same device, it verifies automatically without sending the SMS. If not, the user will receive an SMS containing the OTP and will need to enter it to verify himself/herself.
The user interface for the login is provided in the SDK itself, all you need is to launch the sign in activity and it will return the result to you. Below is the flow diagram to understand how things work in account kit verification.
Setting up the project
Prerequisites
- Android Studio installed on a device.
- Basic knowledge of Java and Android.
- A smartphone since OTP cannot be sent to an emulator.
Step 1: Set up a new Android project
- Start Android Studio and Click on “new project”.
- Give your application a name, mine is “Account kit login”.
- click next and choose Target android device.
- next, choose an empty activity to keep things simple.
- next, name your Activity and click finish to build the project.
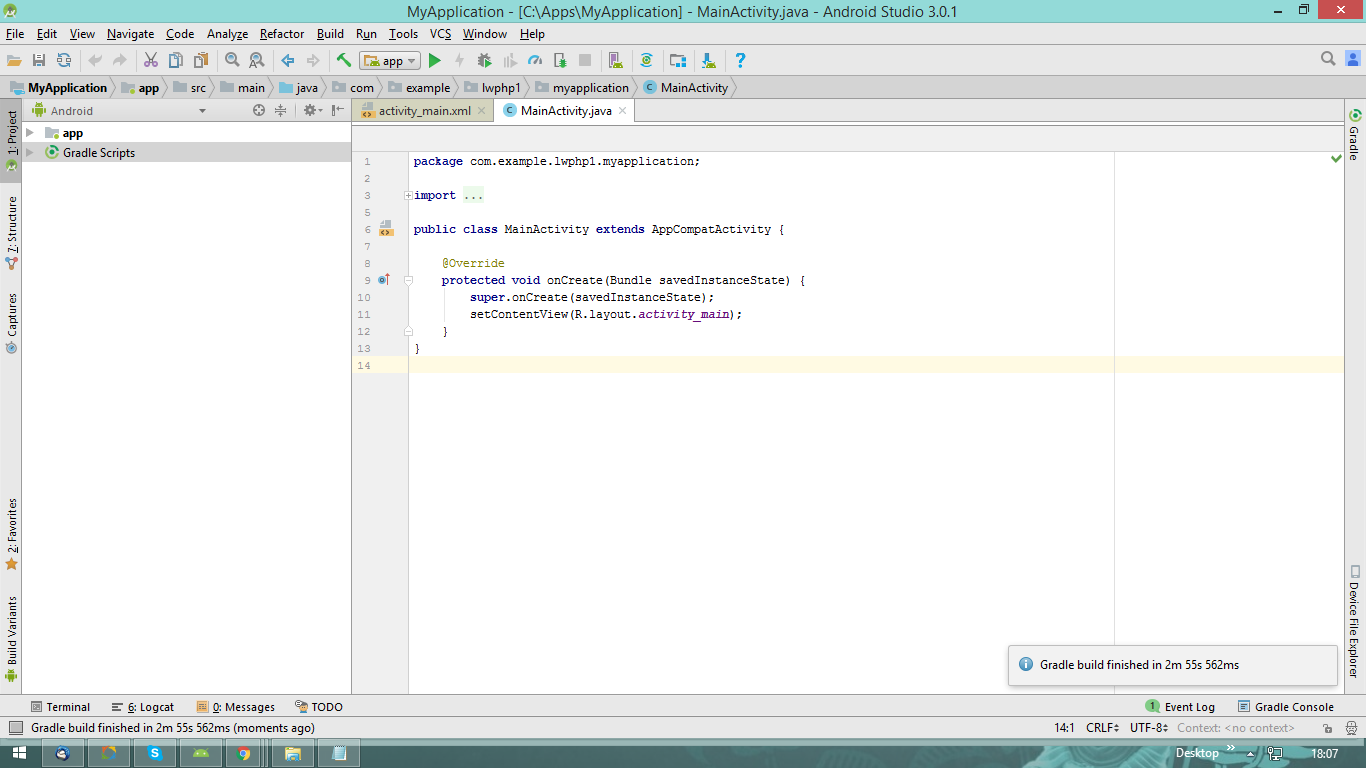
This is how it will look after finishing the above steps:
Step 2: Set up Facebook account kit
- Go to developers.facebook.com and sign in with your credentials.
- Select an app or create a new app
- Create a new App ID, enter a display name and contact Email, click on create App ID then enter the captcha and click submit.
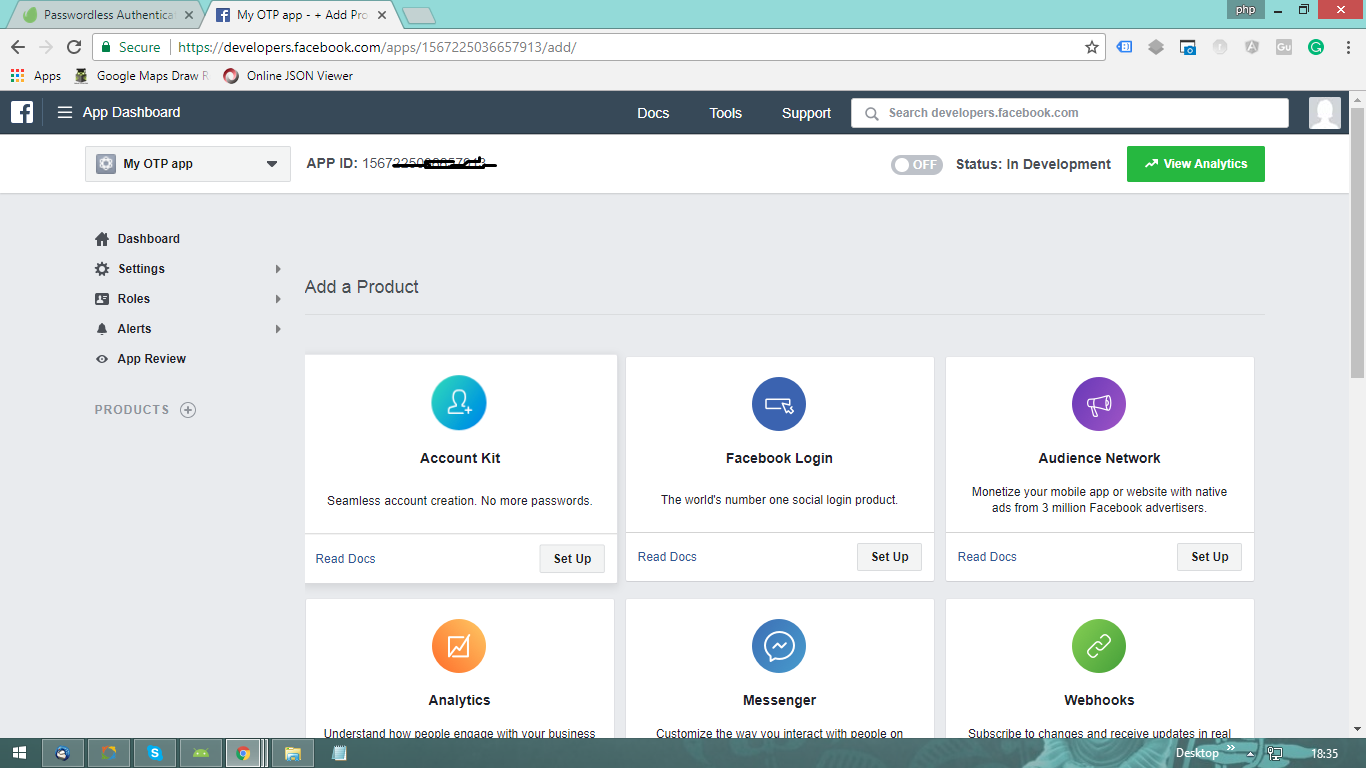
- On the app dashboard, you will see your app. Next is to set up the Account kit.

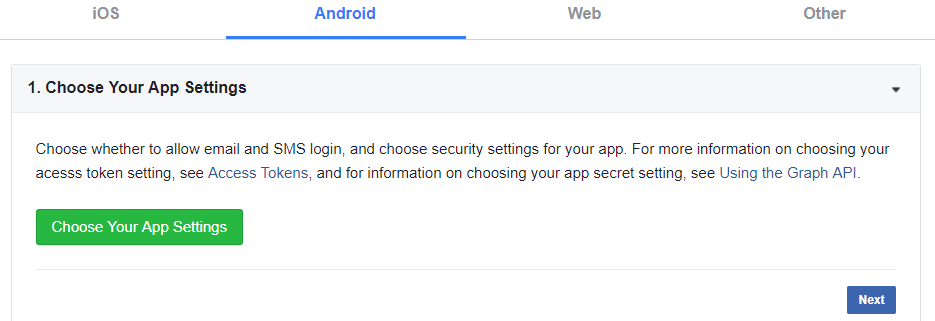
- Select Android as the platform for the app.
- Choose your app settings

- Click on your app, in the left navigation drawer click on Settings-> Basic
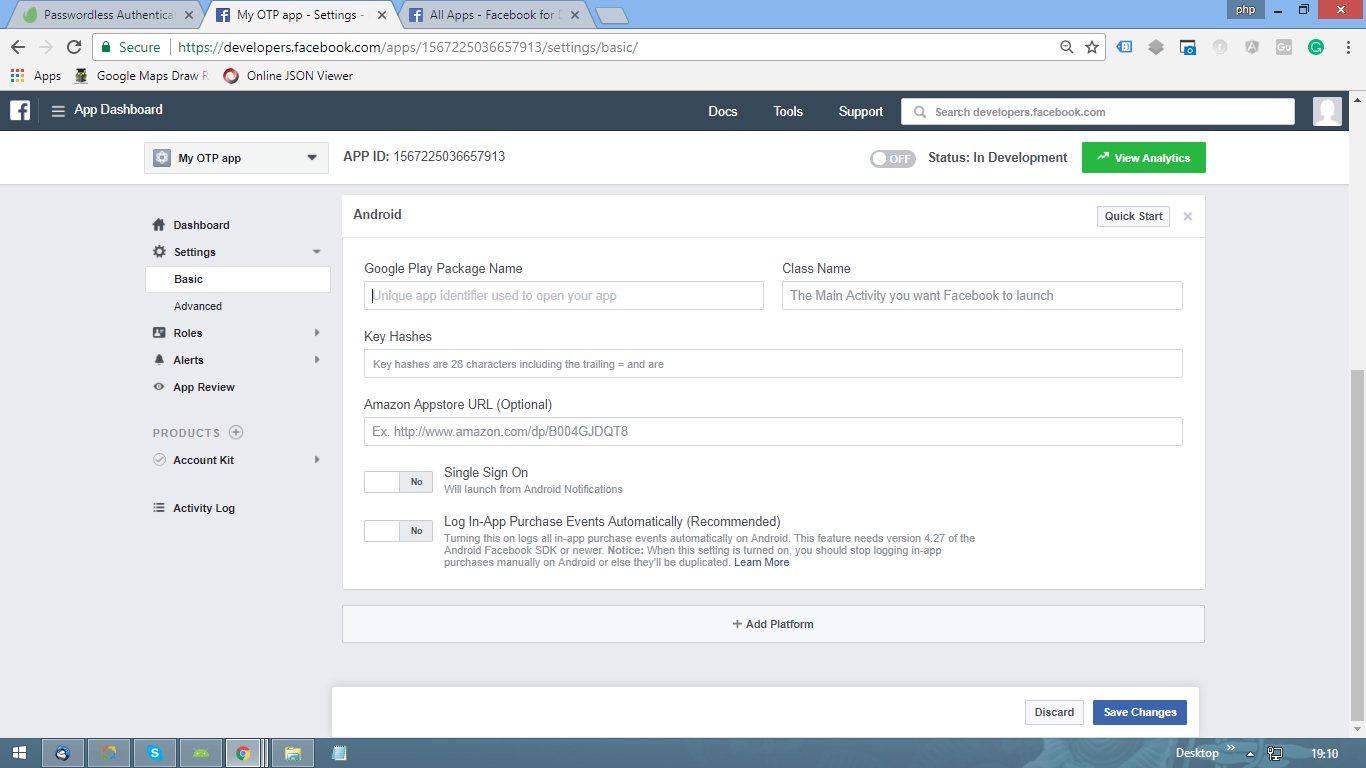
- Click on add platform and choose Android, this screen will open
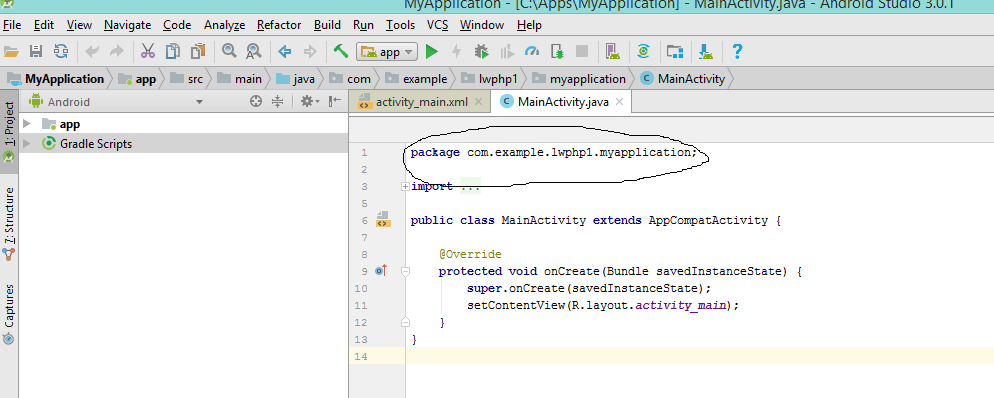
- Go to Android studio and copy the package name of the app from main activity and paste in Class Name. Then, remove .myapplication and paste in Google Play Package Name. i.e; com.example.lwphp1 in my case.

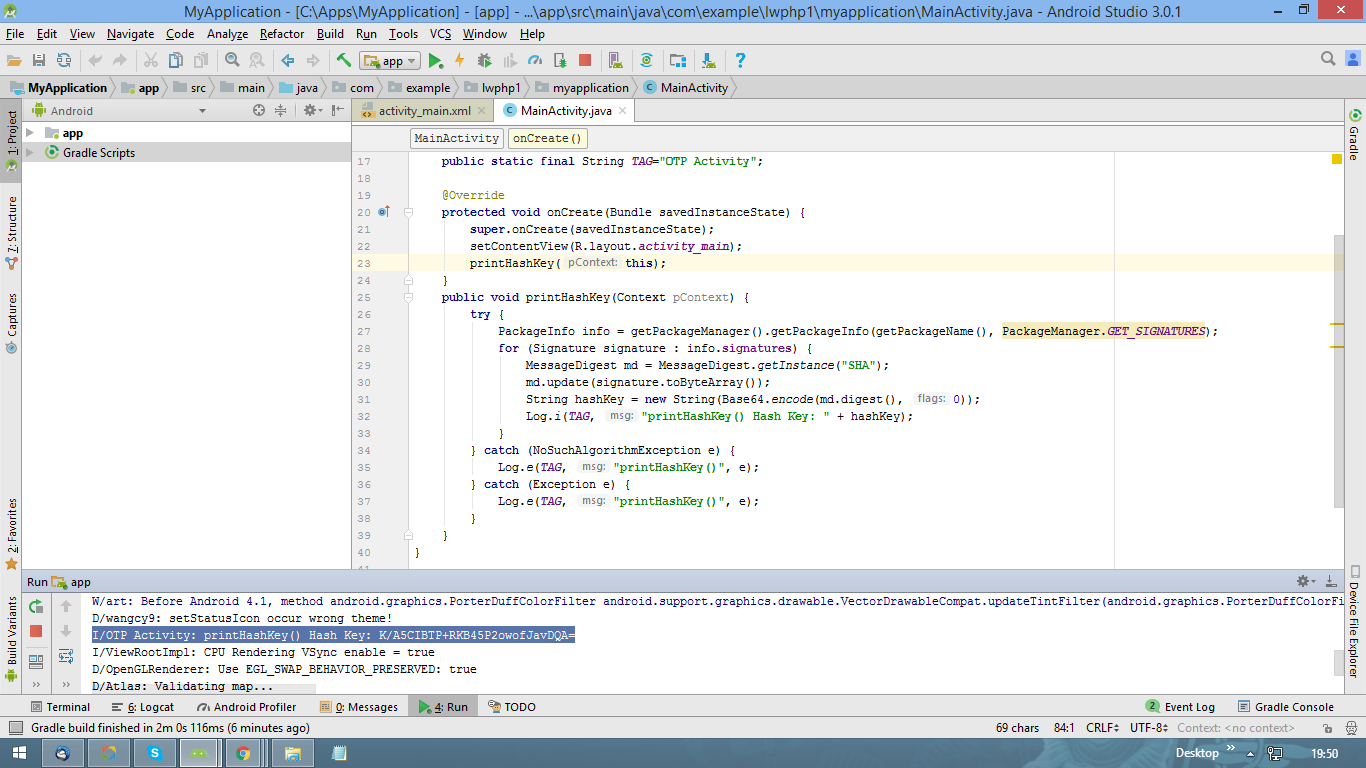
- You can get the Key Hashes either from console command or Android code function. I prefer the function in java code as the console command varies for different OS. Below function will generate the Key Hashes and show it in the log.
public void printHashKey(Context pContext) { try { PackageInfo info = getPackageManager().getPackageInfo(getPackageName(), PackageManager.GET_SIGNATURES); for (Signature signature : info.signatures) { MessageDigest md = MessageDigest.getInstance("SHA"); md.update(signature.toByteArray()); String hashKey = new String(Base64.encode(md.digest(), 0)); Log.i(TAG, "printHashKey() Hash Key: " + hashKey); } } catch (NoSuchAlgorithmException e) { Log.e(TAG, "printHashKey()", e); } catch (Exception e) { Log.e(TAG, "printHashKey()", e); } } - Paste this Key Hash on the developers.facebook page, click on save changes.
- A dialog would appear saying there was a problem verifying package name, don’t worry, your app is not on play store yet this is why this dialog is appearing, click on use this package name.
Step 3: Set up Strings.xml
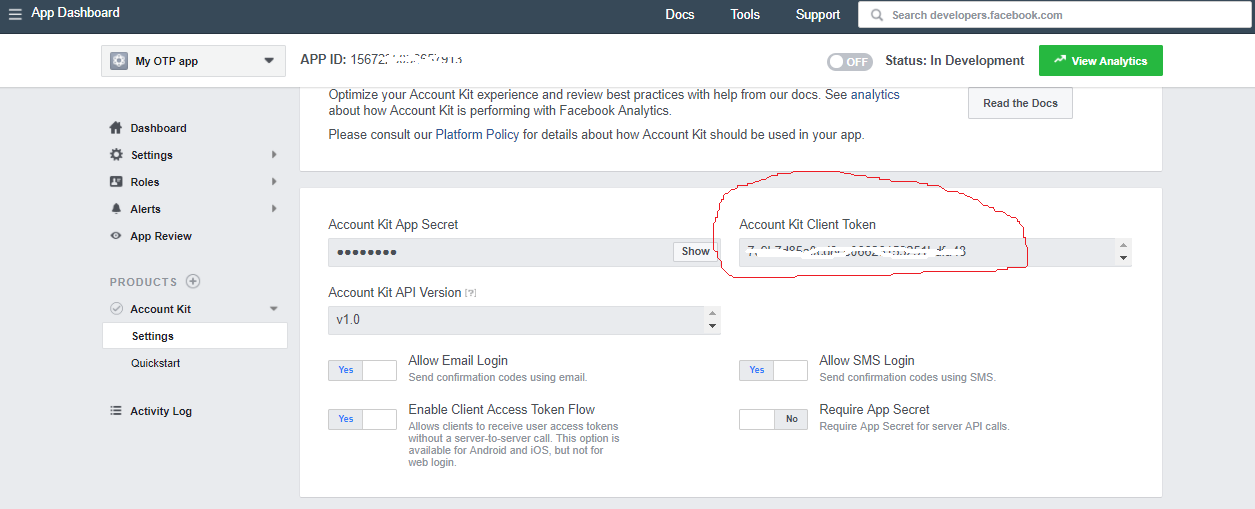
Copy the Facebook AppID( same as on dashboard on developers page ) and Account kit client token.
To get the Account kit client token follow the below steps:
- Go to app dashboard.
- At the bottom, you’ll find Account kit.
- Click on settings
- Click on Get Started button
Now, this page will open and here you may find the Account kit client token.
OK, now in Android studio open the strings.xml file and write the below lines there.
Note: Add your credentials here. Some digits are removed in ID and Token for security purpose.
<string name="app_name">OTP App</string>
<string name="FACEBOOK_APP_ID">15672250366579</string>
<string name="ACCOUNT_KIT_CLIENT_TOKEN">[7c9b7d85a0cd8ce06626153251fa48]</string>
<string name="AK_LOGIN_PROTOCOL_SCHEME">[ak7c9b7d85a0cd8ce06626153251fa48]</string>
Step 4: Edit AndroidManifest.xml
This application needs internet for verification process so we have to, first of all, give permission to our app to use the Internet. Add the following line to your AndroidManifest.xml inside manifest tag.
<uses-permission android:name=“android.permission.INTERNET”/>
Add the following to the application tag of AndroidManifest.xml to specify the meta-data of your app.
<meta-data android:name="com.facebook.accountkit.ApplicationName" android:value="@string/app_name"/><meta-data android:name="com.facebook.sdk.ApplicationId" android:value="@string/FACEBOOK_APP_ID"/><meta-data android:name="com.facebook.accountkit.ClientToken" android:value="@string/ACCOUNT_KIT_CLIENT_TOKEN"/><activity android:name="com.facebook.accountkit.ui.AccountKitActivity"/>-<activity android:name="com.facebook.accountkit.ui.AccountKitEmailRedirectActivity">
<intent-filter>
<action android:name="android.intent.action.VIEW"/>
<category android:name="android.intent.category.DEFAULT"/>
<category android:name="android.intent.category.BROWSABLE"/>
<data android:scheme="@string/AK_LOGIN_PROTOCOL_SCHEME"/>
</intent-filter>
</activity>
Step 5: Import Account kit SDK
Now, we have to import the account kit SDK to our project. Open the app level build.gradle(Module: app) file and add the implementation dependency with the latest version, Since the time of writing this blog, below is the latest version of account kit.
dependencies {
 implementation 'com.facebook.android:account-kit-sdk:4.+'
}
After adding this, click on sync now and let the gradle build complete. Android studio will automatically import the SDK into your project.
Design layout of the app
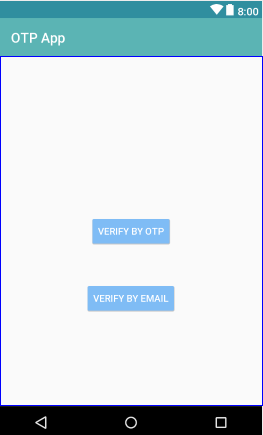
So until step 5, we have done the initial set up of the app. The next step is to design the appearance of your app. For this open the activity_main.xml and add two buttons. One for OTP verification and another one for Email verification.
<?xml version="1.0" encoding="utf-8"?>
<RelativeLayout xmlns:android="http://schemas.android.com/apk/res/android"
    xmlns:app="http://schemas.android.com/apk/res-auto"
    xmlns:tools="http://schemas.android.com/tools"
    android:layout_width="match_parent"
    android:layout_height="match_parent"
    tools:context="com.example.lwphp1.myapplication.MainActivity">


    <Button
        android:id="@+id/btn_otp"
        android:layout_width="wrap_content"
        android:layout_height="wrap_content"
       android:layout_centerInParent="true"
        android:text="Verify by OTP"
        style="@style/Base.Widget.AppCompat.Button.Colored"/>

    <Button
        android:id="@+id/btn_email"
        android:layout_width="wrap_content"
        android:layout_height="wrap_content"
        android:layout_below="@+id/btn_otp"
        android:layout_centerHorizontal="true"
        android:layout_marginTop="50dp"
        android:text="Verify by Email"
        style="@style/Base.Widget.AppCompat.Button.Colored"/>
</RelativeLayout>

After this your app would look like this:
Java code to bring things into action
Step 1: Link xml buttons to java
First of all, we have to define Buttons in MainActivity.java and link the xml buttons by ID’s given to each button in activity_main.xml.
So, define two buttons in the onCreate method and find the views.
public class MainActivity extends AppCompatActivity {

    public static final String TAG="OTP Activity";
    Button btnOTP, btnEmail;


    @Override
    protected void onCreate(Bundle savedInstanceState) {
        super.onCreate(savedInstanceState);
        setContentView(R.layout.activity_main);

        btnOTP=findViewById(R.id.btn_otp);
        btnEmail=findViewById(R.id.btn_email);
 }
Step 2: Initiate the login flow
Now, we will make a function startLoginPage(LoginType loginType), this function will be called by the buttons onClick with parameter LoginType which will be Either EMail or Phone.
Also, Declare a global variable.
public static int REQUEST_CODE=999;
This code is to track your login flow and it can be any integer.
private void StartLoginPage(LoginType loginType) {
    if (loginType == LoginType.EMAIL) {
        final Intent intent = new Intent(this, AccountKitActivity.class);
        AccountKitConfiguration.AccountKitConfigurationBuilder configurationBuilder =
                new AccountKitConfiguration.AccountKitConfigurationBuilder(
                        LoginType.EMAIL,
                        AccountKitActivity.ResponseType.CODE); // Use token when 'Enable client Access Token Flow' is YES
        intent.putExtra(
                AccountKitActivity.ACCOUNT_KIT_ACTIVITY_CONFIGURATION,
                configurationBuilder.build());
        startActivityForResult(intent, REQUEST_CODE);
    } else if (loginType == LoginType.PHONE) {
        final Intent intent = new Intent(this, AccountKitActivity.class);
        AccountKitConfiguration.AccountKitConfigurationBuilder configurationBuilder =
                new AccountKitConfiguration.AccountKitConfigurationBuilder(
                        LoginType.PHONE,
                        AccountKitActivity.ResponseType.CODE); // Use token when 'Enable client Access Token Flow' is YES
        intent.putExtra(
                AccountKitActivity.ACCOUNT_KIT_ACTIVITY_CONFIGURATION,
                configurationBuilder.build());
        startActivityForResult(intent, REQUEST_CODE);
    }
}
Step 3: Set click listeners on buttons
Now we will set click listeners on both the buttons which will call the function to initiate the verification process.
btnOTP.setOnClickListener(new View.OnClickListener() {
    @Override
    public void onClick(View v) {
        StartLoginPage(LoginType.PHONE);
    }
});

btnEmail.setOnClickListener(new View.OnClickListener() {
    @Override
    public void onClick(View v) {
        StartLoginPage(LoginType.EMAIL);
    }
});
Step 4: Handle Activity’s Result
override onActivityResult method where we check for the result code and proceed as per the requirement if login fails you can notify the user with Toast message and if login is successful then you can start a new activity.
@Override
protected void onActivityResult(int requestCode, int resultCode, Intent data) {
    super.onActivityResult(requestCode, resultCode, data);
    if (requestCode == REQUEST_CODE) { // confirm that this response matches your request
        AccountKitLoginResult loginResult = data.getParcelableExtra(AccountKitLoginResult.RESULT_KEY);
        String toastMessage;
        if (loginResult.getError() != null) {
            toastMessage = loginResult.getError().getErrorType().getMessage();

            return;

        } else if (loginResult.wasCancelled()) {
            toastMessage = "Login Cancelled";
            return;
        } else {
            if (loginResult.getAccessToken() != null) {
                toastMessage = "Success:" + loginResult.getAccessToken().getAccountId();
            } else {
                toastMessage = String.format(
                        "Success:%s...",
                        loginResult.getAuthorizationCode().substring(0,10));
            }

          Intent intent=new Intent(this,SignedIn.class);
          StartActivity(intent);
        }
        Toast.makeText(
                this,
                toastMessage,
                Toast.LENGTH_LONG)
                .show();
    }
}
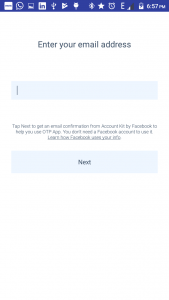
By click on phone and Email login button, the account kit UI will look like this.

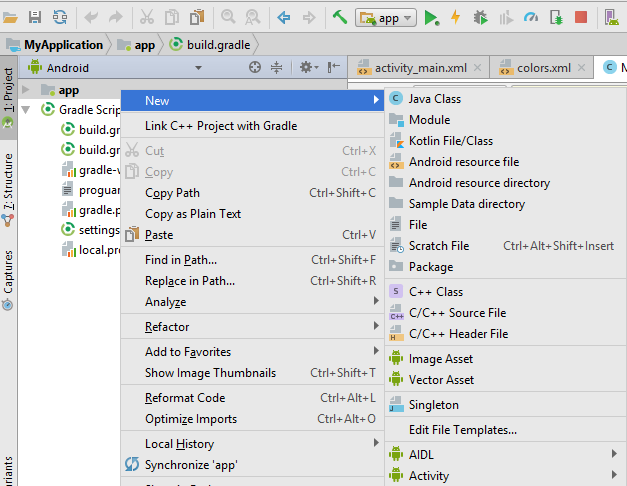
Step 5: Create a new activity to start on successful login
- Right click on app
- click on New>Activity>Empty Activity

- Name the name it as SignedIn activity.
- click finish.
- open the xml file and place a button for logout option.
- place two edit text to display account information i.e; Phone number and Email ID .
SignedIn.xml
<?xml version="1.0" encoding="utf-8"?>
<RelativeLayout xmlns:android="http://schemas.android.com/apk/res/android"
    xmlns:tools="http://schemas.android.com/tools"
    android:layout_width="match_parent"
    android:layout_height="match_parent"
    tools:context="com.example.lwphp1.myapplication.SignedIn">

    <LinearLayout
        android:layout_width="match_parent"
        android:layout_height="wrap_content"
        android:orientation="horizontal"
        android:gravity="center"
        android:padding="10dp">

        <TextView
            android:layout_width="wrap_content"
            android:layout_height="wrap_content"
            android:text="Phone Number"
            android:textSize="17sp"/>

    <TextView
        android:id="@+id/et_phonenumber"
        android:layout_width="200dp"
        android:layout_marginLeft="10dp"
        android:layout_height="wrap_content"
        style="@style/Base.V12.Widget.AppCompat.EditText"/>
</LinearLayout>

    <LinearLayout
        android:layout_width="match_parent"
        android:layout_height="wrap_content"
        android:orientation="horizontal"
        android:layout_marginTop="70dp"
        android:gravity="center"
        android:padding="10dp">

        <TextView
            android:layout_width="wrap_content"
            android:layout_height="wrap_content"
            android:text="Email ID"
            android:textSize="17sp"/>

        <TextView
            android:id="@+id/et_email"
            android:layout_width="200dp"
            android:layout_marginLeft="10dp"
            android:layout_height="wrap_content"
            style="@style/Base.V12.Widget.AppCompat.EditText"/>
    </LinearLayout>


    <Button
android:id="@+id/btn_logout"
android:layout_width="wrap_content"
android:layout_height="wrap_content"
android:layout_centerInParent="true"
android:text="@string/logout"
style="@style/Base.Widget.AppCompat.Button.Colored" />

    </RelativeLayout>
Step 6: Remove access token on logout
On click listener of logout button AccountKit.logout() method is called to remove the stored access token.
public class SignedIn extends AppCompatActivity {

    Button signout;
    TextView tvPhoneNumber, tvEmail;

    @Override
    protected void onCreate(Bundle savedInstanceState) {
        super.onCreate(savedInstanceState);
        setContentView(R.layout.activity_signed_in);

        signout=findViewById(R.id.btn_logout);
        tvPhoneNumber=findViewById(R.id.et_phonenumber);
        tvEmail=findViewById(R.id.et_email);

        signout.setOnClickListener(new View.OnClickListener() {
            @Override
            public void onClick(View v) {
                AccountKit.logOut();
            }
        });
    }
}
Accessing account information on the device
After successful login session, you can access the Account Kit ID, phone number, and Email of the current account via calling getCurrentAccount() in onCreate of SignedIn Activity.
AccountKit.getCurrentAccount(new AccountKitCallback<Account>() {
  @Override
  public void onSuccess(final Account account) {
    // Get Account Kit ID
    String accountKitId = account.getId();

    // Get phone number
    PhoneNumber phoneNumber = account.getPhoneNumber();
    if (phoneNumber != null) {
      String phoneNumberString = phoneNumber.toString();
    }

    // Get email
    String email = account.getEmail();
  }

  @Override
  public void onError(final AccountKitError error) {
    // Handle Error
  }
});
Now we have the phone number and Email ID of the user which you can set in the text views.
tvPhoneNumber.setText(phoneNumberString);
tvEmail.setText(email);
Customizing the appearance of Account Kit user interface
The user interface of the login screens for Email and Phone as above are provided by the SDK of facebook. Facebook Account kit offers customization in the UI of these screens.
Basically, you can customize the login screen by three skins:
- Classic
- Translucent
- Contemporary
For each skin, you can optionally add a background image, choose background tint opacity and adjudge the color of disclaimer text whether the text appears in black disclosure on a white background or vice versa. The next all screens in the login flow pursue the same skin and options that are declared once.
Adding skin to your app
You can customize the skin of login flow by creating an object of UIManager to hold settings and setting this UIManager object to the object of AccountKitConfigurationBuilder.
UIManager uiManager;
uiManager=new  SkinManager(SkinManager.Skin.TRANSLUCENT,
        ContextCompat.getColor(this,R.color.colorAccent));
configurationBuilder.setUIManager(uiManager);
To add a background Image to the skin follow the below code of the SkinManager object.
uiManager=new SkinManager(SkinManager.Skin.TRANSLUCENT,
         ContextCompat.getColor(this,R.color.colorPrimary),
         R.drawable.flower,
         SkinManager.Tint.BLACK,55);
put an image file in the drawable folder of your app and provide the give its name instead of a flower.
Customizing the color of Email
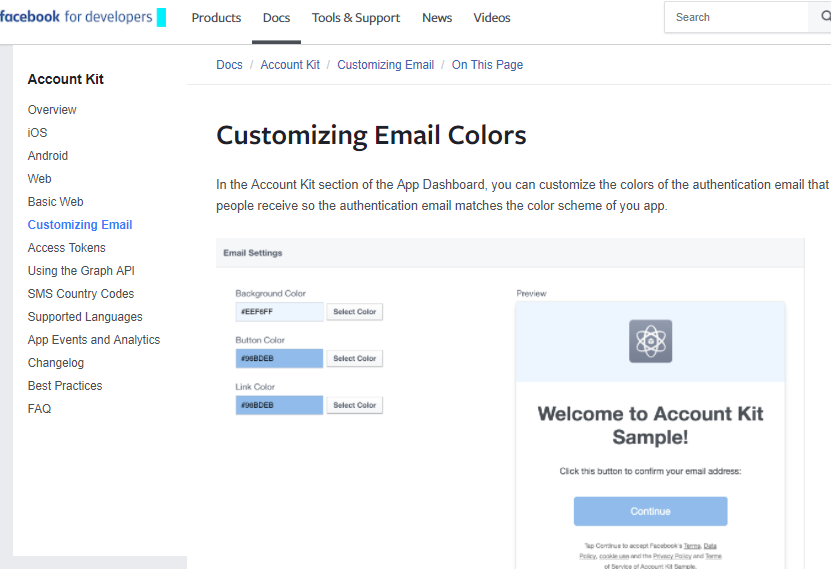
Account kit also offers customization of the color of Emails that sent to the user for verification so that you can match the color scheme of the Emails with the color accent of your app.
To attain this you need to go to the Account kit section of your app dashboard and there you can select the Background color, Button color and Link color of the Email.
Summing-up
In this tutorial, you learned about the facebook account kit integration in your app to verify the user of your app via phone OTP and Email. The next tutorial will be for integrating Firebase OTP verification.
If you liked this post, I’d be very grateful if you’d help it spread, sharing it on Twitter, Facebook or LinkedIn. Please feel free to share your views in the comment box. Thank you!
- What Is Big Data Visualization? - January 22, 2021
- Five Benefits of Big Data Analytics for E-commerce - July 9, 2020
- Google Data Studio Vs. Tableau: Which One is More Suitable for Your Business? - June 25, 2020