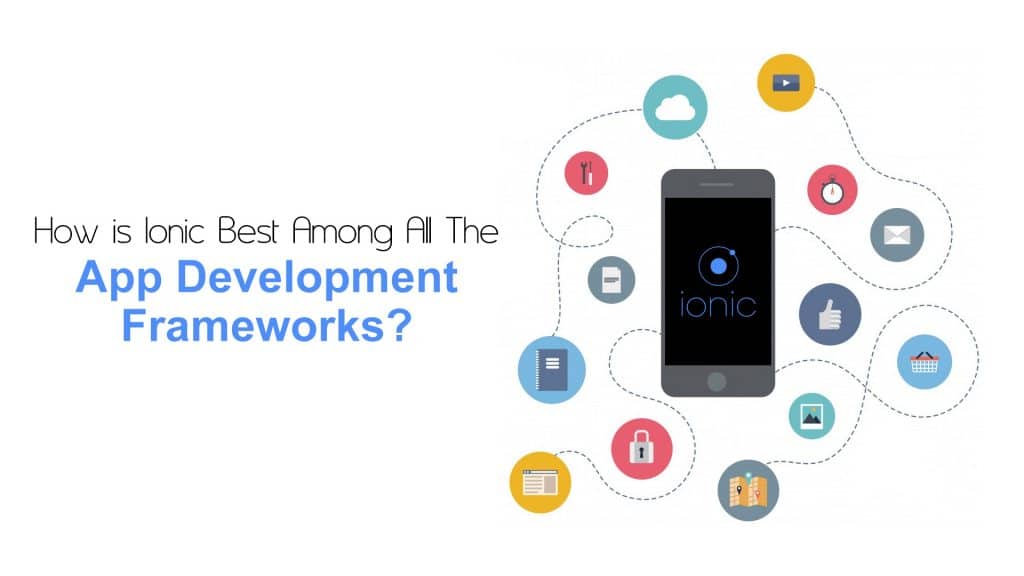
Ionic is one of the latest open-source SDK technology for hybrid mobile and web application development. Founded in 2013, Ionic is backed up by angular.js for its logical implementation. Applications (Apps) built in Ionic framework supports Android 4.1 or above and iOS 7 or above versions.
Ionic provides all the implementations which can be exercised in native development SDKs. App building for Android and iOS with the same code and deploying it with the help of Cordova makes Ionic a league apart. It includes mobile components, extensible base theme, typography and interactive paradigms.
The variety and availability of wide range of components and implementation methods in Ionic is a big benefit for the users. In addition, the length of the code for any implementations is much less in comparison to the native code which enhances its attribute of understandability.
Apart from the SDK, it provides services also known as ‘providers’ to the developers which enables the features such as push notifications, automated builds, and testing.
To create Ionic applications we need to install the latest version of CLI and Cordova by which we will run Ionic commands to execute or add plug-ins to the project.
Jump to Section
Why Should You Use Ionic?
This question is cliche, as today we have native development tools and many other technologies to compete with. But one thing which puts Ionic on the top is its user-friendly code and ease of understandability. The code length which is very less as compared to native development makes Ionic better. If we go by facts, the growth shown by it is really tremendous.
How Can You Install Ionic?
You can implement following steps to use or install Ionic:
1. Download and install the latest version of Node.js from here.
2. Now download the latest version of Ionic-CLI and Cordova by running the following command through the command line:
npm install -g ionic cordova
Note: In order to add the utilities globally, you can add “sudo” before the command.
How To Use Ionic?
Now after you have installed node, Ionic and Cordova select a folder where you want to create your Ionic app. Now follow these steps:
1. Go to the location by command line where you wish to create the project.
2. Type below the line in a command line. This will create your first ionic app in my-app folder ionic start my-app blank.
3. Now open the my-app folder in the command line by using cd my-app.
4. Now run your app using below command in command line. ionic serve.
Additional Commands Info !!!
In order to run the project on different platforms, run the following commands for respective platforms:
For Android:
ionic cordova platform add Android
For iOS:
ionic cordova platform add iOS
To Run your App on the Device Use:
ionic cordova run Android (For Android).
ionic cordova run iOS (For iOS).
Once the project is created, if you want to add new pages to your project, you can do this by running the following command:
ionic -g page pagename;
where pagename is the name of the page you wish to create. It should be relevant in order to give a reference in the project.
Removing Platforms:
In case if you wish to remove platforms then this can be done by running the command-
ionic cordova platform rm android (for Android)
ionic cordova platform rm iOS (for iOS)
Project Structure
Once your project is created it is necessary to understand the project structure which helps you to find the pages and self-generated pages for the project. We will discuss the main folders which are generally used while working on a project.
If we see inside our project directory. Our project has a similar structure as that of a Cordova project. There we can install native plugins, and create platform-specific project files.
./src directory
This is the main folder where our all code resides. This is the place where most of the Ionic app work takes place. When we run Ionic serve, our code inside of src/ is transpiled into the correct Javascript version that the browser understands (currently, ES5). A higher level work can be achieved using TypeScript, but compiling down of the older form of Javascript in the browser needs to be done first.
./src/index.html
./src/index.html is the main entry point for the app, though its purpose is to set up a script and CSS includes and bootstrap, or start running, our app.
./src/pages
This folder contains all the pages/ screens required for the project. Every page or screen has its own folder with following files:
1. *.ts” This file is used to implement the logical part and is coded in typescript which is a superset of javascript.
2. *.html” This file contains the ion-tags which is used to develop the UI for the projects and all its components are created here.
3. *.CSS” If you wish to apply any custom styling to the screen created then the classes for the styling is defined here and referenced in the HTML file with the components later.
src/app/app.module.ts
This typescript file is the entry point for our app.
./src/app/app.html
Here’s the main template for the app in src/app/app.html:
<ion-nav id="nav" [root]="rootPage" #nav swipeBackEnabled="false"></ion-nav>
     <ion-menu [content]="nav">
         <ion-header>
             <ion-toolbar>
                 <ion-title>Pages</ion-title>
             </ion-toolbar>
         </ion-header>
     <ion-content>
         <ion-list>
             <button ion-item *ngFor="let p of pages" (click)="openPage(p)">{{p.title}}</button>
         </ion-list>
     </ion-content>
 </ion-menu>
In this template, we set up an ion-menu to function as a side menu, and then an ion-nav component to act as the main content area. The ion-menu’s [content] property is bound to the local variable nav from our ion-nav, so it knows where it should animate around.
.src/assets directory
This folder is used to put the static files like images, videos, icons used into the project.
manifest.json
This file contains all the information and registry of the application.
Debugging
Once we create our ionic app its testing is most important. We must test our application on both browser and real device so that any issue which may crash our application can be resolved.In order to debug an application we run the following command in the command line:
ionic cordova run android -lc (for Android).
ionic cordova run ios -lc (for iOS).
In case if you want to see the debugging results on browser then u should feel happy as iconic provides this by following these simple steps:
1. Go to Google Chrome and right click on the page.
2. Click on inspect element which opens many sub-windows within the page providing information about it.
3. On the right side of the page, there is menu icon which opens a drop-down list having many options to choose. Select more tools.
4. After selecting more tools further a list will be opened with many options as shown in the picture
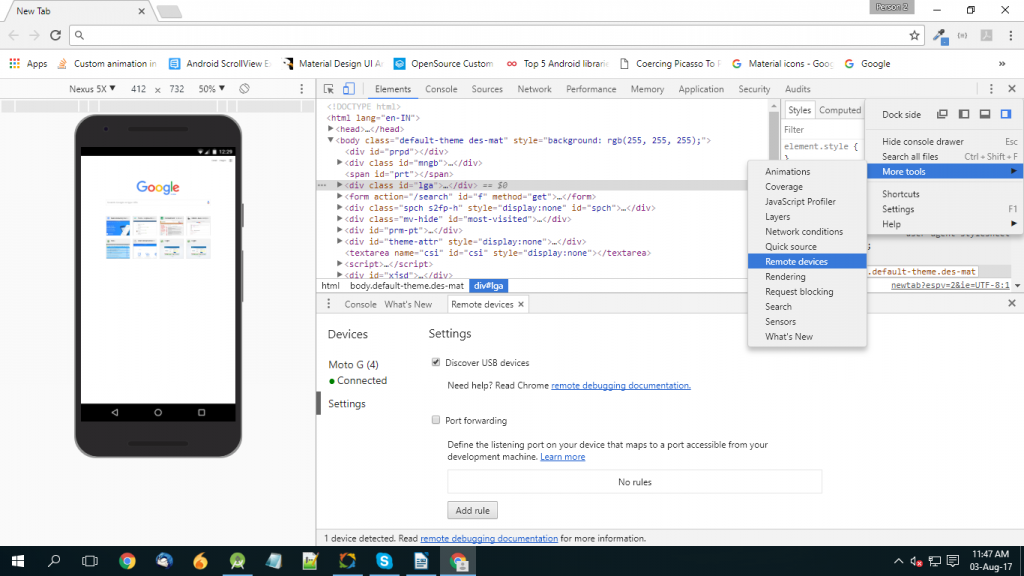 5. Select Remote Devices from the options.
6. On selecting Remote Devices you will be provided with another sub-window which shows the connected device with the screen opened the project in it.
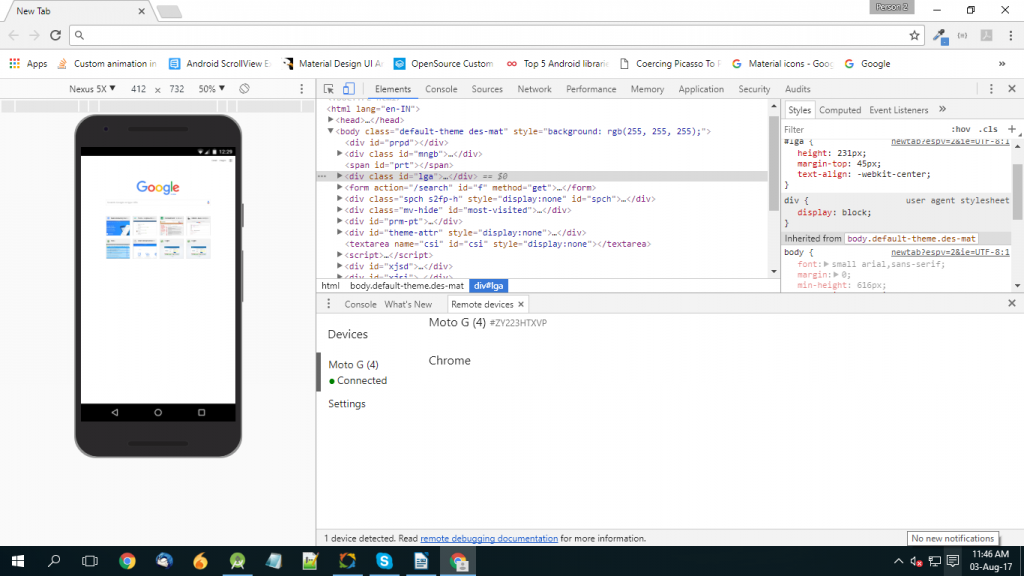 7. Now you can see all the results and console values of your application here.
A Word With the Readers…
By now, I hope you have got enough awareness about Ionic to try it yourself. Once, you start creating apps in Ionic you will love it as compared to other frameworks used for Mobile App Development.
- LinkedIn Scraper | LinkedIn Data Extractor Software Tool - February 22, 2021
- Is Web Scraping Legal? - February 15, 2021
- What Is Data Scraping? - February 10, 2021
Great one….