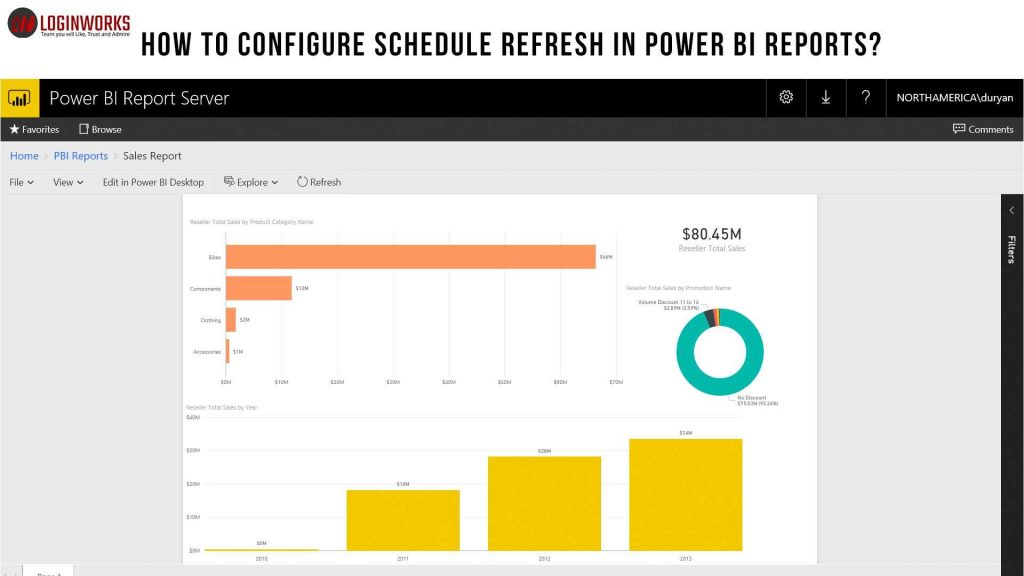
In this section, we are going to discuss how to refresh different reports after a regular interval of time automatically. Power BI gives you this feature to accomplish this task. To understand this, I am going to start from publishing the power BI reports in Power BI service from Power BI desktop. Schedule Refresh functionality is only present in Power BI service. Before doing this, you must know how to publish the reports in the service.
I am considering this you already know how to create Power BI reports in desktop application. I have created a report on my desktop. You all can create your own.
1. Go to File and click on it.
2. You will see a list of methods. Choose Publish, Publish to Power BI.
3. You need to select the workspaces which you need to create in Power BI service.
4. Click OK.
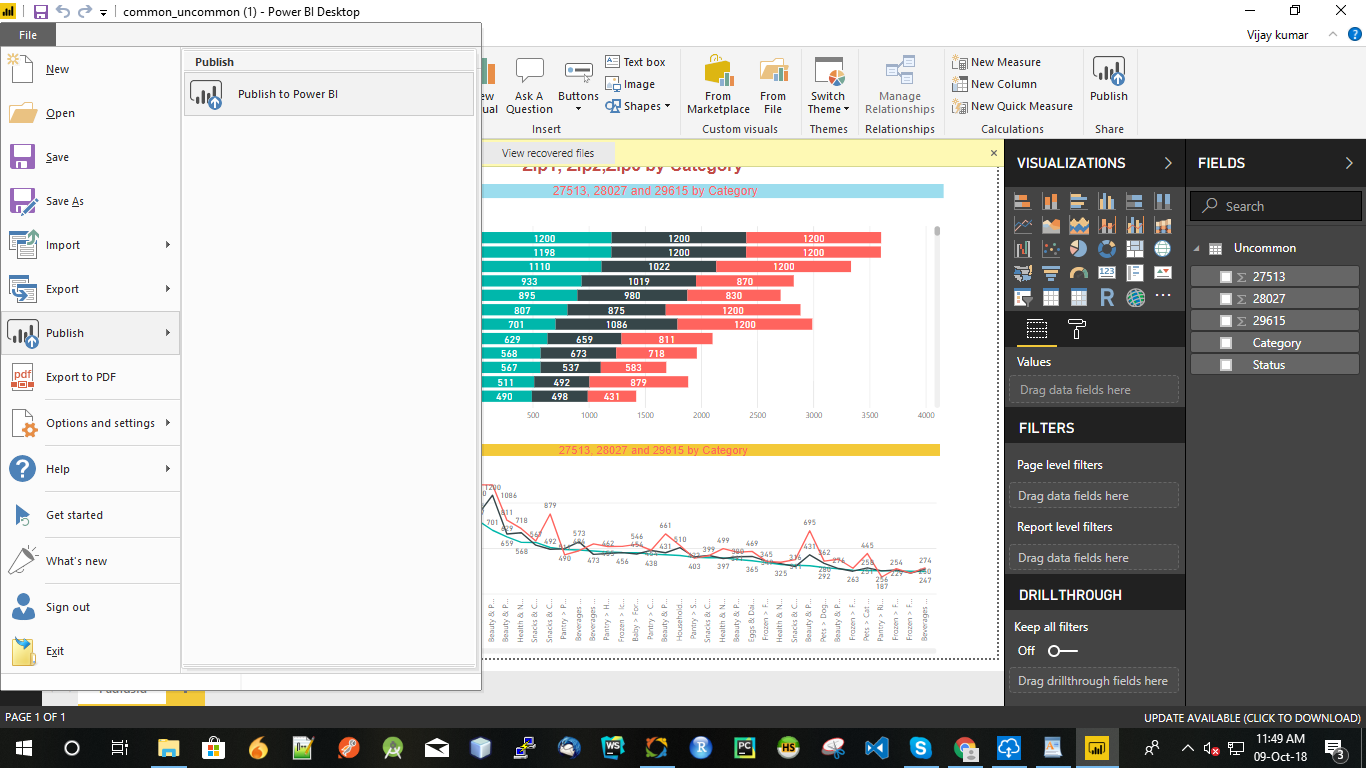
Following these steps, you will see the report has been created in your Power BI service within the selected workspace. The above picture is showing the same
Jump to Section
Create a scheduled refresh plan
Scheduled Refresh is used to update the report automatically if you make any changes in the data source. A data source can be anything. It can be your csv file in your system or the data connected to your localhost database. The process is somehow different in both the cases. Let’s understand each case one by one. First, we are discussing the csv file case.
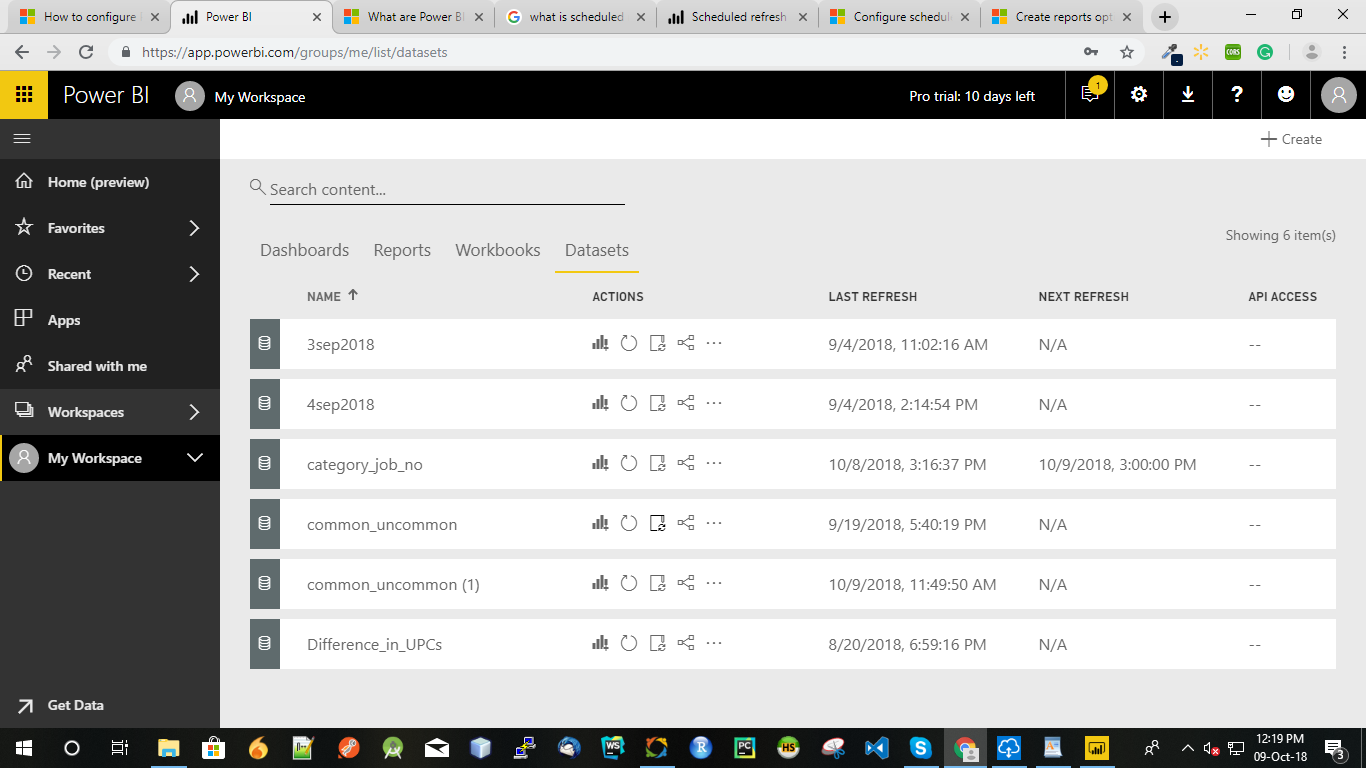
1. First, you need to go to the workspace in which you have created the report.
2. You will see this window as shown above in the image. I had published a common_uncommon report in my workspace.
3. Go to Datasets. You will see all the datasets of your workspace.
4. You will see a Schedule refresh button under the Actions column. Click on it which will redirect to you to another window which will look something like this as shown below.
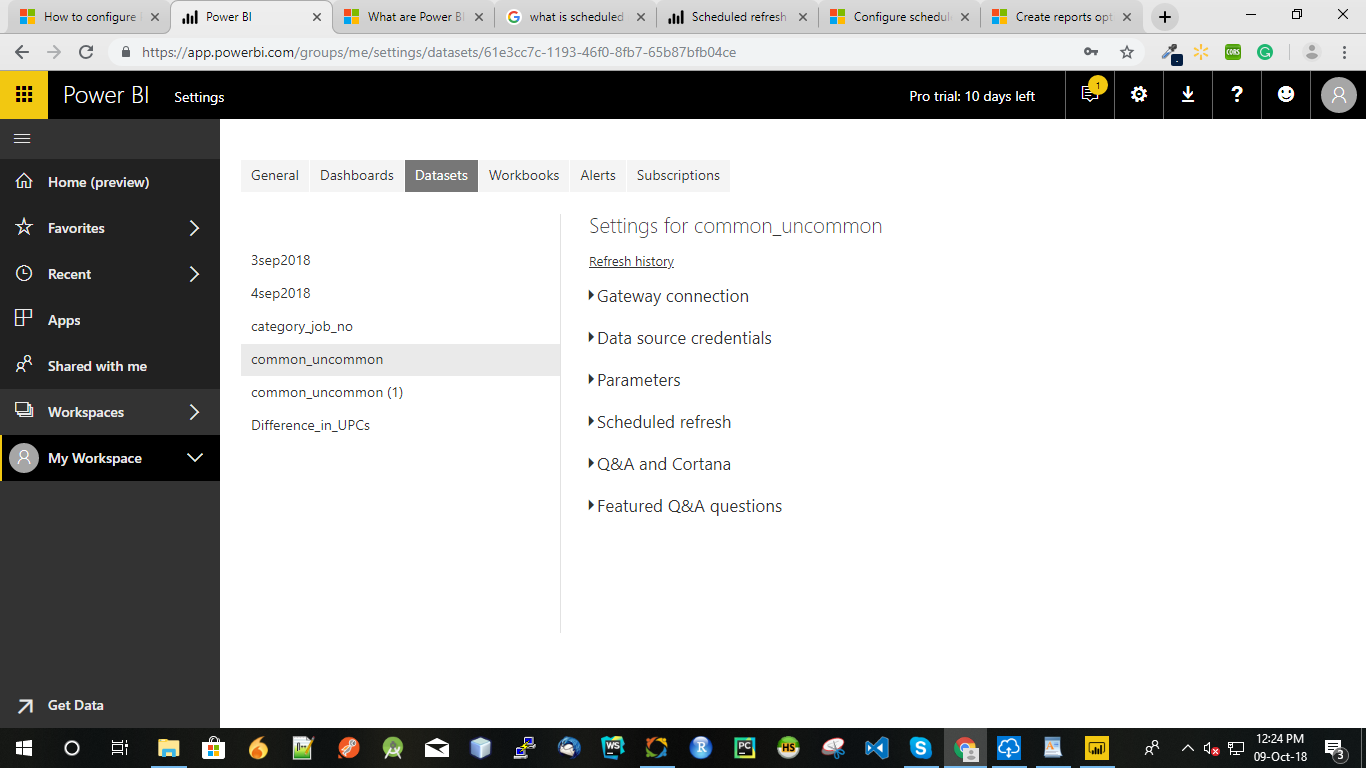
This is the main window which you need to understand. So we will go through all the options showing in the image one by one.
Gateway connection
First, we get going with gateway connection but wait!!! what is Gateway connection or let’s simply say it what are Power BI gateways??
Power BI is the cloud-based service and if the data source is located on premises location (lie csv file or MySQL and Oracle database) to connect these we require some gateway to connect these two which is called Gateway connection.
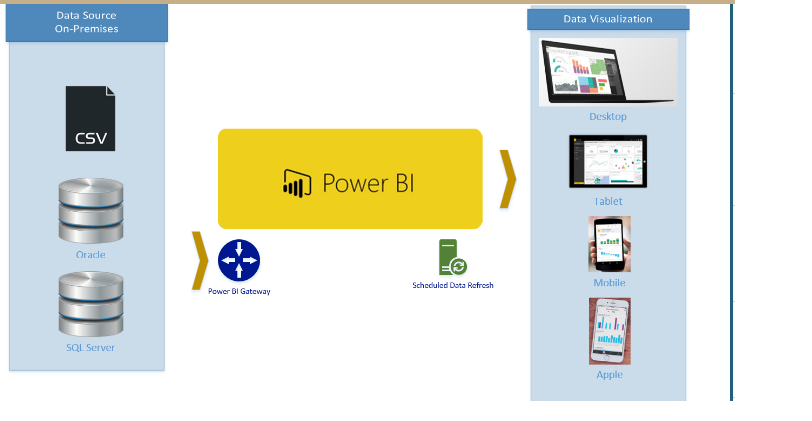
In power BI service, you need to install a gateway for your on-premises data source. To download this, you need to click on the Gateway connection and then install now. After downloading, the screen look something like this as shown below.
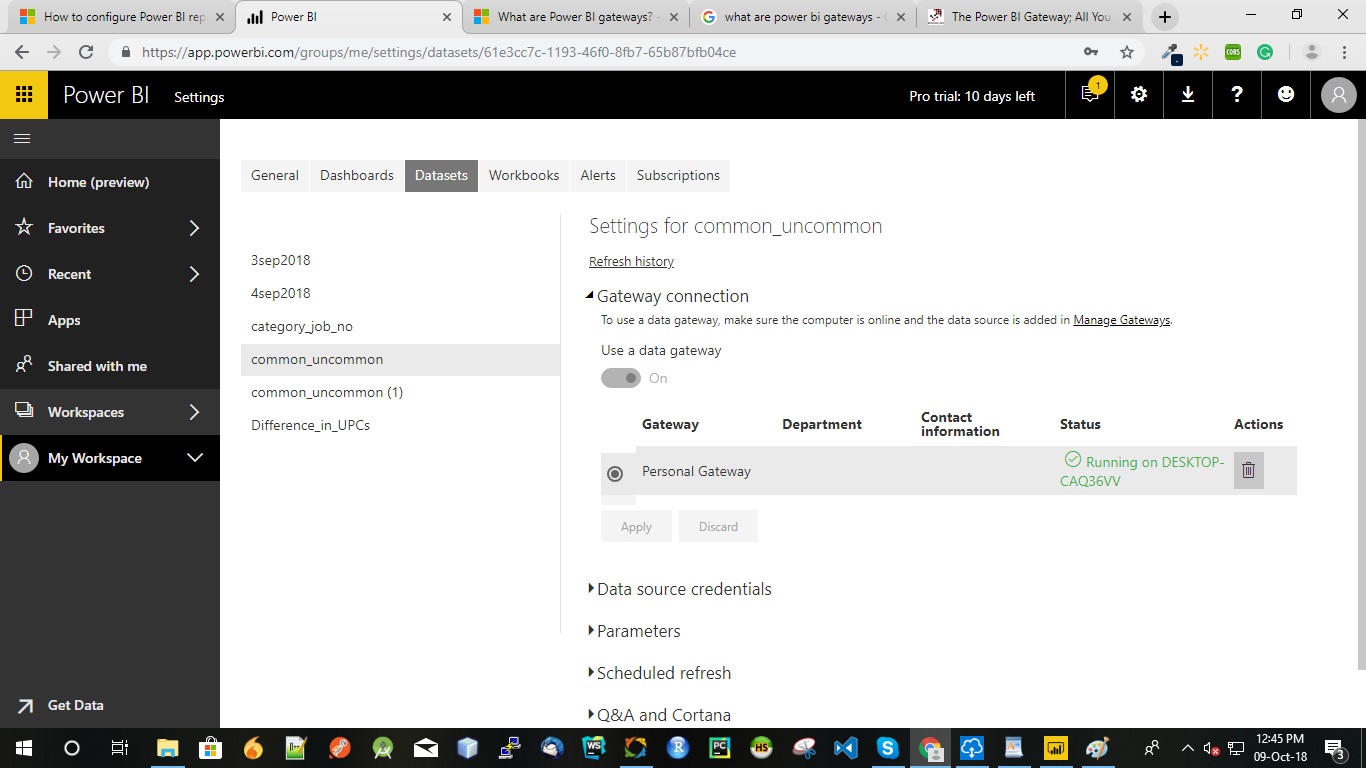
You will see a personal gateway is installed and can be easily seen in your screen. Congratulations our first step is completed. Let’s move on to the second step.
Data Source Credentials
I guess you understand the meaning of data source credentials by just reading it. You need to enter the credentials of your data source. In case if your data source is a CSV or excel file you need to enter the path and in the case of any database data source you need to enter the username and password for the database connection. First, we will see for the CSV file connection.
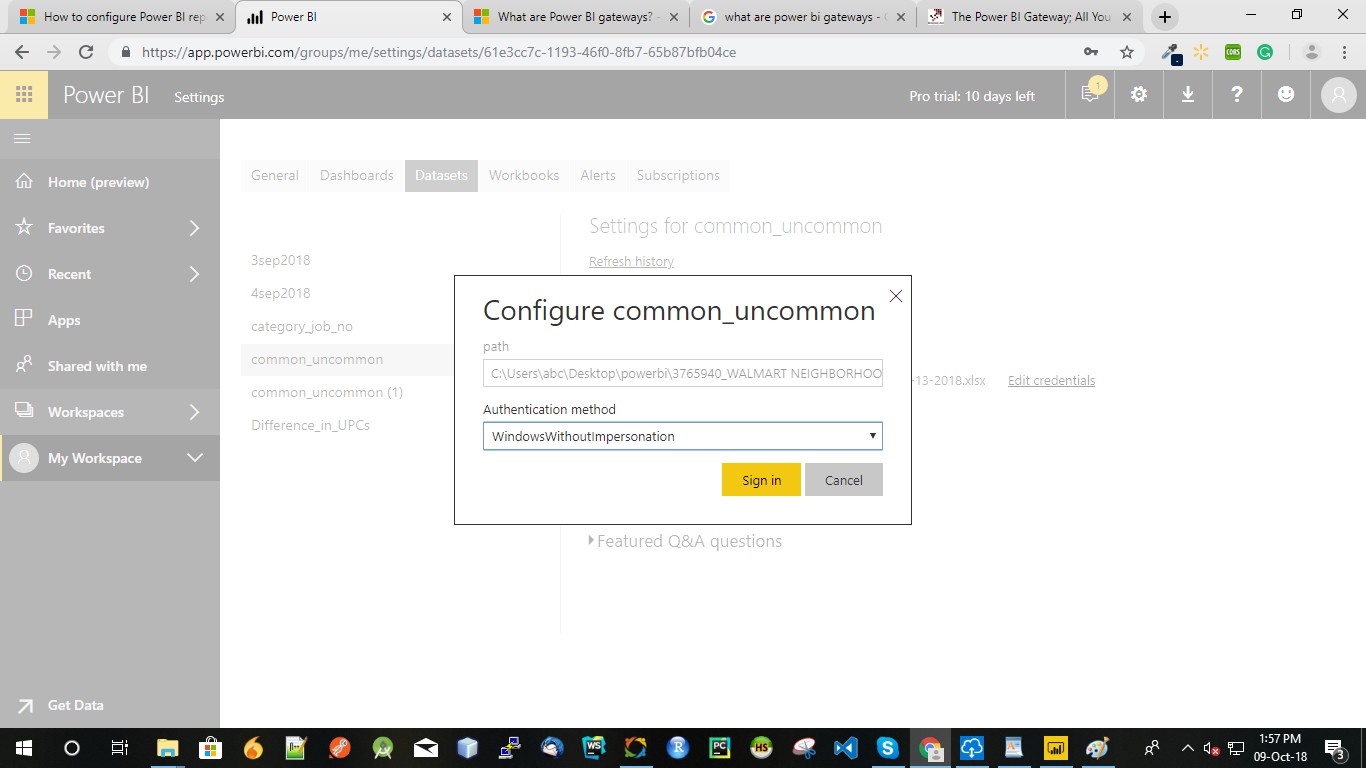
After clicking on data source credentials you need to click on edit option. You can edit the path of the file if you have changed the path of the file in your local system and in the Authentication method you need to select WindowswithoutImpersonation and click on Sign In. A notification will come that Data source updated. Our second step is also completed.
Note: For setting parameters, you need to learn about Query Parameters. You can leave this step if you have not set any parameters in your data table.
In case if your data source is some database you need to enter username and password as shown below.

I have used MySQL database. In authentication, I need to select Basic and then my database username is root and no password is there and click sign in. Then comes our most important step.
Scheduled Refresh
To keep your data upto date, you need to make it ON by pressing the button. You can set the frequency of your data refresh as on daily basis or on weekly basis. If you are using pro version you will get more refreshing intervals. In this, you will get only two options. I am selecting daily.
Then you need to select the Time zone. You can set the time zone according to your location. I am from India so I am selecting New Delhi Time zone. You can select another time too manually by clicking on another time option. You can add as many time interval as you want. The time which you will select is the time on which data is refreshed. Maybe at that time, the report will not be going to show in your service.
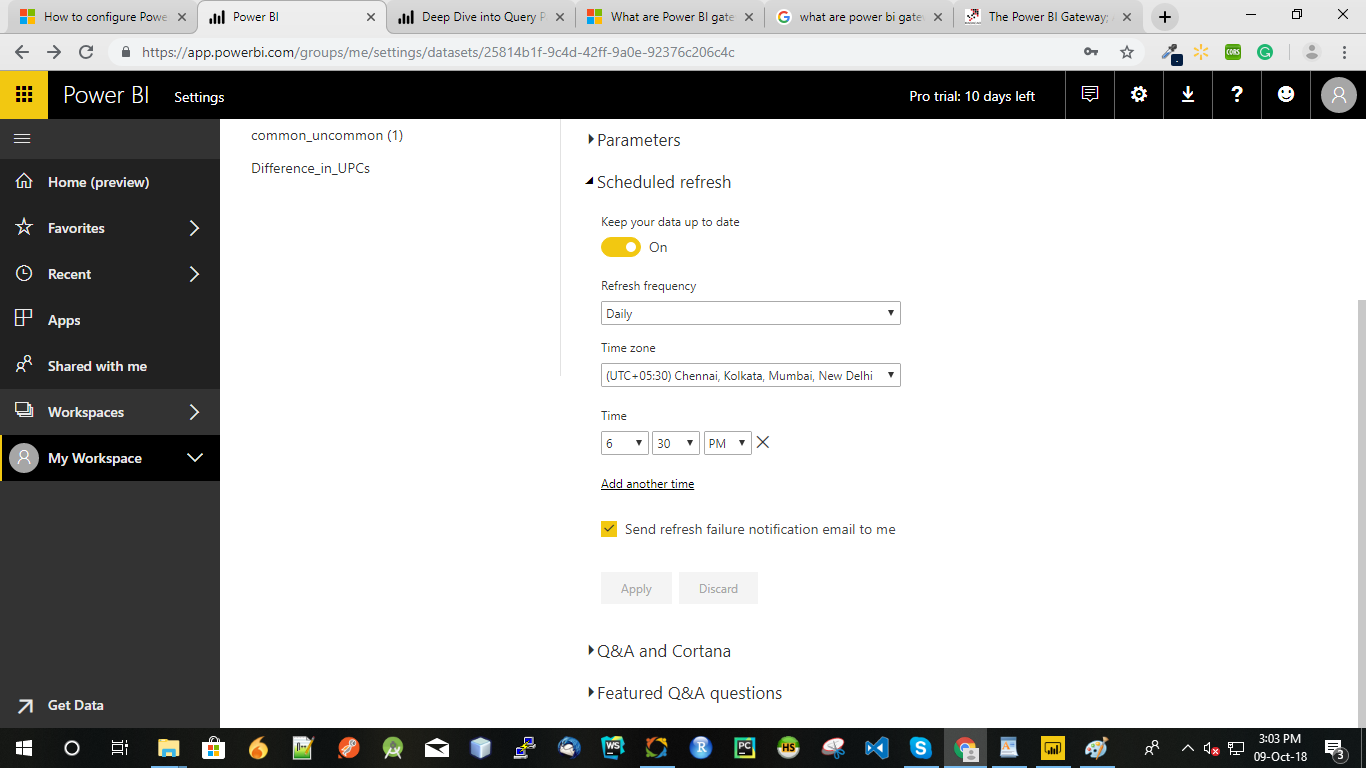
After completing all the steps, you need to click on apply and task is completed. Hurray!!!!!
Q & A and Cortana
This step is very simple. If you need to share this information with other Power BI users, Cortana will help you with this.
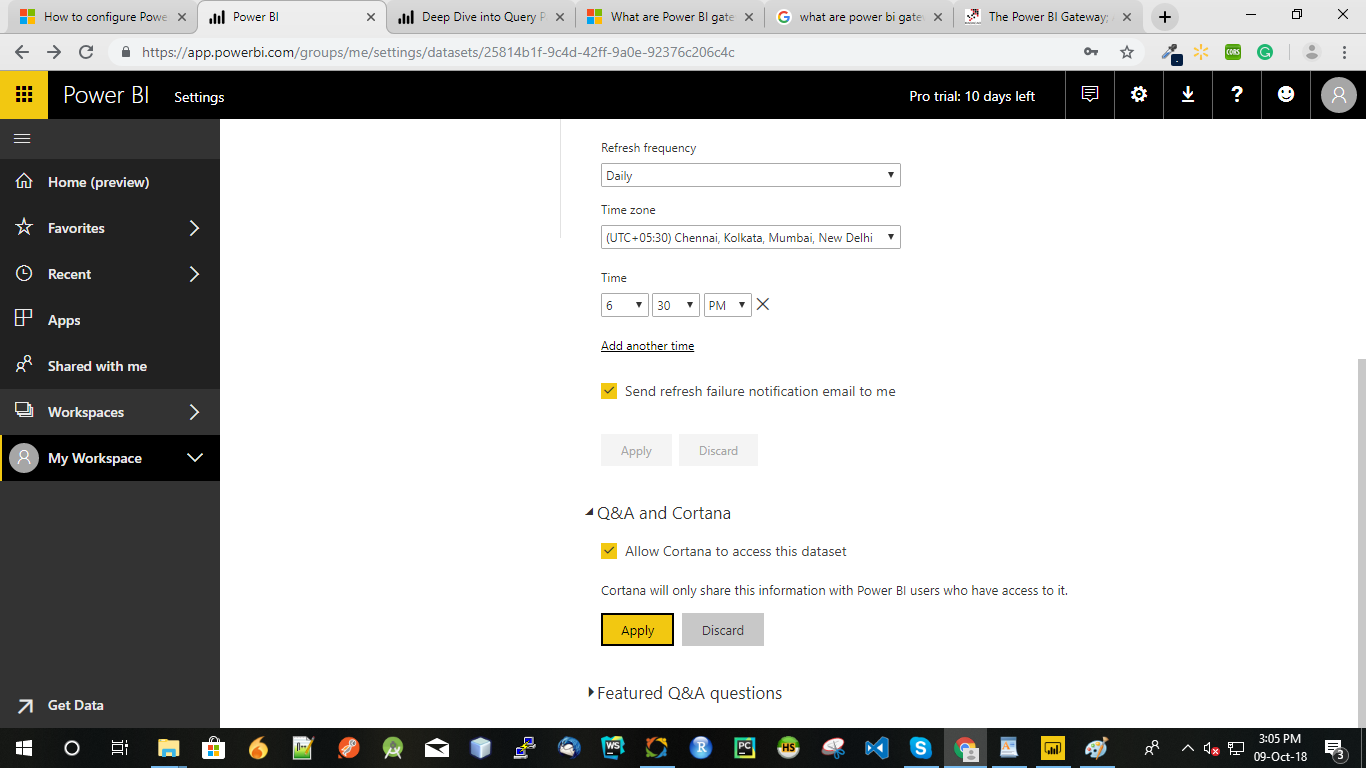
Just click on the checkbox and it’s done. The other power BI users can see this information
if you share this report with other power BI users.
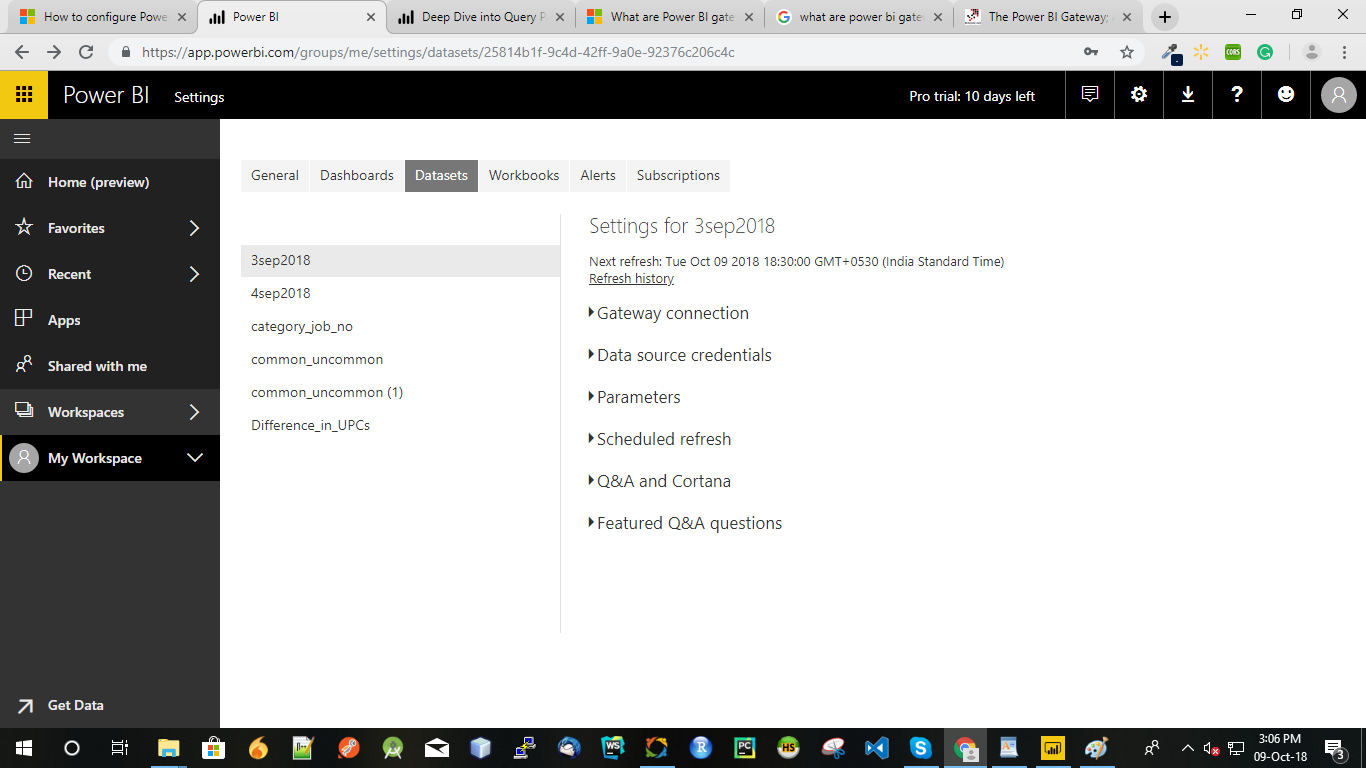
Just above the refresh history you will see the next refresh time of the dataset and is showing (the October which is the same date on which I am writing this). We have successfully completed the process.
Conclusion
When I started working on Power BI I thought it’s very boring and when I started going deep down into the concept it started becoming more interesting. This is just one topic which I explained to you and I think I have successfully made you understand how easy it is to implement this. You can perform this process on our own and it’s my suggestion to try it at least once. For further query, you can write in the below comment section. Thanks!
I excel when it comes to making bespoke data dashboards and visualizations that users and clients absolutely love. Sharing about things I enjoy doing is my hobby, whether it's about a project, collaboration, feedback, or just simple how-to guides about visualization.
If you have something to ask or share, I'd love to hear from you!
- Business Intelligence Vs Data Analytics: What’s the Difference? - December 10, 2020
- Effective Ways Data Analytics Helps Improve Business Growth - July 28, 2020
- How the Automotive Industry is Benefitting From Web Scraping - July 23, 2020
My reports aren’t refreshing next i update automacally dataset. What is the problem?