
In this section, we are going to discuss about creating visuals within Power BI desktop using R script. We are not going to download any R engine in Power BI. It must be downloaded into your local machine. You can download R free of cost using this link https://cran.r-project.org/bin/windows/base/. Let me give you a brief introduction about R. R language is a statistical programming language used to create different types of visualization which are more interactive and also used to create different Machine Learning Models. It is a very popular language in creating different graphics too. Power BI provides a method to us to embed R script into Power BI desktop which we are discussing in this blog.
Jump to Section
How to enable R visuals?
To enable R visuals in Power BI, you need to go through a check progress which is described below. Our first step is:
1. User need to install R language in their local machine.
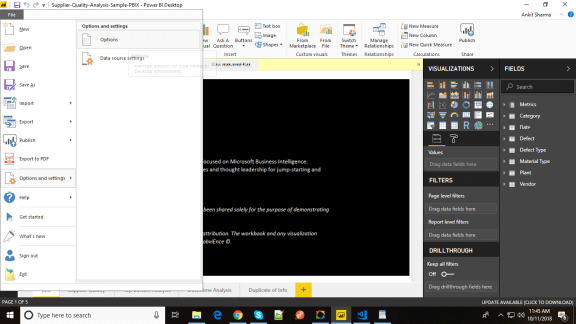
2. Open the power BI desktop in your system. Go to FILE then Options and Settings and finally Options which will look like this:
3. You are redirected to Options page which has so many Global options. I will only discuss R scripting. If R is already installed in your system, it will automatically detect the path of your R installation. If you have two R versions installed and want to use the other one just choose other and enter the installation path.
4. If you have any IDE of R, you can mention in the second text box. Same as above if you have two IDE’s, you can select the other and mention the name of IDE. Power BI automatically detects these two things.
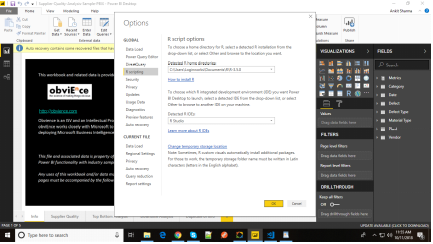
Once you entered all the values you are ready to create R visuals.
Creating R visuals in Power BI desktop
1. The final step is you need to select R script visual from VIsualizations tool to add an R visual.
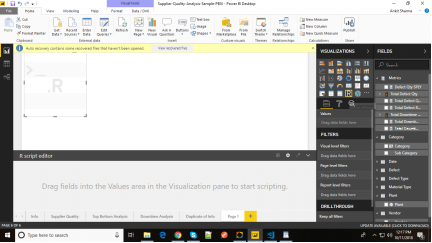
2. You will see the canvas is divided into two parts. First one is the space where your R visualization is going to be shown and the second one is your R script Editor.
3. To create the R script code, you need to drag all the columns from your data to the Value section within the FIelds. The fields you will add to the Value section only will be available to the R script. If you add or remove the field, it will automatically remove from the R script editor. Let’s understand this with an example.
I have uploaded one csv file in my Power BI desktop, which you can easily see in the above image. Let’s enter three columns in the values. You will see it will create three data frames into the R script editor. Data frames are created with the name dataset. One thing Power BI does, that it removes the duplicate rows.
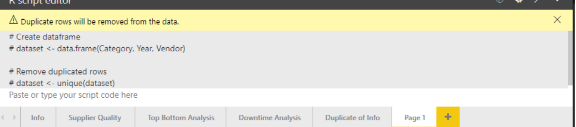
The data frame which is generated is dataset and you can use the column by their name dataset$Category same as we do in R script. The data frames are created, now we need to enter the R code which will create the visualization. After completing the code you need to click on run R script.
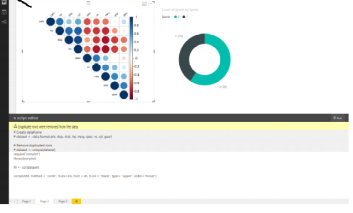
4. When you click on R script Run, it will create the visualization in the canvas area. To get the larger view of the image you can minimize the R script editor too. You can also change the installation settings from here too.
You need to add the R script to create the visual and most important thing the library you are going to use should be installed in your R. Suppose if I am using core plot library it should be installed in my local machine. To generate the graph, I will use this code.
library(corplot)
m <- cor(dataset)
corrplot(M, method = "circle", tl.cex=0.6, tl.srt = 45, tl.col = "black", type= "upper", order="hclust")
and click on Run and it will generate the graph showing below.
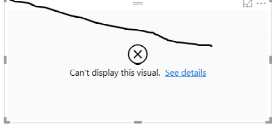
Sometimes R script gives an error. The error visual will show something like this.
Limitations of R
1. You cannot display more than 15000 rows in your visualization.
2. If an R script takes more than five minutes to execute, it will result into an error.
Conclusion
In this article, I have discussed about how to convert columns into data frames, write R code and execute them and create different visuals. I hope you will understand this and there is one more option to directly execute your R script and get the desired result. You can do it as a practice. Hope, you like this article and please mention in the comment section.
I excel when it comes to making bespoke data dashboards and visualizations that users and clients absolutely love. Sharing about things I enjoy doing is my hobby, whether it's about a project, collaboration, feedback, or just simple how-to guides about visualization.
If you have something to ask or share, I'd love to hear from you!
- Business Intelligence Vs Data Analytics: What’s the Difference? - December 10, 2020
- Effective Ways Data Analytics Helps Improve Business Growth - July 28, 2020
- How the Automotive Industry is Benefitting From Web Scraping - July 23, 2020