Before starting query editor in power BI desktop, let us first understand the basics of power BI such as:
- How to connect to Data
- How to import data in power BI
- How to create custom columns in power BI
For accomplishing these tasks I am going to use http://download.microsoft.com/download/5/7/0/5701F78F-C3C2-450C-BCCE-AAB60C31051D/PBI_Edu_ELSi_Enrollment_v2.xlsx this file. You can download this file by clicking the link above.
Jump to Section
1.Connect to Data
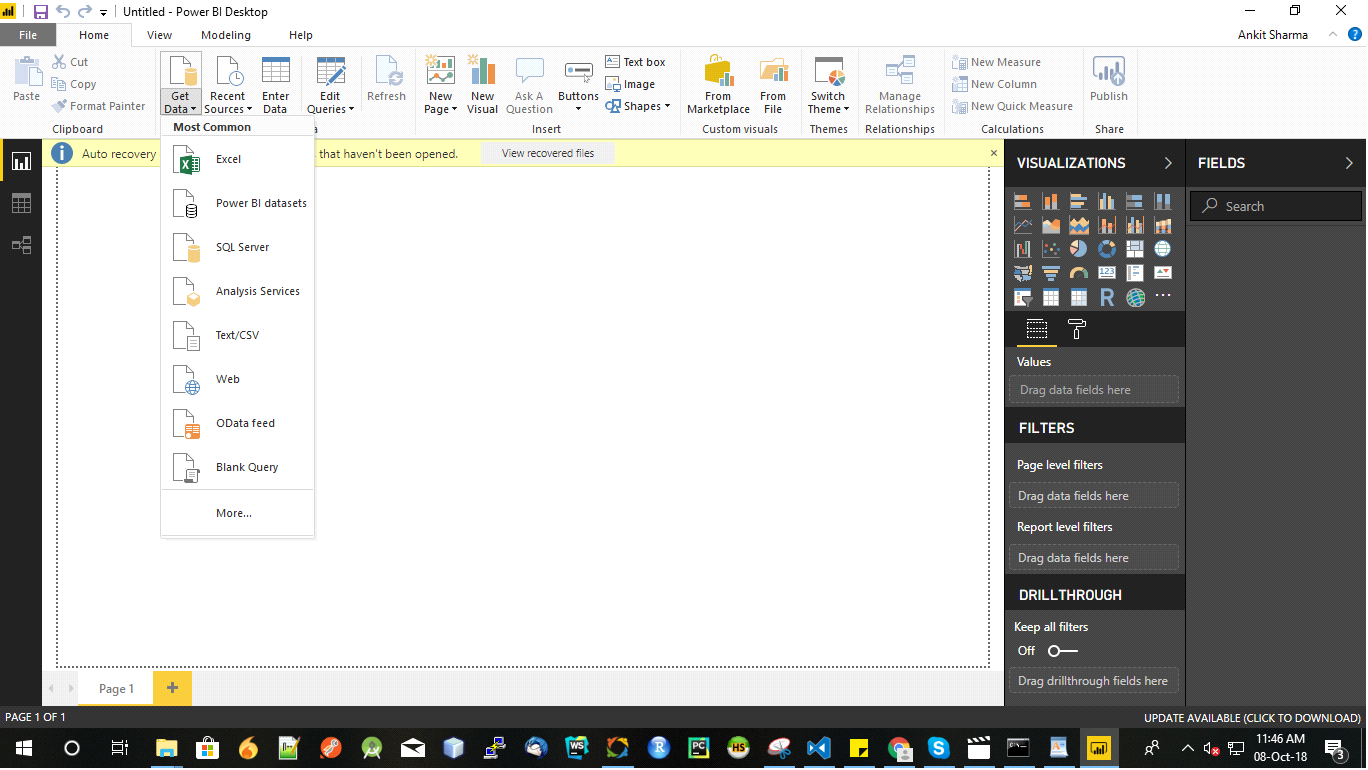
For connecting the data, open your power BI desktop. You will see the Get Data option. Click on it. There are so many options present there. According to your need, you can select the type of file you have. Since in this document we are going to use .xlsx file so I will select excel. After selecting the file it will open a new window named Navigator. You will see that all the sheets present in this file will be shown. Either you can open all the sheets or one. It will open all the selected sheets. While selecting, it will show the preview of Data near around 10 to 15 rows. You can check whether the data is imported properly or not. You can then click on LOAD to load the data in power BI.
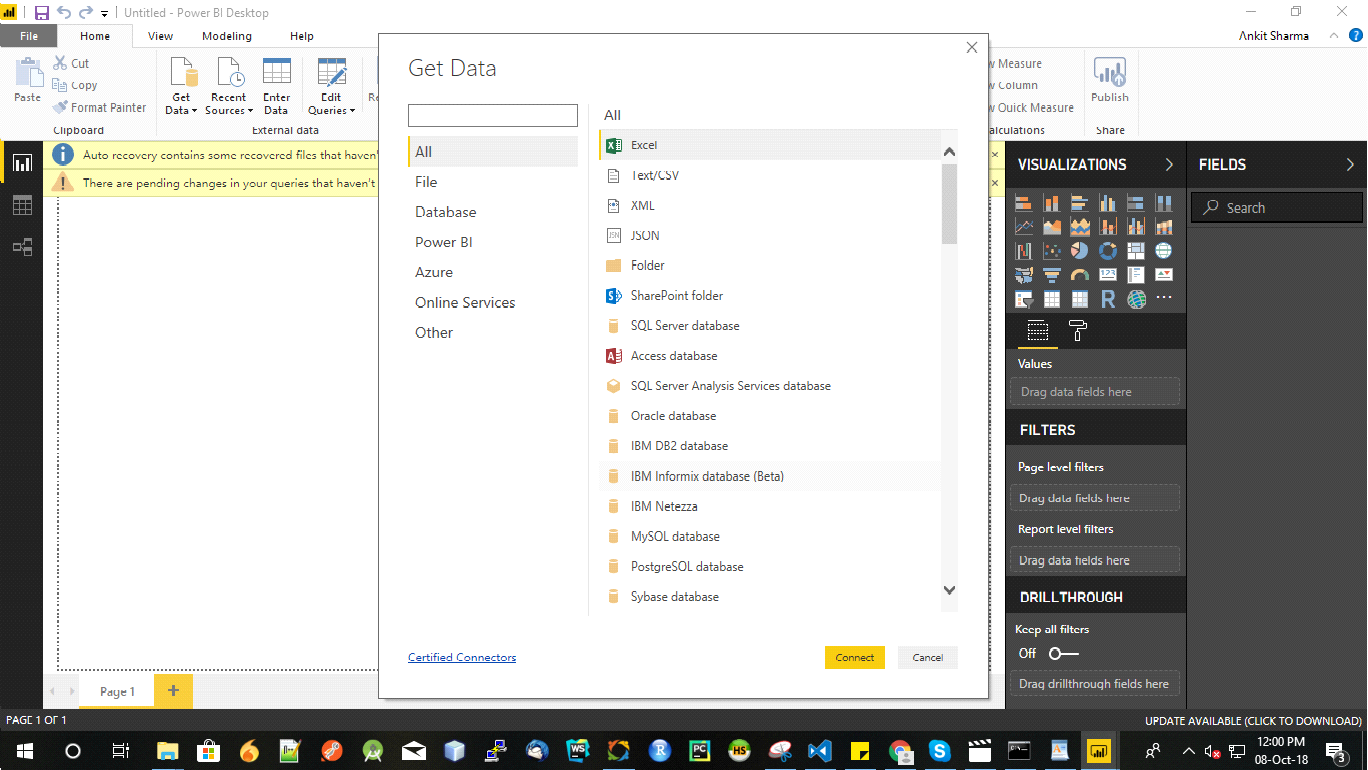
There is one more option present when selecting Get Data more. If suppose the data is present in the database you can go to more options where you will see mostly all the database connectors. You can choose this option too according to your need.
There is one more option present Edit which will open your Power Query Editor which we will be going to discuss in details.
Power Query Editor
Before loading the data, you have the option to edit the data too. Click on Edit. This will open another window in which you can perform editing in the data according to your needs. Let’s try some editing
1. Removing columns
If suppose you have some column which you are not going to use. You can remove them very easily. Go to that particular column right click on that. You will see options. There you will find remove the column. Click on that and the column is removed. Very simple. There is one more option present in the header to remove the columns i.e ‘Remove Column‘. Now let’s go to some other options very quickly

You can either duplicate the column or rename it or you can replace the values too. You can change the type of data too, it means if you want floating point values and by default, it is decimal you can change it following same process clicking change type and then selecting type of data you want.
One thing you should notice the editing you are doing it will show in APPLIED STEPS. If somehow you have done some mistake in editing the data you can remove the particular edited steps by clicking on Crossmark present before the name of step. To apply all the steps which you have performed you need to click close and apply can be seen on the top left corner of your desktop.
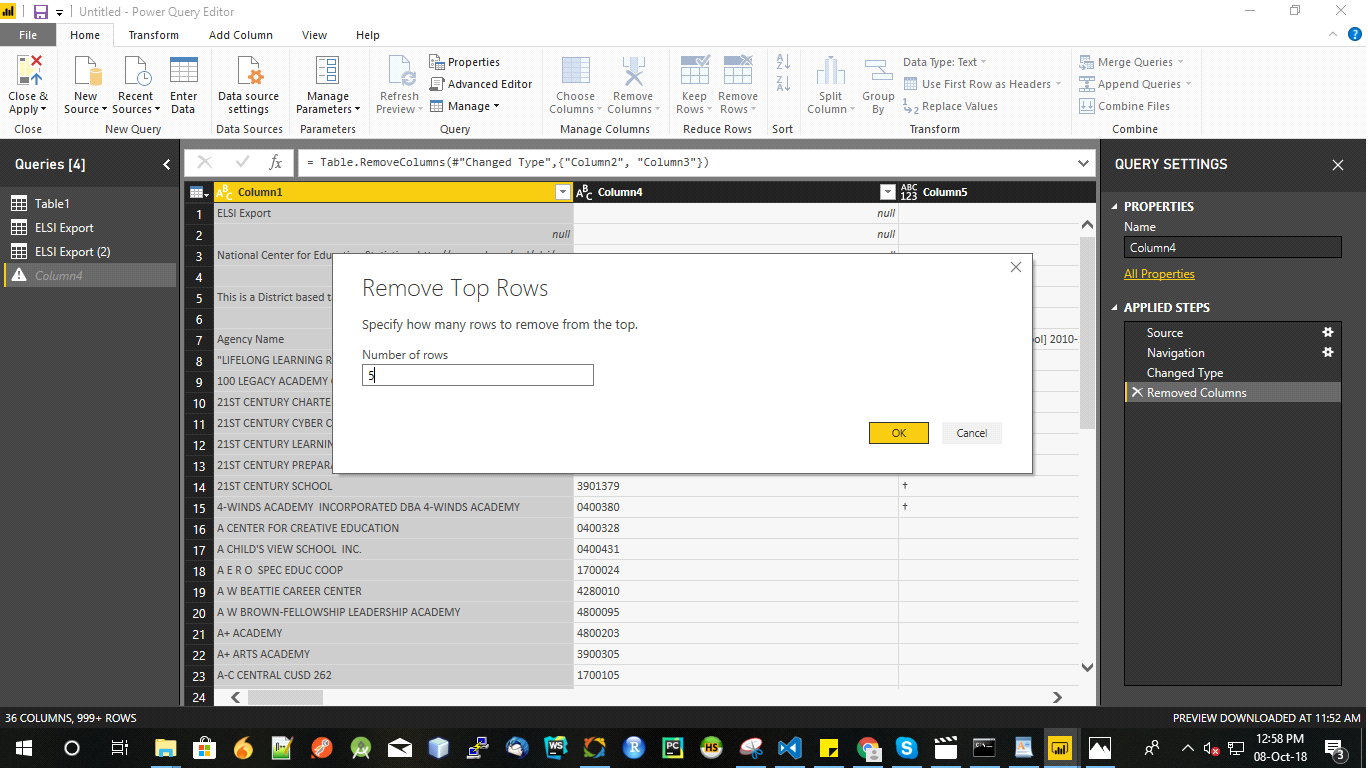
Similarly, you can remove rows too by clicking on Remove Rows. After clicking you will get some options such as remove any number of rows from the top, or from the bottom. According to your needs, select the option and perform it like remove top rows option. It will ask how many rows and you then enter the number and it will be removed.
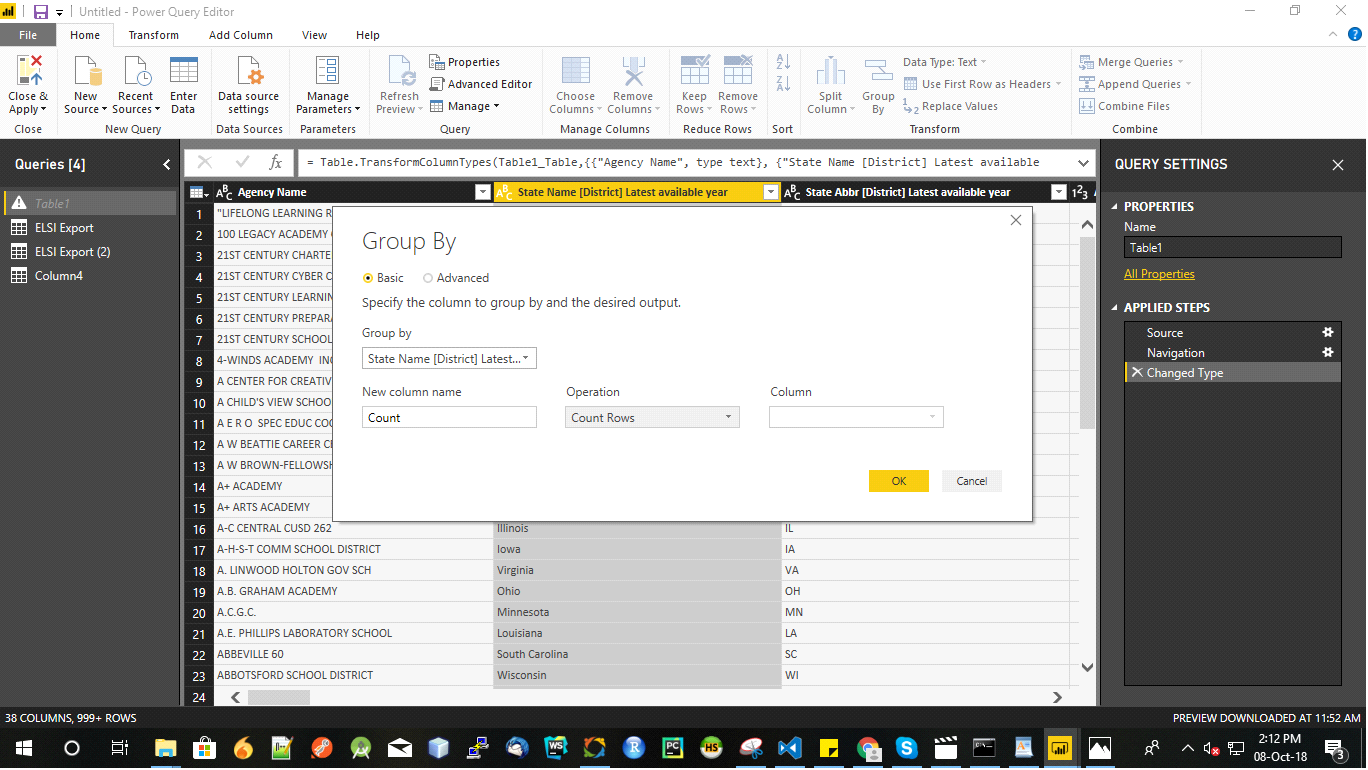
Group Rows
In query editor, you have an option GROUP BY can be easily shown in the above image. This option is used to group the values of a column present in different rows into the single value. You can group the values according to certain operations such as Count, Median, Mean, Average, Min, Max etc. Based on your requirements you can perform this step. Implementation of this step will be shown below.
1. First, select the column you want to GROUP.
2. Select the GROUP BY option. It will pop up a new window.
3. You will see four tabs. In first tab enter column name, the second name of the column and in third choose operation.
4. Click Ok you will get the desired result look something like this as shown below.
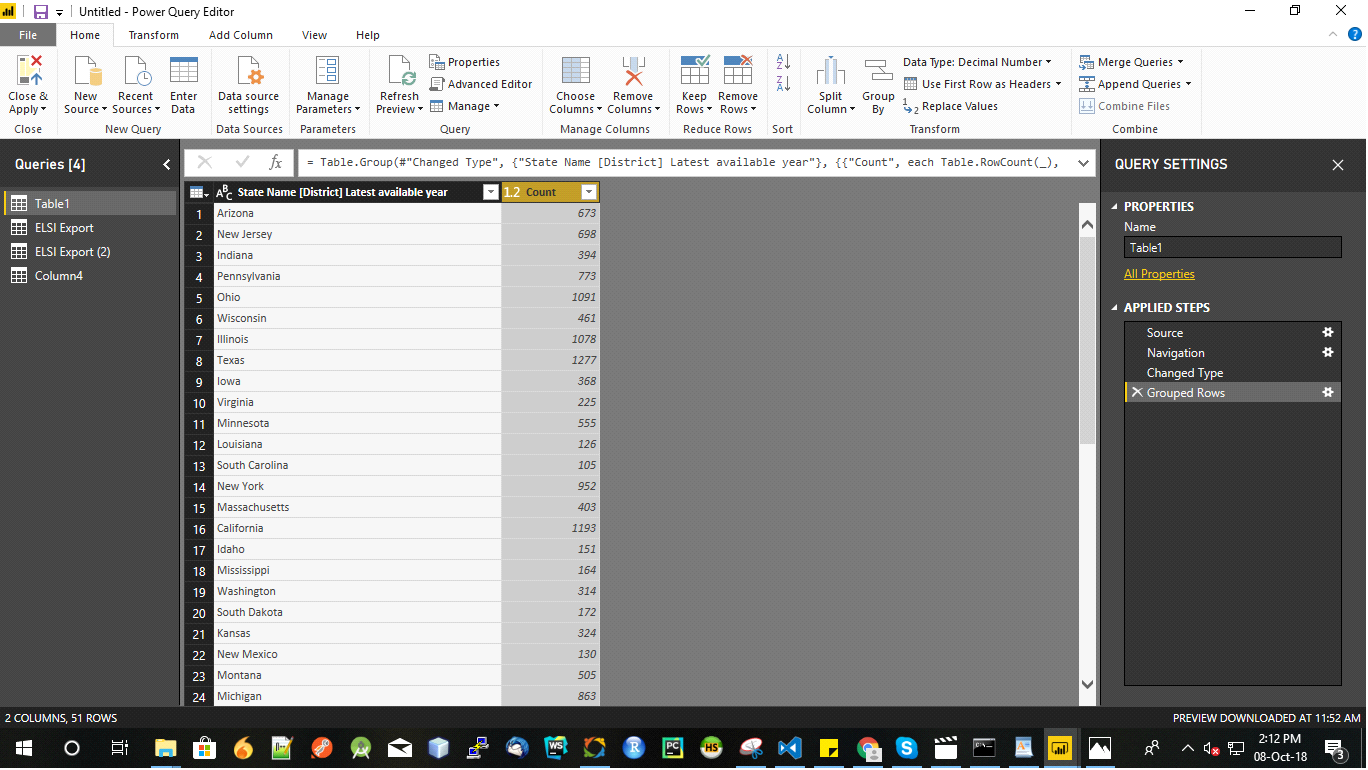
You will get all the counts for different states. Click close and apply or simply close.
Create Custom Columns
When you import the data there is no such guarantee that the data you needed going to be present in the table or dataset. At that time you need to create columns from your side which brings us to use create custom columns option. This option is very handy and used most of the time while cleaning the data. This will create a new column from the columns present in the table.
Suppose you have two column name Weight in your dataset which contains data in milligrams. You want the weight in kilograms. What will you do?
1. Go to Add Column tab. Click on it a new window will appears
2. Click on the custom column it will open a model
3. In the first tab enter column name, select available column. Click on the weight column
4. Write the custom formula, in this case, the formula is going to be
=[Weight] * 1000
5. Click OK. You will see another column added in your dataset
There is one more option conditional column. This is used when you want the value in a column only when a certain condition satisfied like the if-else statement in coding techniques. To understand it lets take an example, Suppose we have a column in our dataset named AGE. We want to create a custom column in which the persons whose age equals 25 will be named as Adults. Follow these steps
1. Select the tab add column and then conditional column which will open a pop-up.
2. In the first tab enter the name of the column. In the second tab select the column name in our case it is AGE. Select the operator in our case equals. In the third tab enter value which is ADULTS.
3. If you want to enter the value if the above condition is not met you can enter the value in the fourth tab.
4. Click OK
Conclusion
Custom power query is the essential part of power BI. It’s not possible to explain all the options present in the query editor, but I have tried to explain most of the parts present in this blog above. In the editor, you can almost do anything with your data to make it meaningful. I hope you will follow all the steps and also try doing it on your own to understand it better.
I excel when it comes to making bespoke data dashboards and visualizations that users and clients absolutely love. Sharing about things I enjoy doing is my hobby, whether it's about a project, collaboration, feedback, or just simple how-to guides about visualization.
If you have something to ask or share, I'd love to hear from you!
- Business Intelligence Vs Data Analytics: What’s the Difference? - December 10, 2020
- Effective Ways Data Analytics Helps Improve Business Growth - July 28, 2020
- How the Automotive Industry is Benefitting From Web Scraping - July 23, 2020
It’s an remarkable post designed for all the internet users;
they will take benefit from it I am sure. http://www.mbet88vn.com
I really like your blog.. very nice colors & theme. Did you create this website yourself or did you hire someone to do it for
you? Plz reply as I’m looking to construct my
own blog and would like to find out where u got this from.
appreciate it http://xn--80aknja1b.xn--p1ai/?option=com_k2&view=itemlist&task=user&id=207280
I really like your blog.. very nice colors
& theme. Did you create this website yourself or did you hire someone to
do it for you? Plz reply as I’m looking to construct my own blog and
would like to find out where u got this from.
appreciate it http://xn--80aknja1b.xn--p1ai/?option=com_k2&view=itemlist&task=user&id=207280