Hello Readers, In this blog, we will find depth explanation on each component of the Azure Portal.
Process 1 −In Step First, login into your Azure account.
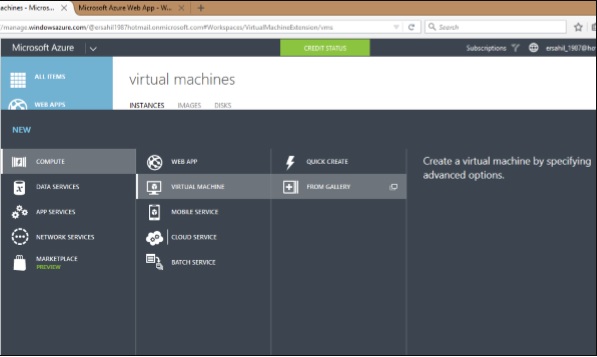
Process 2 −Now Click ‘New’ at the left bottom corner and drag your cursor to ‘Compute‘.
Below is the list of models under Computer Model.

Jump to Section
Create a Web App
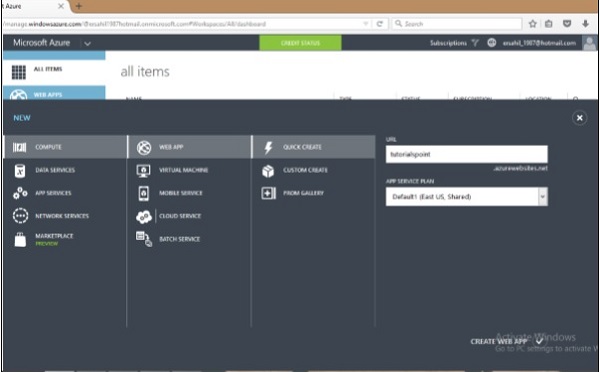
Step 1 − Click Web App.
Step 2 − Click Quick Create and enter the URL and choose a service plan from the dropdown list as shown in the following image.
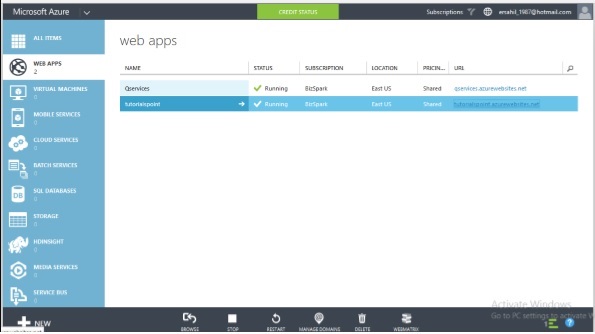
When you go back to the main screen, it will show the website that was just created. And when you click the website URL, it will take you to the website.
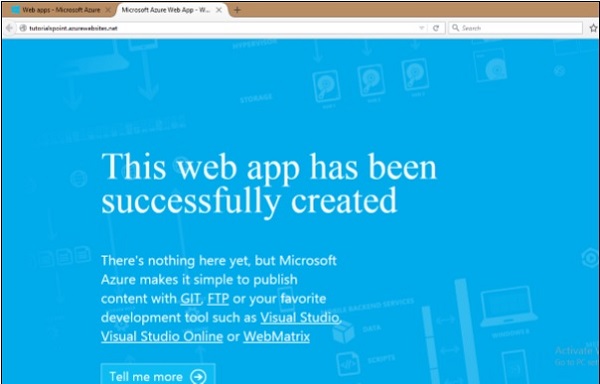
The following image shows as of how your website will look when you click the URL.
Similarly, you can choose ‘From Gallery’ when creating a web app instead of ‘Quick Create’. This will Provide the feature for you to choose the development framework in which you want to create your app.
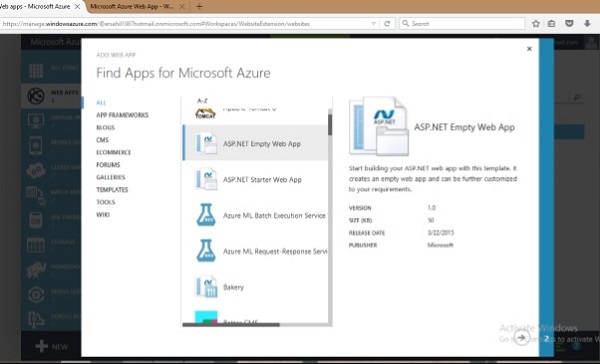
Windows Azure supports, Net, Java, PHP, Python, Node.js, and Ruby are several ways of publishing the code to Azure server. It can be published using FTP, FTPs, Microsoft Web Deploy technology.
Control tools Like GitHub, Dropbox and Codeplex can also be used to publish the code. It provides a very interactive interface to keep track of changes that have been published already and also unpublished changes.
Create a Virtual Machine
1 – Click on ‘Virtual Machine’ from the list.
2 − Then click ‘From Gallery’.
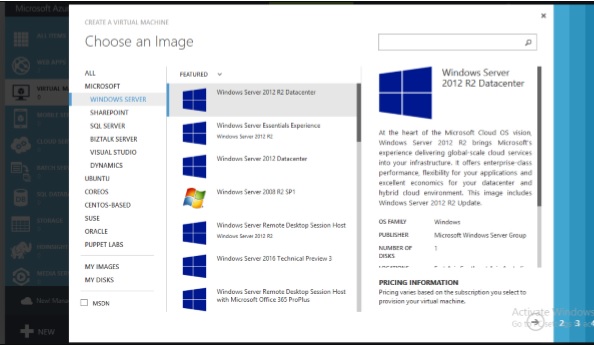
3 − Select the Operating System or Program you want to run.
4 −Please select the configuration and fill in the details.
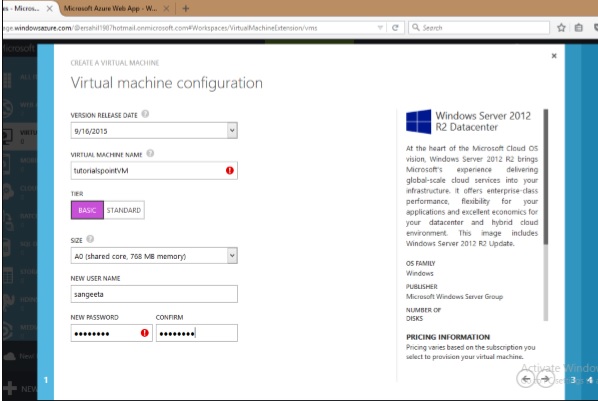
The Username and Password you set up here will be needed to access the virtual machine every time.
On the next two screens, you can leave the default values on for the first time.
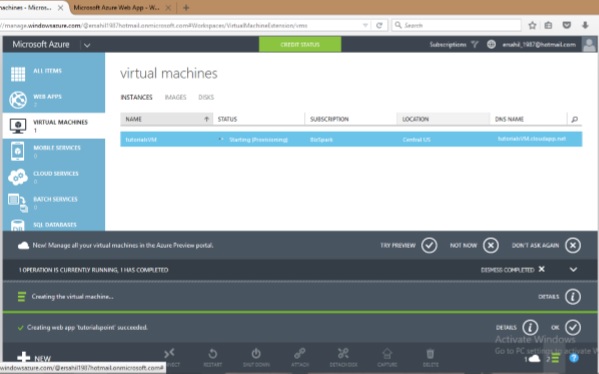
Step 5 − The virtual machine just created will be displayed when you click on ‘Virtual Machine’ on the left panel as shown in the following image. It might take a few minutes to show up.
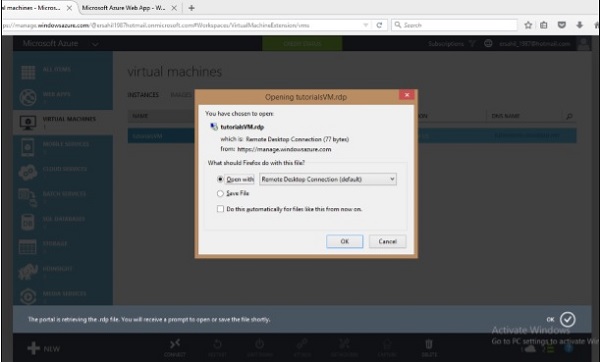
Step 6 − Once the machine is created you can connect to it by clicking on the connect icon displayed at the bottom of the screen. It saves a .rpd file on your machine as shown in the below image. Choose ‘save file’ on the screen and it will save in ‘downloads’ or the in the set location on your machine.
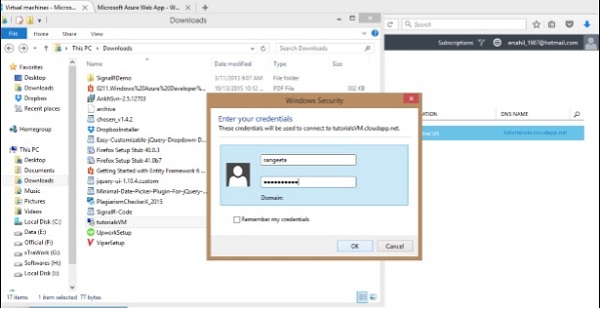
Step 7 − Using .rpd file open it and fill the credentials into the following screen and connect to your Virtual machine.
You can also use your own image by capturing the image of an existing virtual machine or virtual hard drive. Virtual machines are beneficial in several ways.
- A user can try the new operating system without actually installing them.
- A VM can be deleted when you are done with the operating system.
- New versions of an operating system can try and test before the user installs them on the machine.
Creating a Mobile Service
The mobile device is provided by Mobile services compute hosting model. For creating a mobile service −
Follow the steps given below:
Step 1 −Choose a service of mobile under computer and click on create. A new Pop-up will be open as shown in the below image.

Step 2 − Fill in the URL. Select the database, region, and backend.
Step 3 − Tick the check box if you want to configure the advance push settings. The above-given option in the image allows us to configure our Mobile Service to use an existing notification hub or specify the name of a new one. If you leave this checkbox unchecked, then a new hub will be creating a new namespace with a default name.
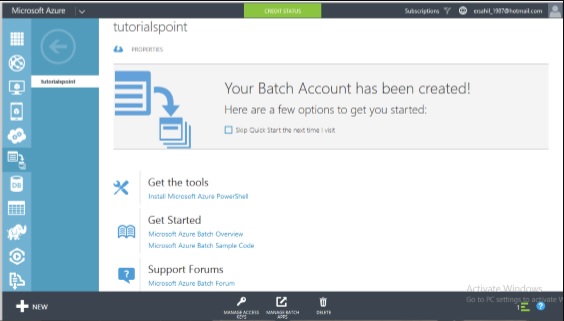
Creating Batch Service
When a large scale application is running and also a parallel high performing computing requires that time batch service is necessary. To run a task parallel that eases the workload at no extra cost The batches can be created by a developer.
How to Create?
Azure only charge for VM which you are being used. They can schedule a task, put them in queues and manage the workload in the cloud. For creating other services under Computer model batch service given below. The below image shows how a batch service can be created quickly.
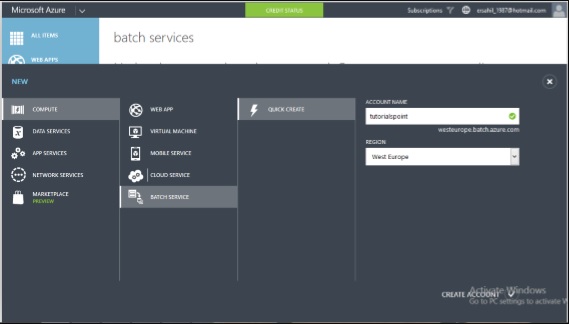
After created batch service, you can see the details by selecting it from the left panel. The below image pops up on the screen.
Windows Azure architecture
Windows Azure architecture is a part of Fabric Controller which is too much significant. When we talk about the components or services provided by Windows Azure, we wonder how all this works and what is happening in clouds. It seems very complex from our end. Let us look into the physical architecture of these services to have a better understanding of Fabric Controller.
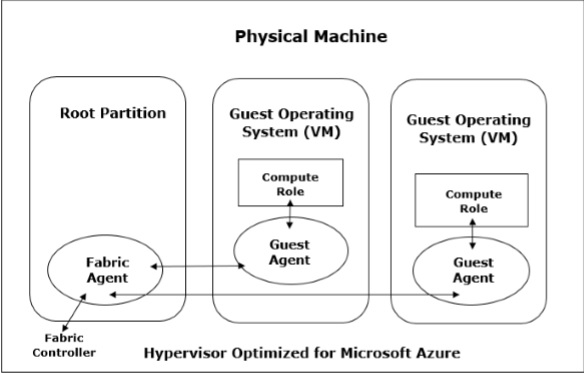
Fabrics & Cluster
By using a switch we can arrange many machines or servers in the datacenter. The brain of Azure services may be known as the fabric controller that analyses the processes and makes decisions. In Microsoft’s datacenter, Fabrics are the group of machines which are aggregated by a switch. The group of these machines is called the cluster.
Fabric Controller managed Each cluster and owned. They are replicated along with these machines. It manages everything on all machines, for e.g., load balancers, switches, etc. When selecting a virtual machine offered by Windows Azure services, there are five options to choose from. The configuration is as follows:−
| Memory | CPU | Instance Storage | |
|---|---|---|---|
| Extra Small | 768 MB | Single core 1.0 GHz | 20 GB |
| Small | 1.75 GB | Single core 1.6 GHz | 225 GB |
| Medium | 3.5 GB | Dual-core 1.6 GHz | 490 GB |
| Large | 7 GB | Four core 1.6 GHz | 1,000 GB |
| Extra Large | 14 GB | Eight core 1.6 GHz | 2,040 GB |
When a user starts working on one virtual machine, the operating system, patch updates software updates are performed by the fabric controller. It is decided by where the new application should run and which is one of the most important functions of Fabric Controller. It also selects the physical server to optimize hardware utilization.
CONCLUDING WORDS
I hope after reading this blog, you will get more aware of the basics of Azure. However, for more such updates, stay connected and do write for any suggestions or query to me in the comment section.
Thank You for reading!!!
I excel when it comes to making bespoke data dashboards and visualizations that users and clients absolutely love. Sharing about things I enjoy doing is my hobby, whether it's about a project, collaboration, feedback, or just simple how-to guides about visualization.
If you have something to ask or share, I'd love to hear from you!
- Business Intelligence Vs Data Analytics: What’s the Difference? - December 10, 2020
- Effective Ways Data Analytics Helps Improve Business Growth - July 28, 2020
- How the Automotive Industry is Benefitting From Web Scraping - July 23, 2020