Nowadays, the most important factor of information technology and communication has been the security of information because of the rise of the internet. Data becomes an essential part of a private as well as government organization from some decades. Because these data carries some secret information related to the organization. If someone misuses that information for any evil purpose. This may be harmful for that organization.
So we use Cryptography to secure the information from other people. Many different methods have been developed to encrypt and decrypt data in order to keep the message secret. Sometimes, it may not enough to keep the contents of a message secret, it may also be necessary to keep the existence of the message secret. So we use Steganography technique which is used to hide your message without changing its meaning.
Jump to Section
Introduction to Steganography
Steganography is a way to communicate invisibly with others. This is done by hiding information into other information. That means we do not encrypt the message into ciphertext. The word steganography is derived from the Greek words ‘STEGANO’ meaning ‘COVER’ and ‘GRAFIA’ meaning ‘WRITING’ called “COVERED WRITING”. In steganography, the information can be hidden in an image, audio, video, etc.
Difference Between Steganography and Cryptography
Now you can see, we use both Steganography and Cryptography to secure your information from others. So that you can communicate without any threat. Then why do we use two techniques instead of one of them? What are the differences between them?
So the difference between Steganography and Cryptography is that the cryptography focuses on keeping the contents of a message secret. It does not change the meaning of your message. But steganography only focuses on keeping the existence of a message secret. That means it changes your message into cipher message.
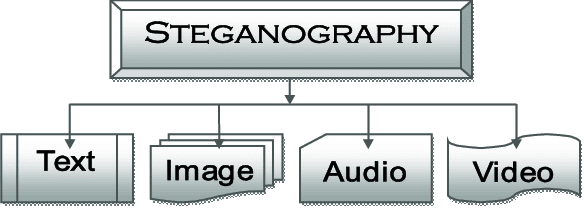
Types of Steganography
There are many types of steganography methods. Below shows the different categories according to the file formats that we can use for steganography techniques.
- Text Steganography
- Image Steganography
- Audio Steganography
- Video Steganography
In this blog, I am going to show you how you can hide your message inside an image and how you can make an application using c# to hide your message inside an image.
Image Steganography
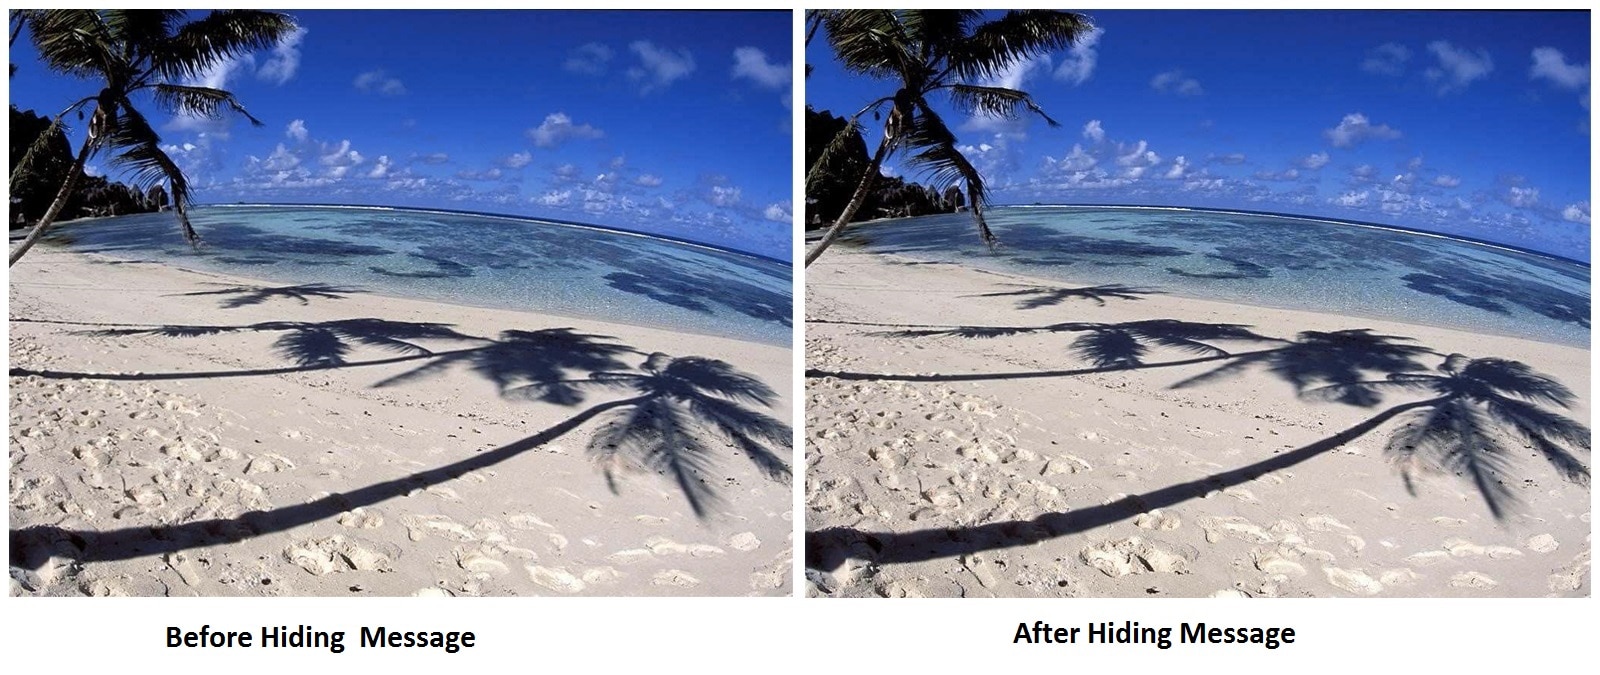
Image Steganography is one of the most powerful techniques to securely transfer data with the help of images. We can easily spread an image over the World Wide Web or in newsgroups with a secret message. The Least Significant Bit (LSB) is a most common method to hide message inside an image.
Image Steganography requires three elements which are as follows:
- Cover Medium – It is an image in which we hide our message.
- The Secret Message – It is the message that we hide inside our image.
- The Stego-Key – This is the key which may or may not be required to hide our message. It depends on the algorithm.
This method is one of the main techniques and the basic idea to replace the LSB of the image with the bits of the message or to hide text file without destroying the property or resolution of the image. The LSB-based technique becomes more challenging one when we replace few LSB bits of the cover object. Because it is difficult to differentiate between the cover- object and stego-object.
For security purpose, we use the concept of steganography to transfer data through internet safely and faster to the destination.
This blog is all about making an application by using of Least Significant Bit (LSB) algorithm for hiding the data into image. We are going to implement it through the Microsoft .NET framework using C# as programming language.
Least Significant Bit (LSB) Algorithm
Least Significant Bits (LSB) is a very simple approach to embed your information in cover image. This is the main steganography technique which replace the bits of the message directly into the least significant bit plane of the cover image.
Changing the least significant bit does not change the property of cover image. It seems like both the original image and stego-image because the amplitude of the changes are small. To implement this technique, we need a proper cover image with a high resolution to hide our secret message inside an image. Because this method uses last bit of each pixel in the image. It is necessary to use a lossless compression format because in the transformations of a lossy compression algorithm, we lost the hidden information. By using a 24-bit color image, we can use a bit of each of the red, green and blue color components, so we can store 3 bits in each pixel.
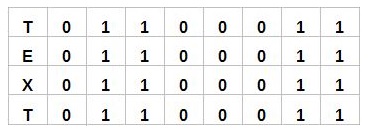
For example, suppose our message is “TEXT”. Below is the binary representation of each character of message. We consider the following grid as 3 pixels of a 24-bit color image, using 9 bytes of memory:
T – 01100011
E – 01101111
X – 01101101
T – 01100011
Below is the binary representation of an image in which we are going to hide our message. We convert every single pixel into binary form which is the combination of 8 bit. Now what we are going to do is going to take every single bit from the message grid and replace it with the last bit of each pixel of cover image.
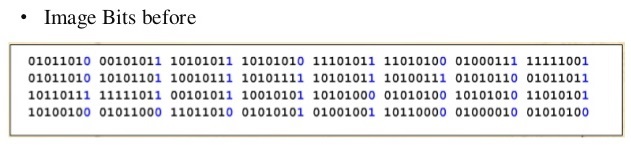
Now you can see, last bit of every pixel is replaced by each bit of message in below image. Every blue and red color number represents each bit of our message. Blue colored number means message’s bit is as same as the pixel’s bit and blue color means Both bits are different.

Implementation of LSB Algorithm using C#
Now we are going to make an windows application to hide and extract your message inside a cover image. The Least Significant Bit (LSB) is one of the main techniques in spatial domain image steganography. In this technique, the least significant bit is replaced by the text.
Software requirement:
-
Windows 7/8 Platform
- .NET Framework 3.5 and above
Hardware Requirements:
-
512 MB RAM
-
Processor 800 MHz and above
Import Image:
Now come to the coding part. First we take a button for selecting an image from our directory as an input. So that we can hide our message in it.
private void openFile_Click(object sender, EventArgs e)
{

OpenFileDialogopenDialog = newOpenFileDialog();

openDialog.Filter = "Image Files(*.png) | *.png;";

if (openDialog.ShowDialog() == DialogResult.OK)

{

textBox1.Text = openDialog.FileName.ToString();

pictureBox1.ImageLocation = textBox1.Text;

loadedImage = Image.FromFile(textBox1.Text);

loadedTrueImage = Image.FromFile(textBox1.Text);

loadedTrueBitmap = newBitmap(loadedTrueImage);

DecryptedImage = Image.FromFile(textBox1.Text);

DecryptedBitmap = newBitmap(DecryptedImage);
}
textsize = (8.0 * ((loadedImage.Height * (loadedImage.Width / 3) * 3) / 3 - 1)) / 1024;
}
In this function, we take a .png type image as an input to hide message. When you click on this button, a pop up will come to select your image. When image is successfully loaded, we calculate the maximum length of message that can be saved inside an image. We save that length inside variable (textsize ).
Note- the length of your message should be less the the value of textsize. If message’s length is greater then the value of textsize, take an image has a large resolution.
Hiding Your Text:
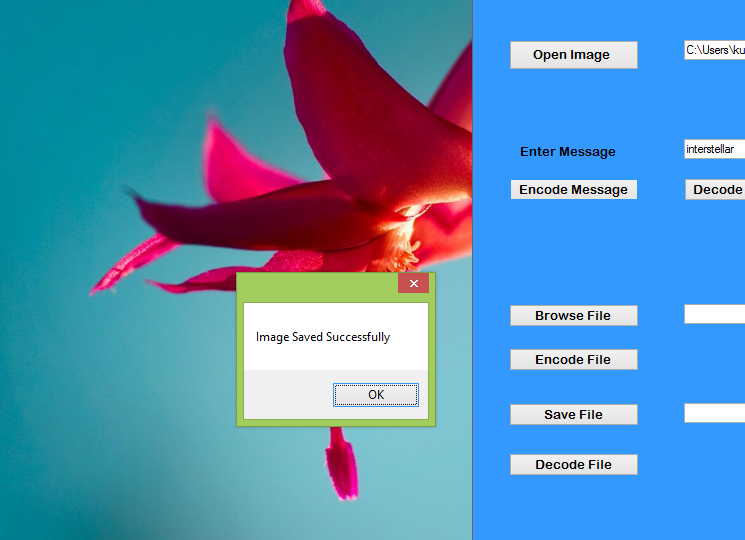
private void encode_Click(object sender, EventArgs e) //encode function
{

if (textBox1.Text == "")
{
MessageBox.Show("Please Select the Image to encode");
}

else if (textBox2.Text == "")
{
MessageBox.Show("Please Enter the Text to be hidden");
}

else
{
string messagetext = textBox2.Text;
double textlength = System.Text.ASCIIEncoding.ASCII.GetByteCount(messagetext);
double textlen = textlength / 1024;

if (textsize<textlen)
{
MessageBox.Show("Image cannot save text more than" + textsize + "KB");
}

else
{
Bitmapimg = newBitmap(textBox1.Text);

for (int i = 0; i <img.Width; i++)
{

for (int j = 0; j <img.Height; j++)
{

Color pixel = img.GetPixel(i, j);

if (i < 1 && j < textBox2.TextLength)
{
Console.WriteLine("R= [" + i + "][" + j + "]=" + pixel.R);
Console.WriteLine("G= [" + i + "][" + j + "]=" + pixel.G);
Console.WriteLine("B= [" + i + "][" + j + "]=" + pixel.B);

char letter = Convert.ToChar(textBox2.Text.Substring(j, 1));
int value = Convert.ToInt32(letter);
Console.WriteLine("letter :" + letter + " value :" + value);
img.SetPixel(i, j, Color.FromArgb(pixel.R, pixel.G, value));

}

if (i == img.Width - 1 && j == img.Height - 1)
{
img.SetPixel(i, j, Color.FromArgb(pixel.R, pixel.G, textBox2.TextLength));
}

}

}
SaveFileDialogsaveFile = newSaveFileDialog();
saveFile.Filter = "Image Files (*.png) | *.png";
saveFile.InitialDirectory = @"C:\Users\Kusum\Desktop";

if (saveFile.ShowDialog() == DialogResult.OK)
{
textBox1.Text = saveFile.FileName.ToString();
pictureBox1.ImageLocation = textBox1.Text;
img.Save(textBox1.Text);

}

MessageBox.Show("Image Saved Successfully");
}

}

}
We use this function to encode our message inside image. After importing image, we write our message in text box. If you do not import image or left the text box as blank, it will show you a messsage like “Please Select the Image to encode” or “Please Enter the Text to be hidden“.
When you write your message into the textbox, it convert your message into binary form and calculate it’s length. If your text’s length is greater than the value of textsize variable, it will show you a message.
Suppose, the capacity of your image is 60kb and you want to save a 70kb size message inside cover image. Then the message will be like “Image cannot save text more than 60KB“.
After checking the message size, we take a pixel from an image and find the R,G,B’s value from it. After retrieving R,G,B’s value, we take the first word from the message and divide every letters from that word and convert it into binary form. Take this binary number and replace it with value of Blue pixel’s value.
Replacing every bit from the message, we save the message length in the last pixel of image.
Extracting Message From Image:
private void decode_Click (object sender, EventArgs e) // decode function
{
if (textBox1.Text == "")
{
MessageBox.Show("Please Select the Image to decode");
}

else
{
Bitmapimg = newBitmap(textBox1.Text);
Stringmsg = "";
Colorlastpixel = img.GetPixel(img.Width - 1, img.Height - 1);
intmsgLength = lastpixel.B;

for (int i = 0; i <img.Width; i++)
{

for (int j = 0; j < img.Height; j++)
{
Color pixel = img.GetPixel(i, j);

if (i < 1 && j < msgLength)
{
int value = pixel.B;
char c = Convert.ToChar(value);

String letter = System.Text.Encoding.ASCII.GetString(newbyte[] { Convert.ToByte(c) });
Console.WriteLine ("letter : " + letter + " value : " + value);
msg = msg + letter;

}
}
}
textBox2.Text = msg;

if (textBox2.Text == "")
{
MessageBox.Show("No data hidden in the image");
}

else
{
label1.Text = "Decoded Text:";

MessageBox.Show (" Image Decoded Successfully. Check the decoded text in the Decoded TextBox");
}

}

}
We use this function to extract your message from cover image. To perform extraction, you have to select an image which contains message inside. This function will check whether we select a cover image or not to perform extraction. If you do not select any image, it will show a message like “Please Select the Image to decode“.
When we select a cover image, we get the message’s length from the last pixel of image. Then run a loop from image’s height to it’s width. We print every letter from the last bit of every pixel and print the message till the loop reaches to the message’s length.
In any case, if we select an image which do not contain any secret message then it will print a message like “No data hidden in the image“.
After successfully extracting our information from cover image, we print this information in a textbox. As a result message will be like “Image Decoded Successfully Check the decoded text in the Decoded TextBox“.
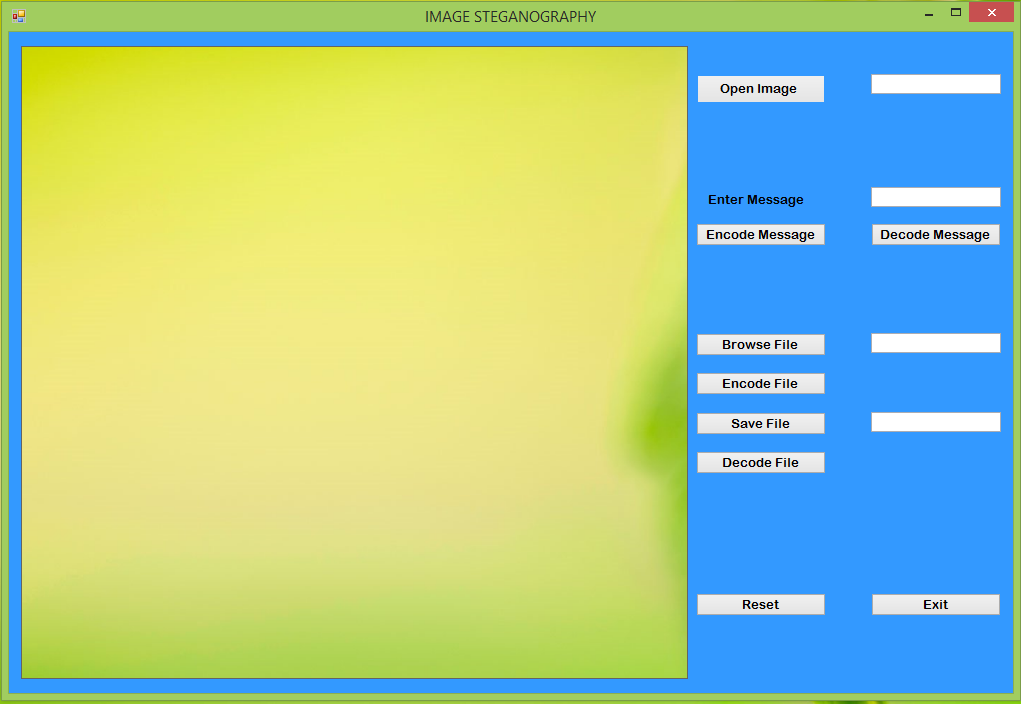
Interface Of Application
Below is the interface of my application. The yellow box is a picture box. I have also added another feature. As a result, you can hide your information from a text file as well.
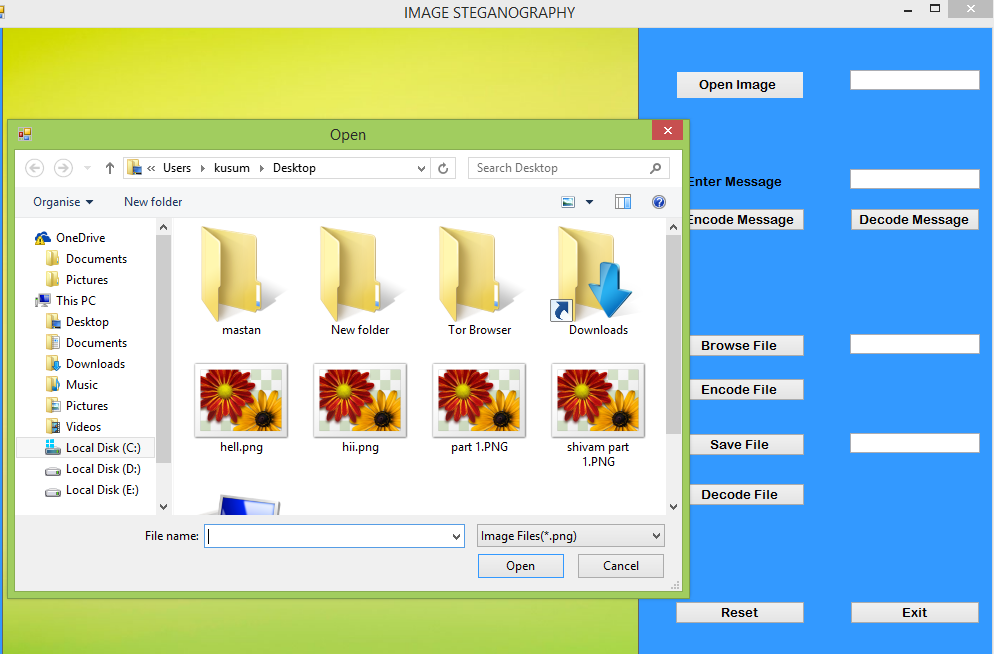
Importing Image
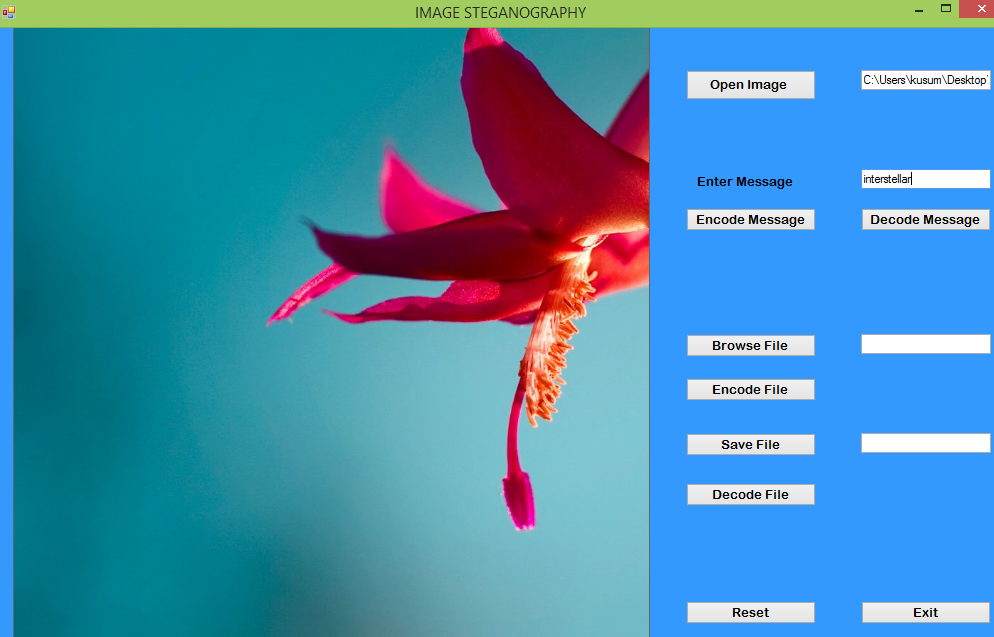
First of all you have to select a cover image by clicking on open image button. When you import a cover image, it will be shown in this picture box and the path of your image will show in the first text box. See the image below-
Write Your Message
When you select your cover image, you can write your message in second textbox.
Hide Your Message And Save
When you write your information in the textbox then click on the encode message button. As a result a dialogue box will open to save your image. See the image below-
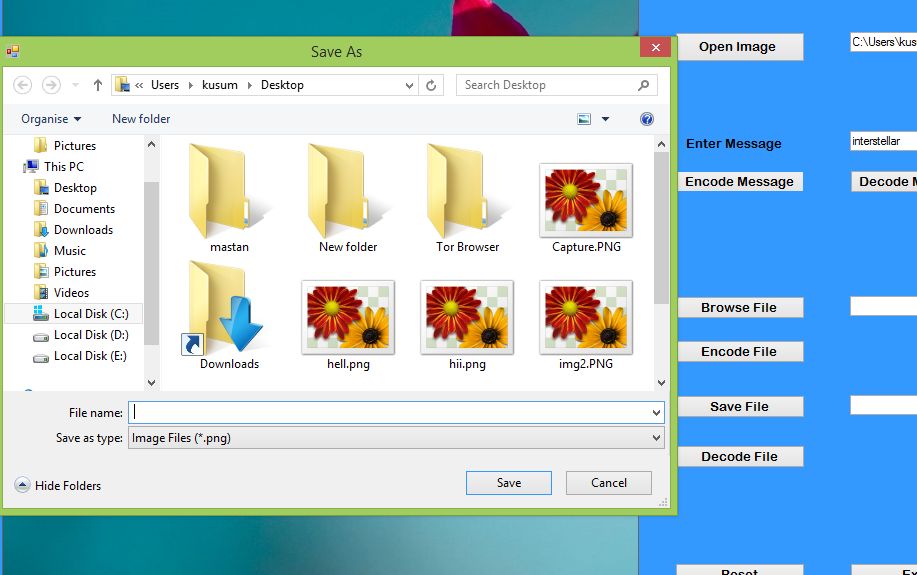
Now write a name for your cover image and click on save button. Finally your information is saved.
Extract Your Information
To perform extraction, you have to click on ‘open image’ button. As a result a dialogue box will open and you have to select a cover image which have your secret information inside. When you click on “Decode Message” button, it will print your message inside the textbox.

Summary
In the present world, data transfer is rapidly growing. Security is an important issue. This application creates a stego image in which the personal data is embedded. The proposed approach provides higher security and can protect the message from stego attacks. The image resolution doesn’t change much and is negligible when we embed the message into the image.
The major limitation of the application is designed for bitmap images(.png). It accepts only png images as a carrier file, and the compression depends on the texts size as well as the carrier image size.
Further Enhancements/Recommendations
The future Work on this application will be to increase the types of images like .jpg etc. for encoding and decoding purpose. You can also make an android application for the same to make the application more handy and portable.
I excel when it comes to making bespoke data dashboards and visualizations that users and clients absolutely love. Sharing about things I enjoy doing is my hobby, whether it's about a project, collaboration, feedback, or just simple how-to guides about visualization.
If you have something to ask or share, I'd love to hear from you!
- Business Intelligence Vs Data Analytics: What’s the Difference? - December 10, 2020
- Effective Ways Data Analytics Helps Improve Business Growth - July 28, 2020
- How the Automotive Industry is Benefitting From Web Scraping - July 23, 2020
Can you provide the souce code