
Testing web applications with Selenium is a sought-after decision for many developers. Understanding what is Selenium, and then moving into how it can be put to use is really the core to this tutorial, in helping developers overcome difficult situations while testing.
If Selenium testing is a task in hand or something you decide to use then this blog is apt for you. It aims to resolve the following two pertinent questions in addition to, providing a first-hand user guide.
Do you know, What is Selenium?
Do you know, How you can work with Selenium?
Jump to Section
A Sneak-Peak at Selenium Testing Tool:
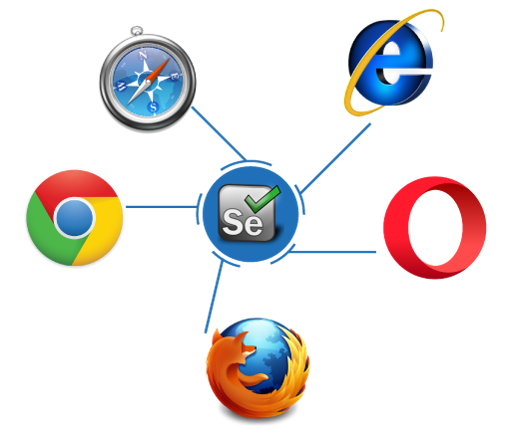
Selenium is an Automation Testing Tool. It is used for testing of dynamic web applications. However, it comes with some limitations too; With Selenium, we cannot test any desktop (software) application or test any mobile application. Isn’t that a bummer!
Needless to worry, there are many other testing software tools available that you can use for testing a desktop or mobile app, like IBM’s RFT, HP’s QPT, Appium and much more. Our focus here is mainly around Selenium for testing dynamic web applications.
A large number of companies, let’s say, all those currently developing web-based solutions to be run in an internet browser will be delighted to know that they can use Selenium tool, as it supports all common browsers for automation. Not only this, the tool also supports to write/run test cases without learning scripting languages as well as to all common languages such as Java, C#, PHP, Python, Ruby and Groovy scripts. Hence, Quality Automation (QA) engineer is able to use own test cases and run through selenium.
Prerequisites for Selenium:
Listed here, things that are required in your system to start working with Selenium:
- Java: Java is a high level, robust, secured and an object-oriented programming language that is specifically designed to have as few implementation dependencies as possible. It is intended to let application developers “write once, run anywhere. You can install java from here
- Eclipse: Eclipse is an integrated development environment (IDE) used in computer programming, and is the most widely used Java IDE. It contains a base workspace and an extensible plug-in system for customizing the environment. You can download Eclipse from here
- Selenium Jar Files: Selenium Jar Files or Selenium Standalone server, contains both server-side bindings and client-side bindings for running tests both locally and remotely with Selenium WebDriver. You can download Selenium Jar files from here
Learn How to Configure Eclipse with Selenium:
First things first. Before you begin to write any code you need to set up your environment. I have detailed all important steps that you will need to follow in order to configure Eclipse with Selenium, thus making it very easy for you. Be attentive to get this going in the right direction.
A step by step process of configuration of Eclipse with Selenium:
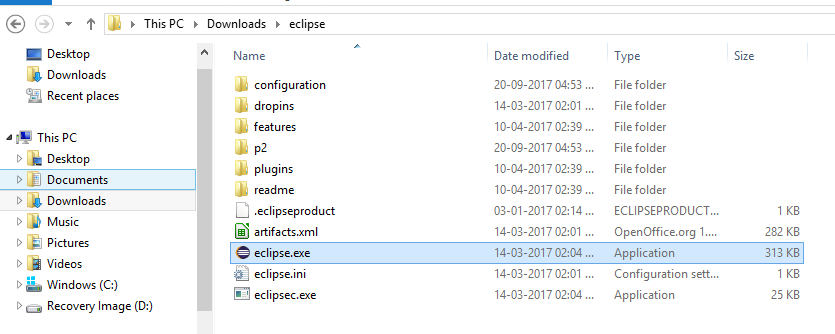
1. Launch Eclipse:
Click on ‘eclipse.exe’ to launch the eclipse IDE, See the below image.
When you will click on eclicpse.exe it will ask you to select your workspace when you are opening it the first time. So, you can provide any location on your local system to save all of your work. See the below image.
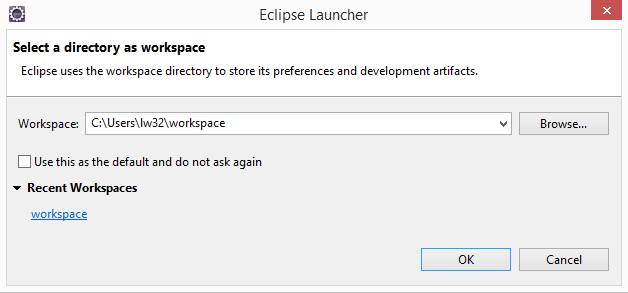
Once you have selected your work location you will be able to start working on eclipse and you only need to provide the location for the first time only after that you can save all of your data at the same location.
So now, perform next steps as,
2. Create a New Project:
This is how you can create a new project.
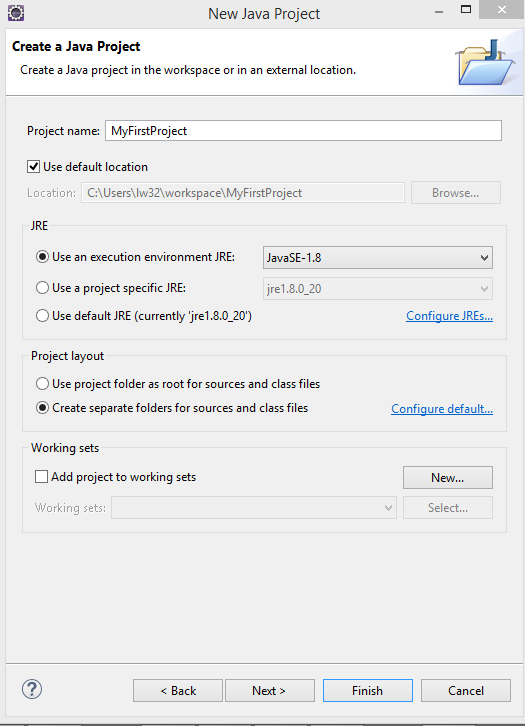
For creating a new project go to file click on ‘New ‘and then click on ‘Project’ and, then you will have to select ‘Java Project’ here and click on the ‘Next’ button.
It will take you to a pop-up where you will have to provide the name of the project, let’s say, ‘MyFirstProject‘ and then click on ‘Finish’ button.
Once you click on ‘Finish’ button your project will be created and your newly created project ‘MyFirstProject’ will display in eclipse project explorer.
3. Create a New Package:
After creating the new project, you need to create a Package.
For creating a package right-click on ‘your Project’ and click on ‘New’ and then click on ‘Package’.
When you will click on ‘package’ it will take you to a pop-up. Now you can provide a name to your package lets say ‘Automation’ and click on ‘Finish’ button.
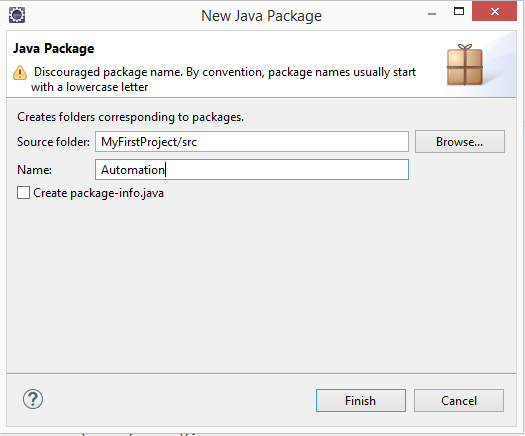
The post you have created the package, you can see a new package with name ‘Automation’ under project name MyFirstProject.
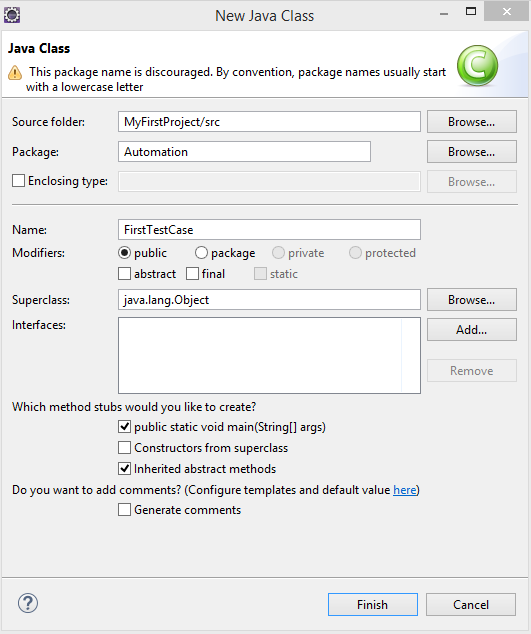
4. Create a New Class:
Learn how you can create a class – for creating a class right-click on your package and click on ‘New’ and, then click on ‘Class’.
When you will click on the class it will take you to a pop-up. Here, provide a name to class, let’s say, ‘FirstTestCase’ and check the checkbox for ‘public static void main(String args[])’ and click on ‘Finish’ button.
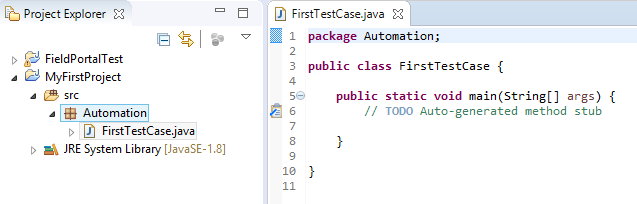
Once, you have created the class you can see that class in your project as below:
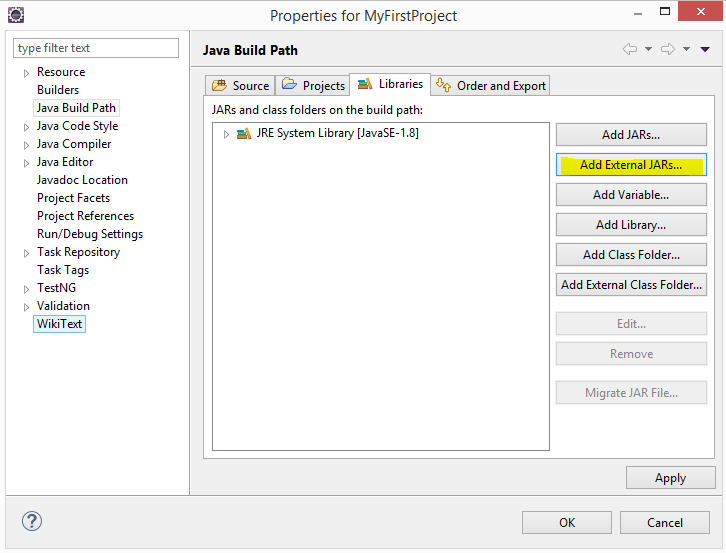
5. Add External Jars to Java build path:
This is the final step for configuration. Here, you will come to know about adding the Selenium Jar files to project.
When you are done with all the above steps, you will need to add Selenium web driver jar files in your project to configure the Java build path.
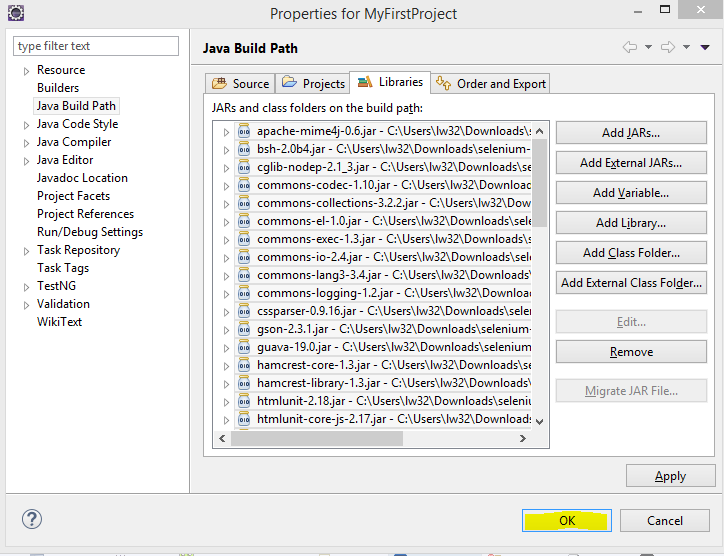
To configure the Java build path, right-click on ‘your Project’ and click at ‘Build Path’ and, after that click on Configure build path.
It will take you to Libraries tab. Click here at ‘Add External JARs’
Here, you need to browse the Selenium Jar files from your system where you have saved those jar files as shown in the below image.
Here you have to add the Selenium Java Jar and, you can add Selenium Source File too.
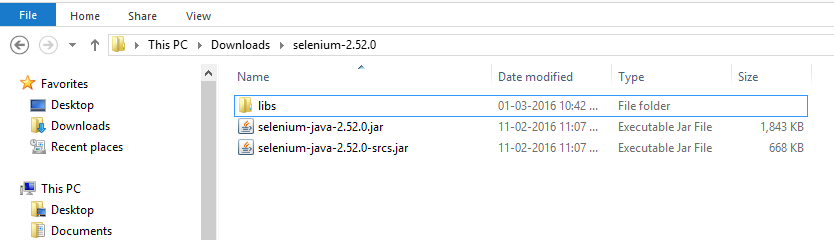
Now, you have to add all the jar files from libs folder as well, when you have added all the jar files click ‘Ok’ button
This is all about configuration for Selenium with eclipse. You can start to write your first test script in eclipse and, run it with Selenium Web Driver.This is all about configuration for Selenium with eclipse. You can start to write your first test script in eclipse and, run it with Selenium Web Driver.
First Test Case with Selenium Web driver:
Be confident to implement your first test, as by now you would have fully configured the environment. Here is how to implement a sample test scenario and, assuring that you will be able to create the second one yourself with no hiccups. So, in this sample test scenario let’s automate the below scenario:
1. First, launch the Firefox browser
2. Open website ‘www.google.com’
3. Print a message to display ‘Website is opened successfully’
4. wait for 2 second
5. Close the browser
To assist you with your very first test case in Selenium web driver, it will be advisable to paste the below code in class you have created.
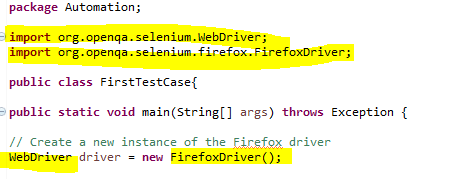
package Automation;
public class FirstTestCase{
public static void main(String[] args)
{
// Create a new instance of the Firefox driver
WebDriver driver = new FirefoxDriver();
//Launch the Online Store Website
driver.get(“http://www.google.com”);
// Print a Log In message to the screen
System.out.println(“Website is opened successfully”);
//Wait for 2 Sec
Thread.sleep(2000);
// Close the driver
driver.quit();
}
}
On writing the above code in your class you may get some exceptions. Which you can see below as some lines of code are underline by red color line.

To resolve the exception, import the Web driver package in your class and for this mouse over at the exception you are getting and click on the import org.openqa.selenium.WebDriver.
Note: This suggestion will work only when the WebDriver jars are added/imported to the project if not then Eclipse would not be able to suggest the correct solution
Similarly, you can resolve the second error of the same statement which is for ‘FirefoxDriver()’ keyword. Mouse over at the error keyword and again Eclipse will show you all the possible solutions and select the very first solution.
So, when you have removed all the exception from your class it will look as below:
Bravo! you are good to run your first test case.
Run your First Java Test Case:
Let’s proceed to run your first test class.
Here, right-click on the ‘Class’ you are going to run and just select Run > Run As > Java Application.
Once, you have run your test case after a few Seconds a Firefox Browser will open and Selenium will Launch the google.com and display the Successful Message and Close the browser.
Upon full execution, you will see the message you have written in code to show in Console section of the Eclipse IDE as below:

Till now, hopefully, everything should be in control as expected with no serious issues. If so, this is how you will be able to write your own test case in Selenium.
This is your step-by-step guide on how to implement sample test for opening google. To summarize: First, we have configured environment by installing Java. Next, we have created a new project and we added required dependencies like Selenium Jar files to it. After that, we were ready to create our first test. These are great practical concepts of Selenium that will allow you to interact with a web browser.
Soon, in the next part of this edition, gear-up to learn about Page Object Pattern.
Your key on how to refactor the code to use page objects. See you in next part!
- COVID-19: How We Are Dealing With It as a Company - March 23, 2020
- Agile Testing – The Only Way to Develop Quality Software - February 8, 2019
- How to Perform System Testing Using Various Types Techniques - May 16, 2018