
Hi readers, welcome to my new post on how to work with ExpandableListView in Android. In this post, we are going to know how to create an ExpandableListView in Android. It’s a sort of menu and submenu in ListView.
Jump to Section
ExpandableListView
ExpandableListView shows the items in a vertically scrolling two-level list. This differs from the ExpandableListView and ListView by allowing two level groups. If you have worked with Listview in Android then it’s not difficult for you to create ExpandableListView in Android.
In this tutorial, we are going to display the Smartphones, Bikes, and Cars as Parent Views and their respective companies as child view items. If you want to show more options within the less space then you should go with the use of ExpandableListView in your application.
Prerequisites
The prerequisites that we need to create the Android Project.
1. Check whether Android studio is installed on your pc or not.
2. The latest version of the Android SDK manager including the SDK tools component.
3. A real-time android device (Smartphone or Tablet) configured with Android Studio.
4. The project must be configured to compile against Android 2.3 (Gingerbread) on newer.
Let’s start creating the Android Project using Android studio.
Creating Project
1. Firstly open Android Studio on your pc.
2. Go to File menu->New->New Project
3. Application name: ExpandableListViewDemo.
4. Company domain: Your package name.
5. Then click on Next button.
6. Minimum SDK: Android 4.4 (KitKat).
7. Then again click on the Next button.
8. Choose the Activity type as Empty Activity, afterward click on Next button.
9. Activity Name: MainActivity.
10. Finally, click on Finish button.
This will create your Android application Project named as ExpandableListViewDemo.
AndroidManifest.xml
Here is my AndroidManifest.xml file.
<?xml version="1.0" encoding="utf-8"?>
<manifest xmlns:android="http://schemas.android.com/apk/res/android"
    package="com.loginworks.expandablelistviewdemo">
    <application
        android:allowBackup="true"
        android:icon="@mipmap/ic_launcher"
        android:label="@string/app_name"
        android:roundIcon="@mipmap/ic_launcher_round"
        android:supportsRtl="true"
        android:theme="@style/AppTheme">
        <activity android:name=".MainActivity">
            <intent-filter>
                <action android:name="android.intent.action.MAIN" />
                <category android:name="android.intent.category.LAUNCHER" />
            </intent-filter>
        </activity>
    </application>
</manifest>
However, we will create two more layout files First one is for parent.xml and the second one for child.xml for displaying parent and child items.
Note: We cannot use the value wrap_content for the android:layout_height attribute of an ExpandableListView in XML if the parent’s size is also not strictly specified (for example, if the parent were ScrollView you could not specify wrap_content since it also can be any length).
However, you can use wrap_content if the ExpandableListView parent has a specific size, such as 100 pixels.
1. activity_main.xml
Firstly, we are creating the ExpandableListView UI which is our main agenda.
Open res->layout->activity_main.xml and copy the code as shown below.
<?xml version="1.0" encoding="utf-8"?>
<RelativeLayout xmlns:android="http://schemas.android.com/apk/res/android"
    xmlns:app="http://schemas.android.com/apk/res-auto"
    xmlns:tools="http://schemas.android.com/tools"
    android:layout_width="match_parent"
    android:layout_height="match_parent"
    tools:context="com.loginworks.expandablelistviewdemo.MainActivity">
        <ExpandableListView
            android:layout_width="match_parent"
            android:layout_height="match_parent"
            android:id="@+id/expandableListView"
            android:layout_alignParentTop="true"
            android:layout_alignParentLeft="true"
            android:layout_alignParentStart="true"
            android:divider="#A4C739"
            android:textColor="#000000"
            android:dividerHeight="1.0dp"
            android:layout_marginTop="10dp" />
    </RelativeLayout>
2. parent.xml
Here we are creating a TextView for the header in this file.
<?xml version="1.0" encoding="utf-8"?>
<RelativeLayout xmlns:android="http://schemas.android.com/apk/res/android"
    android:layout_width="match_parent"
    android:layout_height="match_parent">
<TextView
    android:id="@+id/text"
    android:layout_width="fill_parent"
    android:layout_height="wrap_content"
    android:paddingLeft="?android:attr/expandableListPreferredItemPaddingLeft"
    android:textColor="@android:color/black"
    android:paddingTop="10dp"
    android:paddingBottom="10dp"
    />
</RelativeLayout>
3. child.xml
In this file, we are creating the TextView to display the content of child items.
<?xml version="1.0" encoding="utf-8"?>
<RelativeLayout xmlns:android="http://schemas.android.com/apk/res/android"
    android:layout_width="match_parent"
    android:layout_height="match_parent">
    <TextView
        android:id="@+id/child_text"
        android:layout_width="fill_parent"
        android:layout_height="wrap_content"
        android:paddingLeft="?android:attr/expandableListPreferredChildPaddingLeft"
        android:paddingTop="10dp"
        android:paddingBottom="10dp" />
</RelativeLayout>
ExpandableListAdapter
1. We need to create a custom adapter class i.e ExpandableListAdapter class which extends from the class BaseExpandableListAdapter and implement the override methods.
2. The adapter is acting as a bridge between the data and the UI.
ExpandableListAdapter.java
Copy and paste the below code in ExpandableListAdapter.
package com.loginworks.expandablelistviewdemo;

import android.content.Context;
import android.graphics.Typeface;
import android.view.LayoutInflater;
import android.view.View;
import android.view.ViewGroup;
import android.widget.BaseExpandableListAdapter;
import android.widget.TextView;
import java.util.HashMap;
import java.util.List;

/**
 * Created by abc on 22-Mar-18.
 */

public class ExpandableListAdapter extends BaseExpandableListAdapter {
    private Context context;
    private List<String> expandableListTitle;
    private HashMap<String, List<String>> expandableListDetail;

    public ExpandableListAdapter(Context context, List<String> expandableListTitle,
                                       HashMap<String, List<String>> expandableListDetail) {
        this.context = context;
        this.expandableListTitle = expandableListTitle;
        this.expandableListDetail = expandableListDetail;
    }

    @Override
    public Object getChild(int listPosition, int expandedListPosition) {
        return this.expandableListDetail.get(this.expandableListTitle.get(listPosition))
                .get(expandedListPosition);
    }

    @Override
    public long getChildId(int listPosition, int expandedListPosition) {
        return expandedListPosition;
    }

    @Override
    public View getChildView(int listPosition, final int expandedListPosition,
                             boolean isLastChild, View convertView, ViewGroup parent) {
        final String expandedListText = (String) getChild(listPosition, expandedListPosition);
        if (convertView == null) {
            LayoutInflater layoutInflater = (LayoutInflater) this.context
                    .getSystemService(Context.LAYOUT_INFLATER_SERVICE);
            convertView = layoutInflater.inflate(R.layout.child, null);
        }
        TextView expandedListTextView = (TextView) convertView
                .findViewById(R.id.child_text);
        expandedListTextView.setText(expandedListText);
        return convertView;
    }

    @Override
    public int getChildrenCount(int listPosition) {
        return this.expandableListDetail.get(this.expandableListTitle.get(listPosition))
                .size();
    }

    @Override
    public Object getGroup(int listPosition) {
        return this.expandableListTitle.get(listPosition);
    }

    @Override
    public int getGroupCount() {
        return this.expandableListTitle.size();
    }

    @Override
    public long getGroupId(int listPosition) {
        return listPosition;
    }

    @Override
    public View getGroupView(int listPosition, boolean isExpanded,
                             View convertView, ViewGroup parent) {
        String listTitle = (String) getGroup(listPosition);
        if (convertView == null) {
            LayoutInflater layoutInflater = (LayoutInflater) this.context.
                    getSystemService(Context.LAYOUT_INFLATER_SERVICE);
            convertView = layoutInflater.inflate(R.layout.parent, null);
        }
        TextView listTitleTextView = (TextView) convertView
                .findViewById(R.id.text);
        listTitleTextView.setTypeface(null, Typeface.BOLD);
        listTitleTextView.setText(listTitle);
        return convertView;
    }

    @Override
    public boolean hasStableIds() {
        return false;
    }

    @Override
    public boolean isChildSelectable(int listPosition, int expandedListPosition) {
        return true;
    }
}
ExpandableListData
This class is used to represent the data object, by using the HashMap object i.e “expandableListDetail” is used to map the child items with their group.
ExpandableListData.java
package com.loginworks.expandablelistviewdemo;

import java.util.ArrayList;
import java.util.HashMap;
import java.util.List;

/**
 * Created by abc on 22-Mar-18.
 */

public class ExpandableListData {
    public static HashMap<String, List<String>> getData() {
        HashMap<String, List<String>> expandableListDetail = new HashMap<String, List<String>>();

        List<String> cars = new ArrayList<String>();
        cars.add("Audi");
        cars.add("Benz");
        cars.add("Bentely");
        cars.add("BMW");
        cars.add("Ferrari");
        cars.add("Jaguar");
        cars.add("porsche");

        List<String> smartphones = new ArrayList<String>();
        smartphones.add("Apple");
        smartphones.add("Blackberry");
        smartphones.add("Samsung");
        smartphones.add("Nokia");
        smartphones.add("Micromax");
        smartphones.add("Lenovo");
        smartphones.add("Motorola");

        List<String> bikes = new ArrayList<String>();
        bikes.add("Yamaha");
        bikes.add("Honda");
        bikes.add("Suzuki");
        bikes.add("Tvs");
        bikes.add("Duccati");

        expandableListDetail.put("Cars", cars);
        expandableListDetail.put("Bikes", bikes);
        expandableListDetail.put("Smartphones", smartphones);
        return expandableListDetail;
    }
}
MainActivity
1. However, the interfaces that are implemented by the class are given below.
a) ExpandableListView.OnChildClickListener: This method is invoked when we click on the child item.
b) ExpandableListView.OnGroupClickListener: This method is executed when we click on Parent item
c) ExpandableListView.OnGroupExpandListener: Used for being notified when a group is expanded.
d) ExpandableListView.OnGroupCollapseListener: Used for being notified when a group is collapsed.
1.Now open MainActivity.java file in your project and follow the below instructions as follows.
2. At the same time, we need to implement all the interface and callback methods.
3. First, initialize the ExpandableListView as like.
ExpandableListView expandableListView;
4. Copy the below code and add it to the onCreate() method in the MainActivity class.
expandableListView = (ExpandableListView) findViewById(R.id.expandableListView);
MainActivity.java
package com.loginworks.expandablelistviewdemo;

import android.support.v7.app.AppCompatActivity;
import android.os.Bundle;
import android.view.View;
import android.widget.ExpandableListView;
import android.widget.Toast;
import java.util.ArrayList;
import java.util.HashMap;
import java.util.List;

public class MainActivity extends AppCompatActivity   {
    ExpandableListView expandableListView;
    ExpandableListAdapter expandableListAdapter;
    List<String> expandableListTitle;
    HashMap<String, List<String>> expandableListDetail;

    @Override
    protected void onCreate(Bundle savedInstanceState) {
        super.onCreate(savedInstanceState);
        setContentView(R.layout.activity_main);
        expandableListView = (ExpandableListView) findViewById(R.id.expandableListView);
        expandableListDetail = ExpandableListData.getData();
        expandableListTitle = new ArrayList<String>(expandableListDetail.keySet());
        expandableListAdapter = new ExpandableListAdapter(this, expandableListTitle, expandableListDetail);
        expandableListView.setAdapter(expandableListAdapter);
        expandableListView.setOnGroupExpandListener(new ExpandableListView.OnGroupExpandListener() {

            @Override
            public void onGroupExpand(int groupPosition) {
                Toast.makeText(getApplicationContext(),
                        expandableListTitle.get(groupPosition) + " List Expanded.",
                        Toast.LENGTH_SHORT).show();
            }
        });

        expandableListView.setOnGroupCollapseListener(new ExpandableListView.OnGroupCollapseListener() {
            @Override
            public void onGroupCollapse(int groupPosition) {
                Toast.makeText(getApplicationContext(),
                        expandableListTitle.get(groupPosition) + " List Collapsed.",
                        Toast.LENGTH_SHORT).show();

            }
        });

        expandableListView.setOnChildClickListener(new ExpandableListView.OnChildClickListener() {


            @Override
            public boolean onChildClick(ExpandableListView parent, View v,
                                        int groupPosition, int childPosition, long id) {
                Toast.makeText(
                        getApplicationContext(),
                        expandableListTitle.get(groupPosition)
                                + " -> "
                                + expandableListDetail.get(
                                expandableListTitle.get(groupPosition)).get(
                                childPosition), Toast.LENGTH_SHORT
                ).show();
                return false;
            }
        });
    }
}
Run the App
As a final step before to wrap up, we need to run or build the app either on a mobile device or emulator. Click the run button or shift+F10 in your Android studio to run the app.
Outcome
All the output screens are shown below.
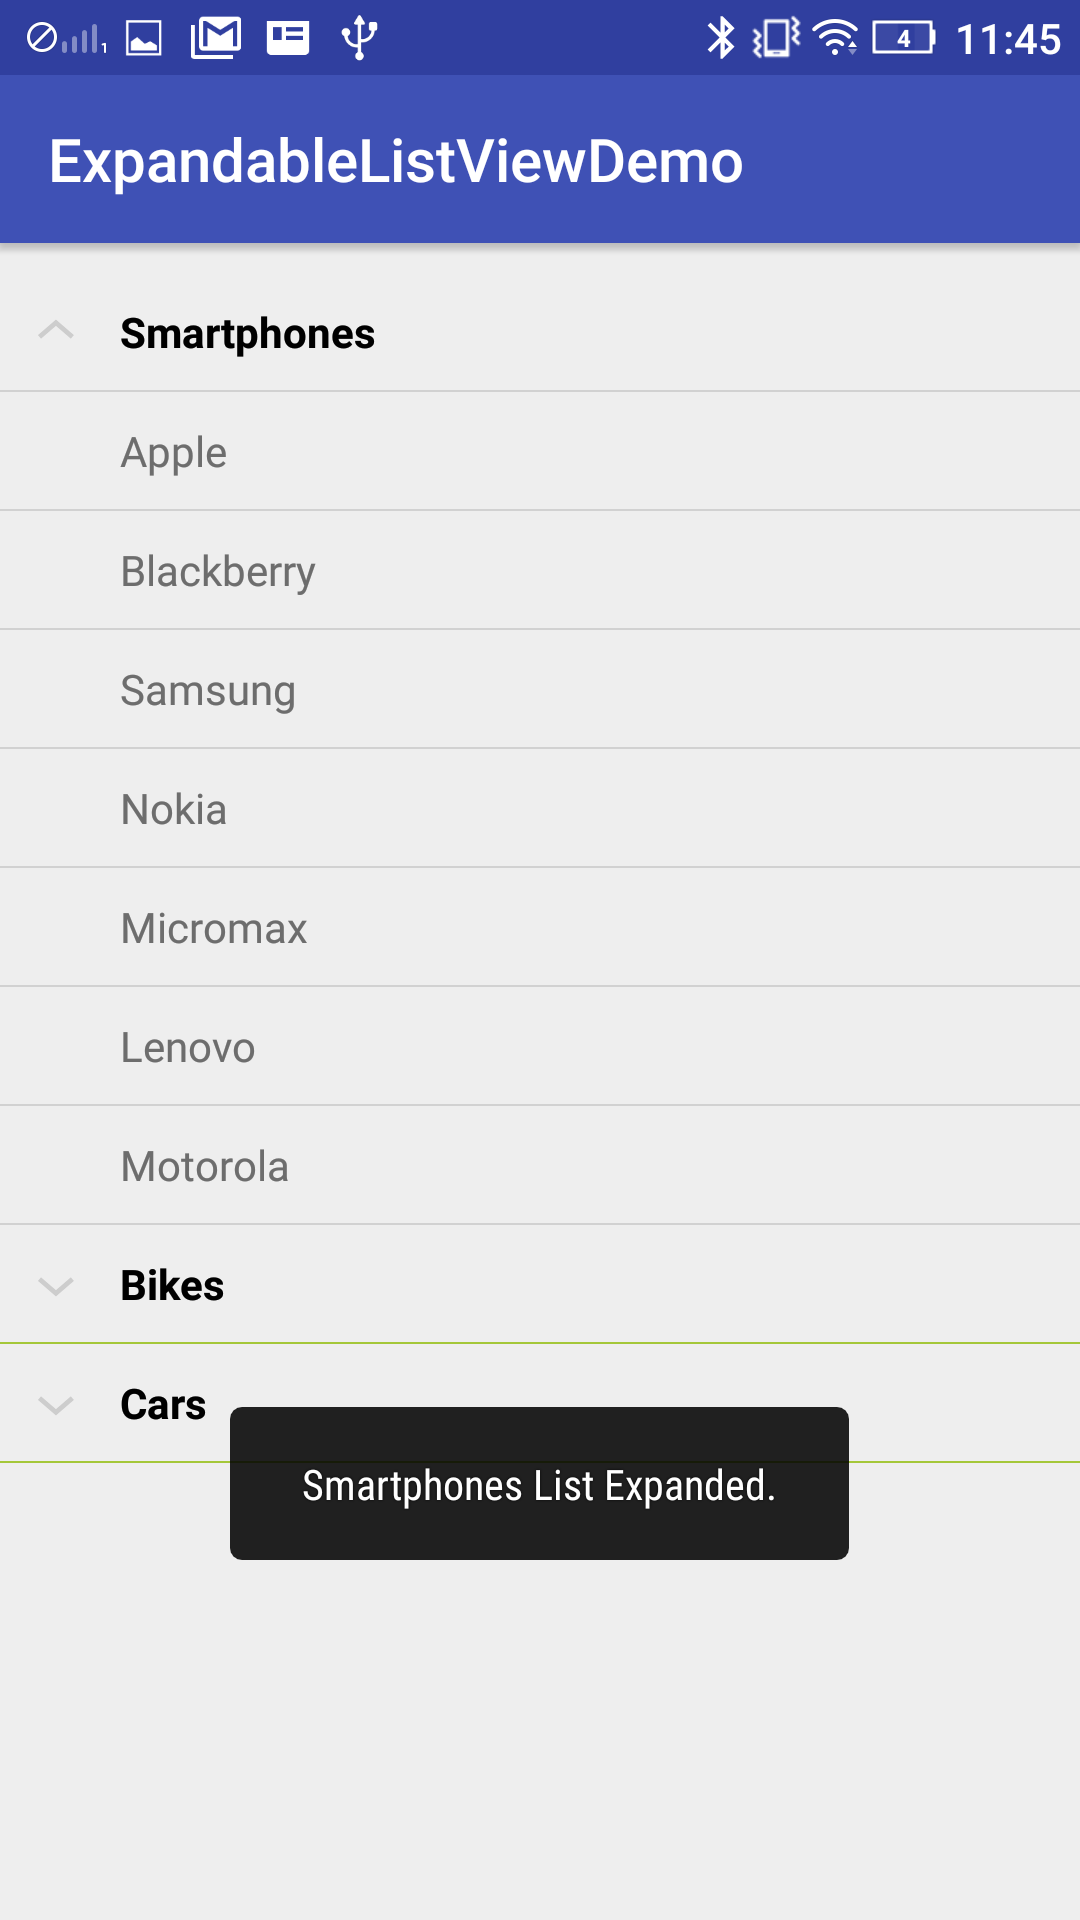
1. This is the first screen we have seen when we run the app either on the mobile device or emulator.

2. When you click on the Smartphone it will expand and show the child items of Smartphone as shown above example.
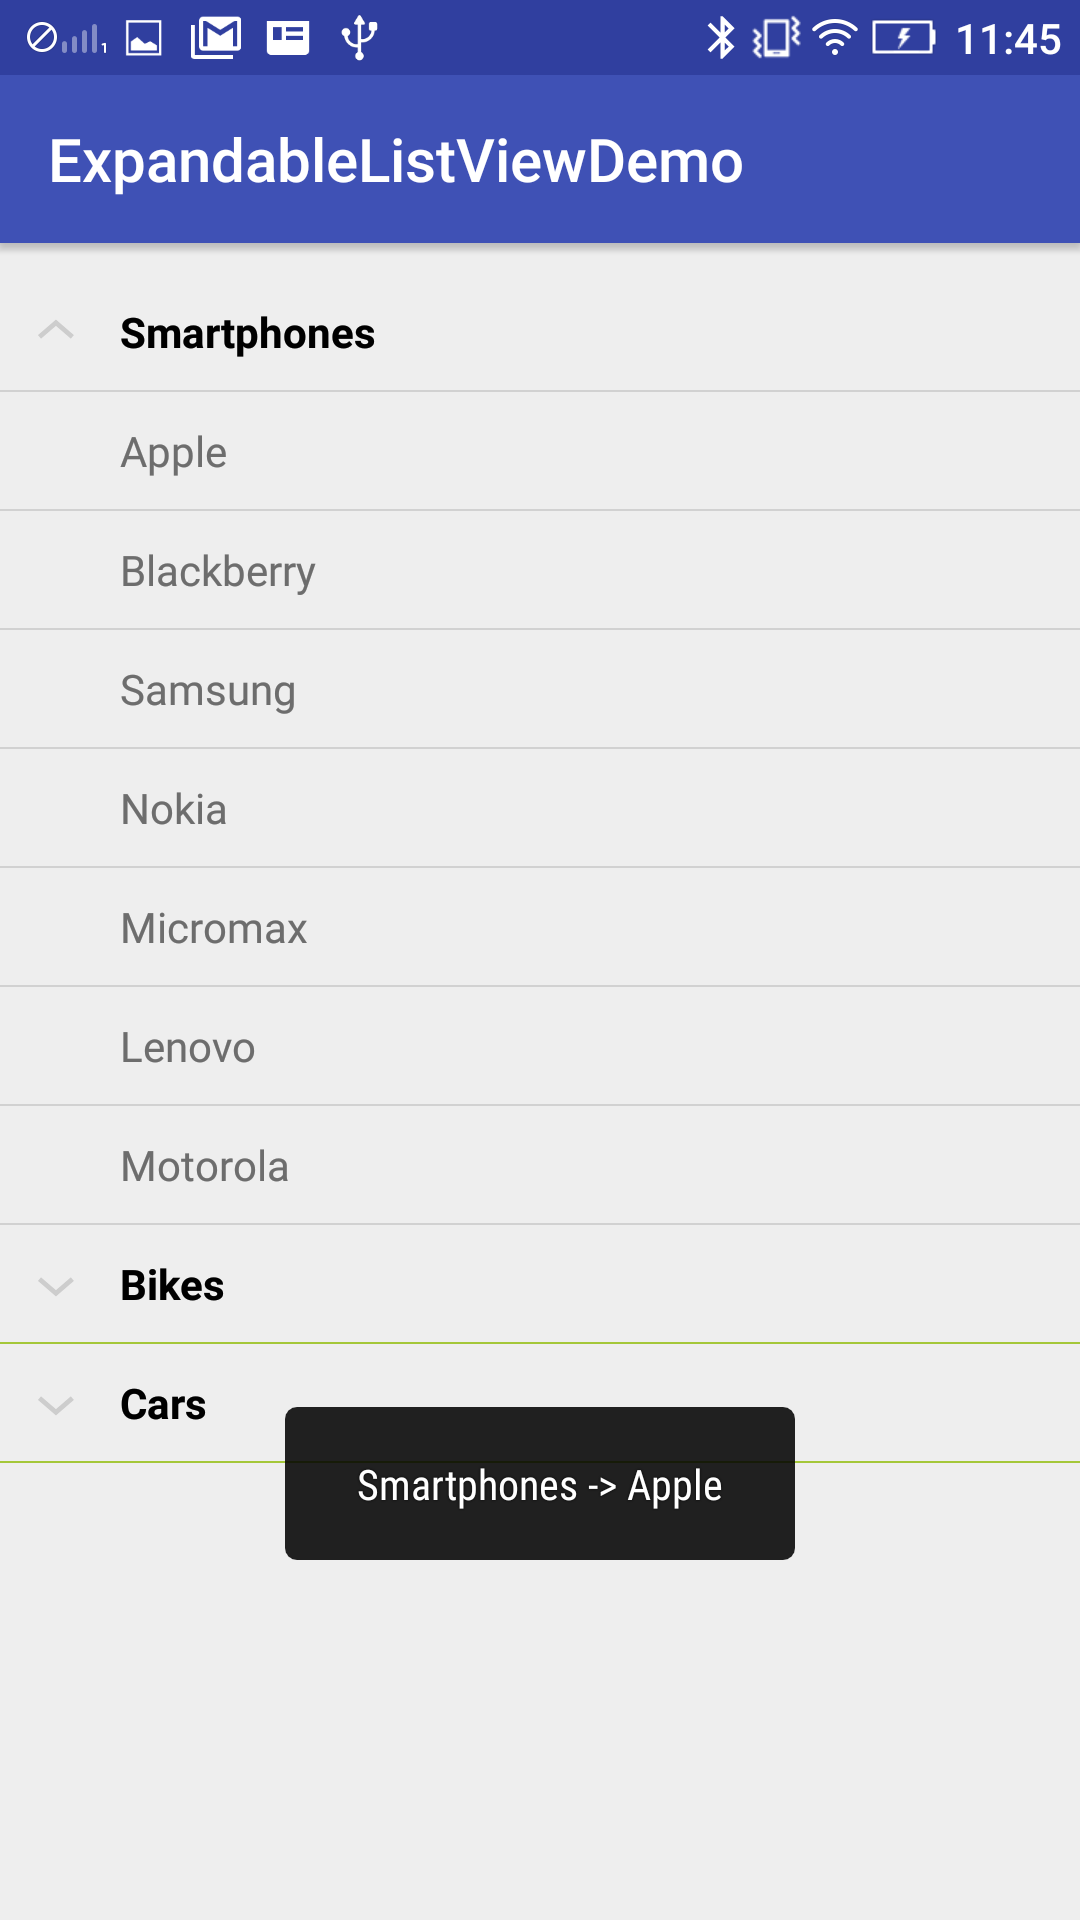
5. If you click on the child item it will invoke the onChildClick() method in MainActivity.
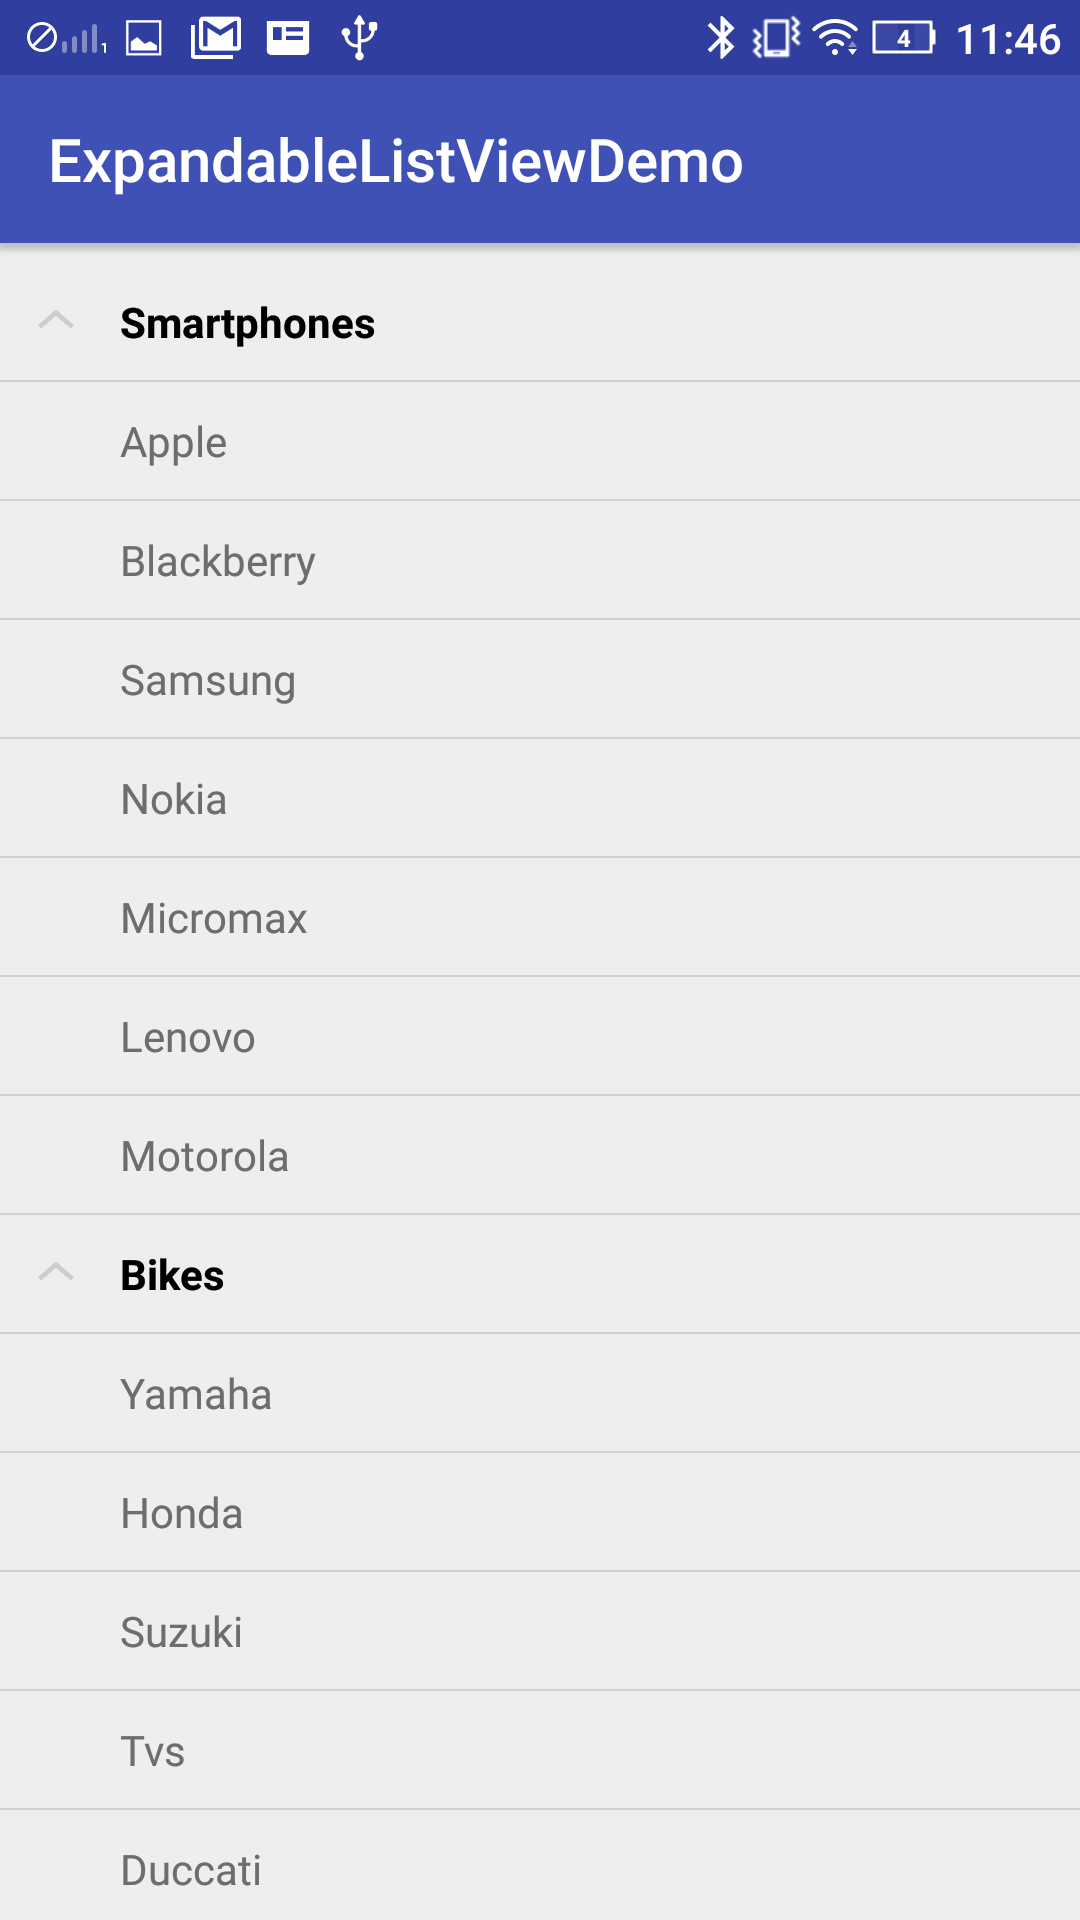
6. Moreover, in this image, we are showing that all the parent views are expanded and showing the child items.
Conclusion
This brings to the end of this tutorial. Now, I hope that you are good at working with the ExpandableListView in Android and you will get benefit from this post. In the meantime do like, share and comment in the comment box below. Thank you!
- LinkedIn Scraper | LinkedIn Data Extractor Software Tool - February 22, 2021
- Is Web Scraping Legal? - February 15, 2021
- What Is Data Scraping? - February 10, 2021