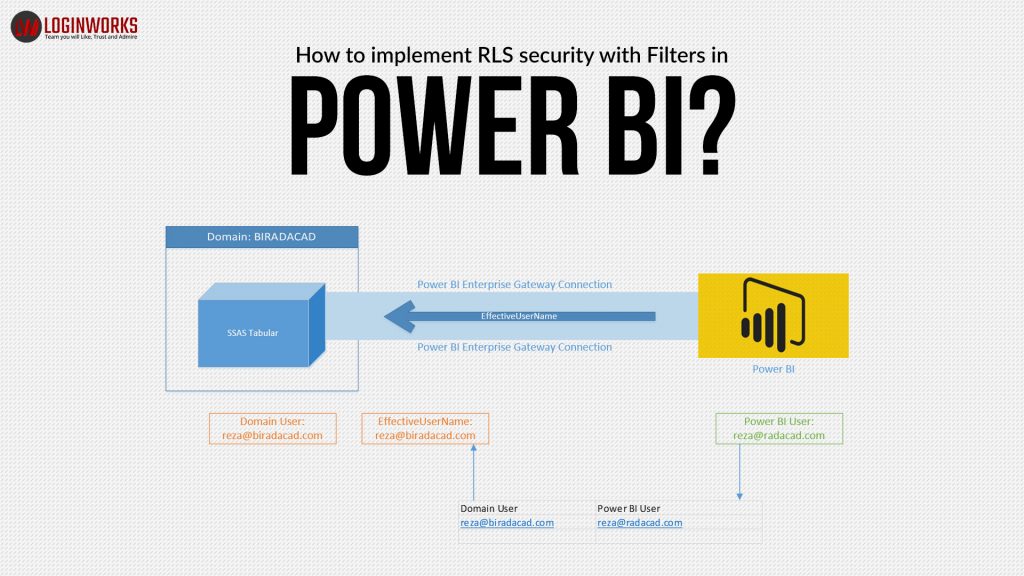
Hey guys, Today’s topic is about the RLS Security and Filters that can be applicable in RLS. The first thing that comes in our mind is What is RLS, What is filters and why we need it. Now, I will be discussing and explaining each of the above topics in detail.
Let’s say if we want to restrict the user for viewing all the reports we need RLS so that the user can only see the specific data that we want to show As we all know that data plays a major role in our lives and to protect that data from a particular individual or group we would need security for that data.
Similarly, In power BI reports we need some kind of security to protect the data from the specific user. This can be done by the RLS and Filters in Power BI. We use RLS security and filters to define the roles and according to roles, we apply the filters on data. So, that if a role is assigned to the user then he can only view the specific filtered data report. Let me brief you more by defining RLS and filters.
Jump to Section
What are the filters?
Filters are used to restrict the data at a low level. In Power BI there are three types of filters that we can use while creating reports. Below are the filters in power BI.
- Visual Level Filter- It is applicable only for specific visual
- Page Level Filter – It is applicable only for a specific page
- Report Level Filter – It is available for the whole report created in Power BI
What is RLS?
RLS is “Row Level security” means restriction of data accessing for a particular user. Filters restrict the data at a low level. We can configure or apply RLS for data-set that we have imported in the Power BI desktop and can only configure RLS security in Power BI Service by defining the roles in the Power BI desktop. So, to apply RLS security on a data model which we have imported previously, we need to download the Power BI desktop and create a report with roles and then publish it to Power BI service in order to apply the RLS. We can also use filters in RLS to filter-out the data for a specific user.
Let’s read further as of how to configure the RLS security with filters.
How to configure RLS security?
To configure the RLS security we need to import the data model first. After that, we can easily create the visuals based on the data. Once the visuals are created, then its time to configure the RLS. While configuring the RLS we need to define the roles under the manage roles area in Power BI desktop. Based on the roles defined in the power BI desktop we can apply or configure the RLS in Power BI service. Below are the steps for creating the report and defining the roles in the power BI desktop.
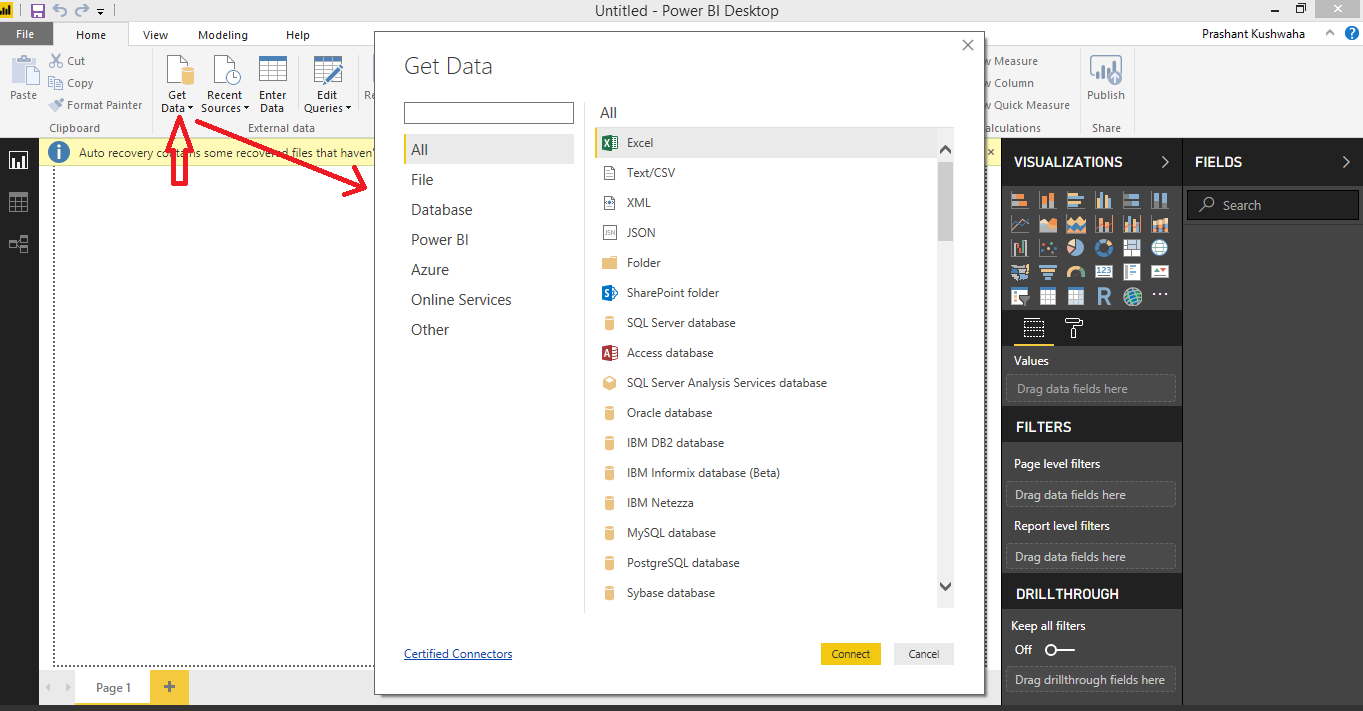
- Import the data from any source as shown below.

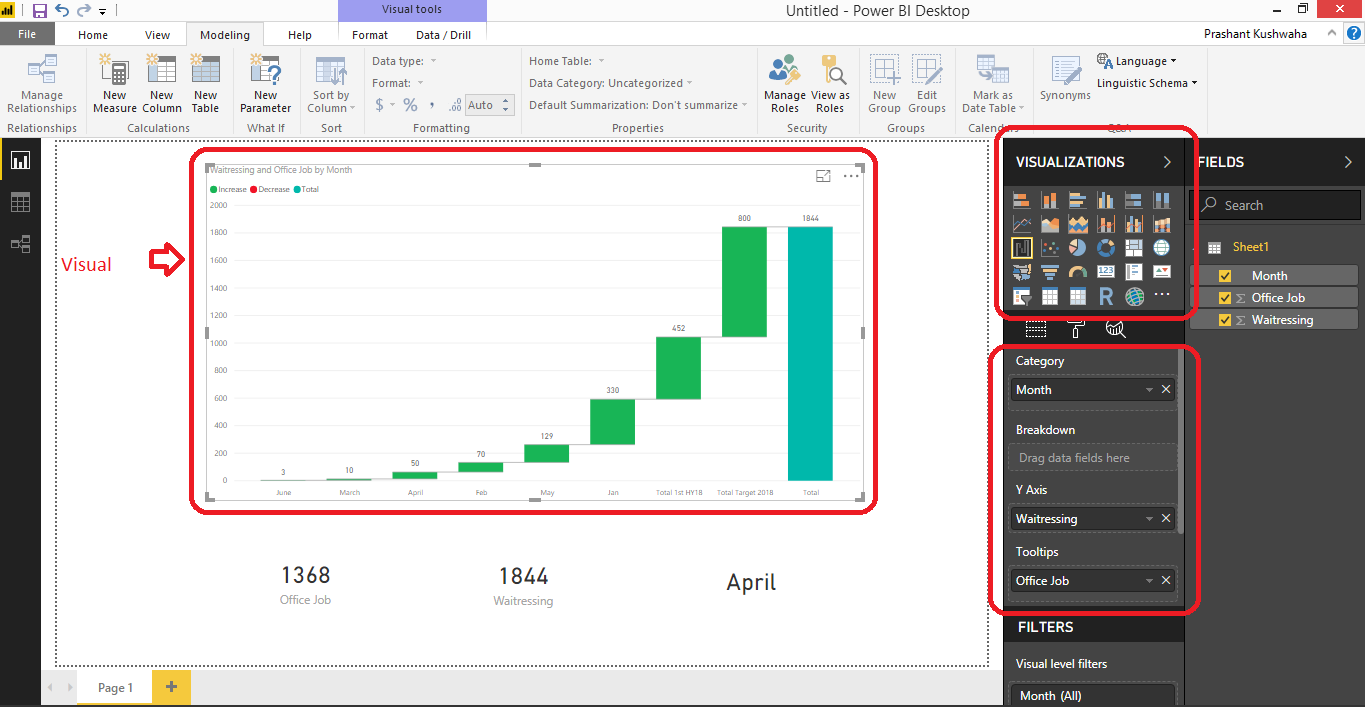
- After importing data from the specific source. Create graphs or visual by clicking on the graph in the visualization panel. And then add the field from the fields panel by dragging the column name in the area given below in the visualization panel as shown in screen-shot.

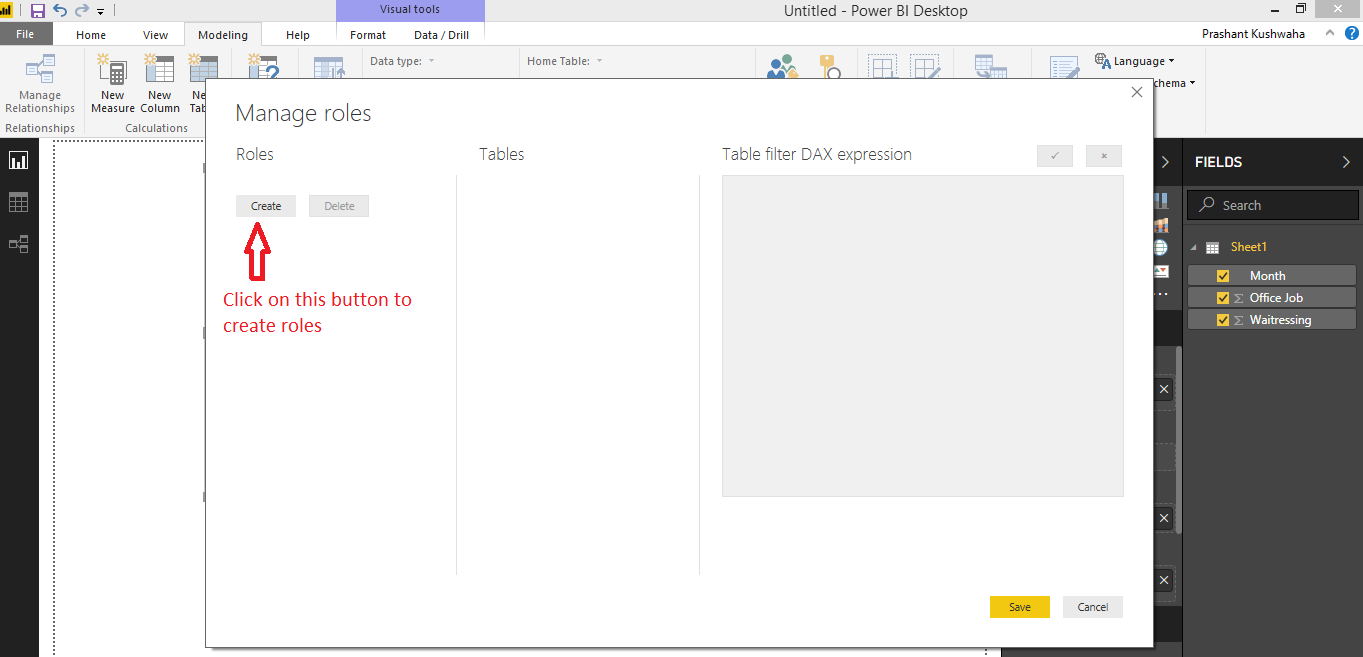
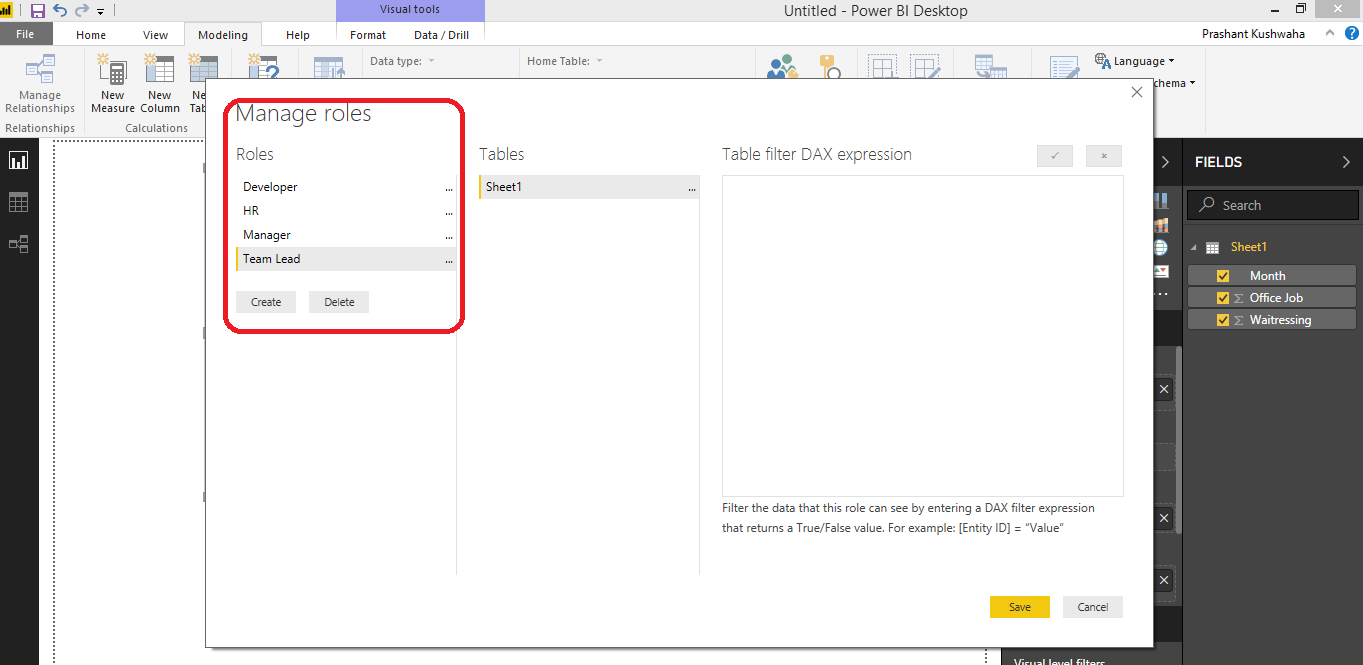
- Now, as we have created the report, it’s time to create the roles by clicking the ‘Manage roles’ button in the modeling section as shown below is the screen-shot.

- Then click on the above button and create the roles. Below is the screen-shot of the same. The highlighted area contains the roles that we have created.

How to apply filters in RLS?
Now, we will filter the data based on the roles and also apply the filter to all the roles that we have created in the above section. After that, we will publish the report to the Power BI service to assign these roles to the users we want. As described in the screenshot given below.
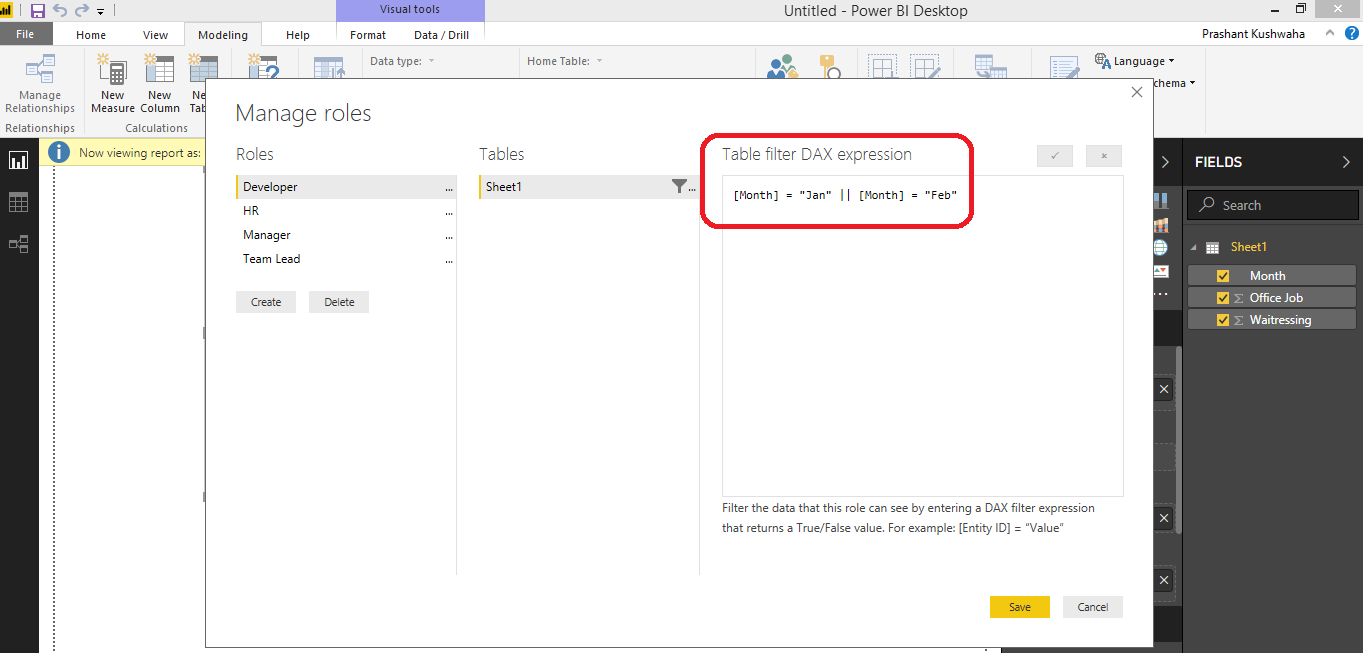
In the above picture, we have filter the data for developer role by using DAX expression as shown above in the highlighted area. In the DAX expression, only January and February data will show and other data will be hidden.
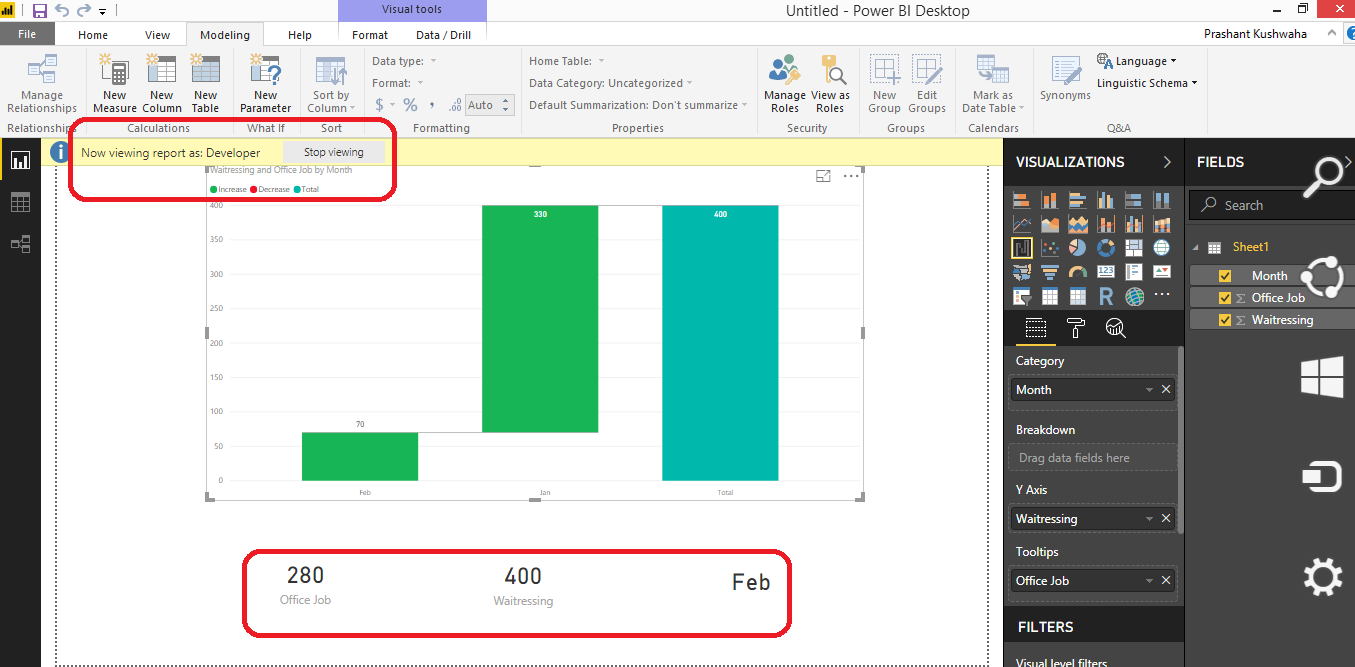
Now, as you can see that we have applied the filters and test according to the roles. It clearly shows that data is different in every image as shown above.
Benefits of RLS implementation
We can restrict data access to a specific user.
Conclusion
In the above article, I have described the RLS security with filters in Power BI. I hope you have understood the concept of RLS in Power BI. As I have also discussed the Creation of roles while filtering the data. Along with describing as how to create the report and how to import the data into Power BI desktop. However, if you still have any queries related to this topic kindly post your query in the comment section mentioned below.
Thank you.
Keep learning!!!
- What Products Should You Sell on Amazon? - November 18, 2020
- 10 Reasons Why You Should Start Selling on Amazon - October 22, 2020
- Comparative Study of Top 6 Web Scraping Tools - September 3, 2020
Hello Prashant,
Does RLS like WHERE in SQL?
When we create some measures under RLS, we only can based on the filtered data by RLS.
We can not use CALCULATE to remove RLS. Right?
Because CALCUALTE is calcualting the dataset which is after filtering by RLS?
Yes, it worked the same as SQL.
As per my knowledge, RLS worked on a hierarchical basis and this feature is provided by power BI for data filtration on the basis of role assign.
Therefore we cannot use MEASURE over RLS.