Single sign-on (SSO) provides protection and flexibility as users sign in to the Azure Active Directory (Azure AD) software. In this blog, we will describe “How to implement single sign-on using active directory.” Let us begin this exciting journey of knowledge.
Jump to Section
What is Azure?
Microsoft Azure is an application cloud computing of various cloud services. Hence it helps to meet business challenges inside an organization. It is also known as Windows Azure.
For example, there are several services that users can select from these platforms to build and scale new applications, or run existing applications, using your favorite tools and frameworks in the public cloud.
Microsoft created cloud services to deploy the services like, for building, testing, deploying, and managing applications and services through Microsoft-managed data centers.
How Does Azure Work?
The fact is, Azure provides the services, uses the solutions including Infrastructure as a Service (IaaS), Platform as a Service (PaaS), and Software as a Service (SaaS).
Consequently, the Azure takes the virtualization technology and therefore rethinks it on a massive scale in Microsoft data centers around the world.
Azure is an enormous array of servers and network hardware, along with a complex set of distributed applications that plan or organize the configuration components, virtualized hardware functionality, and software for these servers. It is this orchestration that makes Azure so efficient: for users, they are not now responsible for maintaining and updating the hardware, because Azure is taking care of all this in the background. Now let’s talk about the Azure Active Directory and how Single Sign-on provides smooth access.
What Is the Azure Active Directory?
Azure Active Directory is a fully managed Microsoft multi-tenant service that offers identity and access features for applications running in Microsoft Azure and on-premise systems.
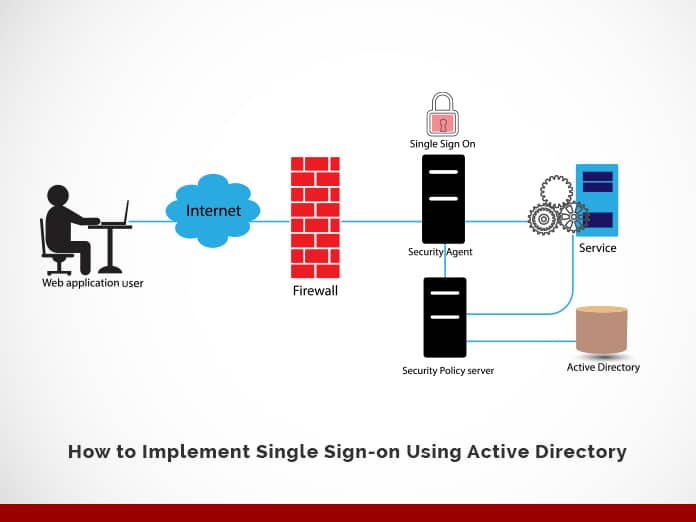
What Is Single Sign-on (SSO)
In brief, Single sign-on (SSO) adds security and convenience when users sign-on to applications in Azure Active Directory (Azure AD). Whereas, administrators can centralize user account management and automatically add or remove user access to applications based on group membership.
What Is the Importance of SSO
- With single sign-on, users sign in once with one account to access the other domain-joined devices like company resources, software as a service (SaaS) applications, and web applications. After that, a user signing in, the user can launch applications from the Office 365 portal or the Azure AD MyApps access panel.
- Without single sign-on, users have to remember application-specific passwords and sign in to each application. Therefore, IT staff needs to create and update user accounts for each application, such as Salesforce, Office 365, and Box. Hence, users need to remember their passwords, plus spend the time to sign in to each application every time.
Azure Active Directory SSO Integration Guide
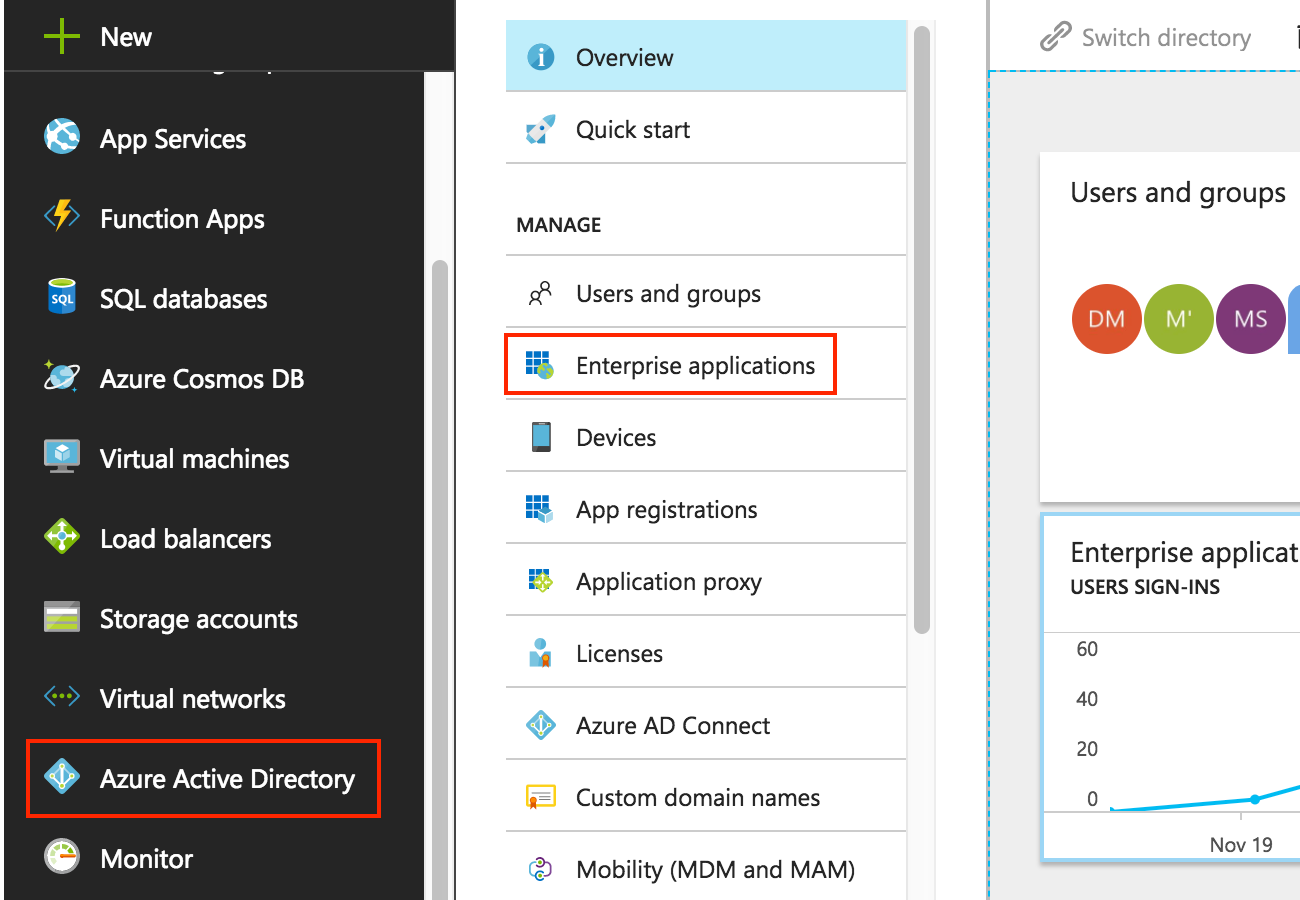
- First, click on the Azure Active Directory icon on the left menu and then click on Enterprise Applications.

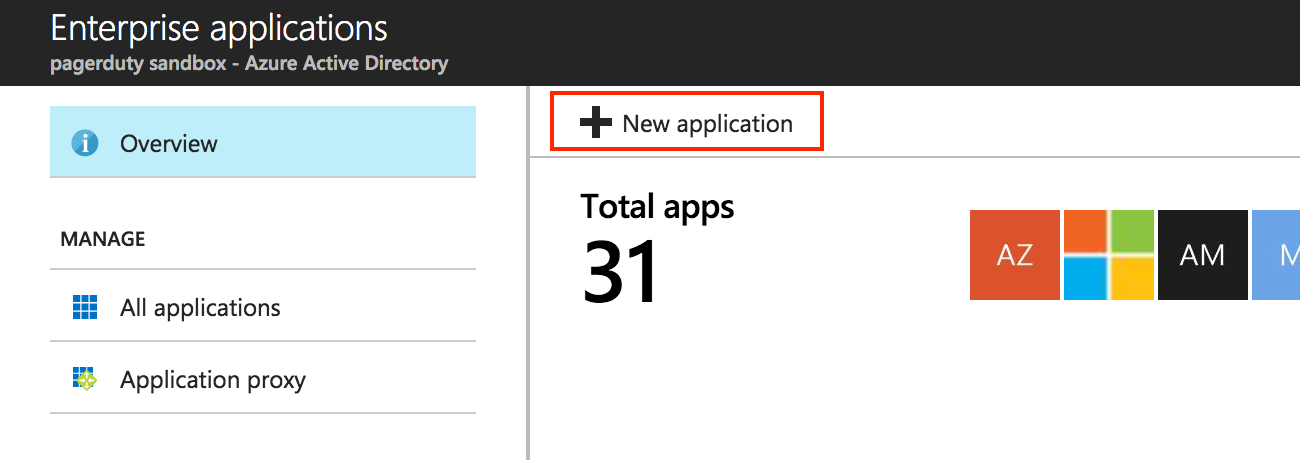
- Then, click on the New application.

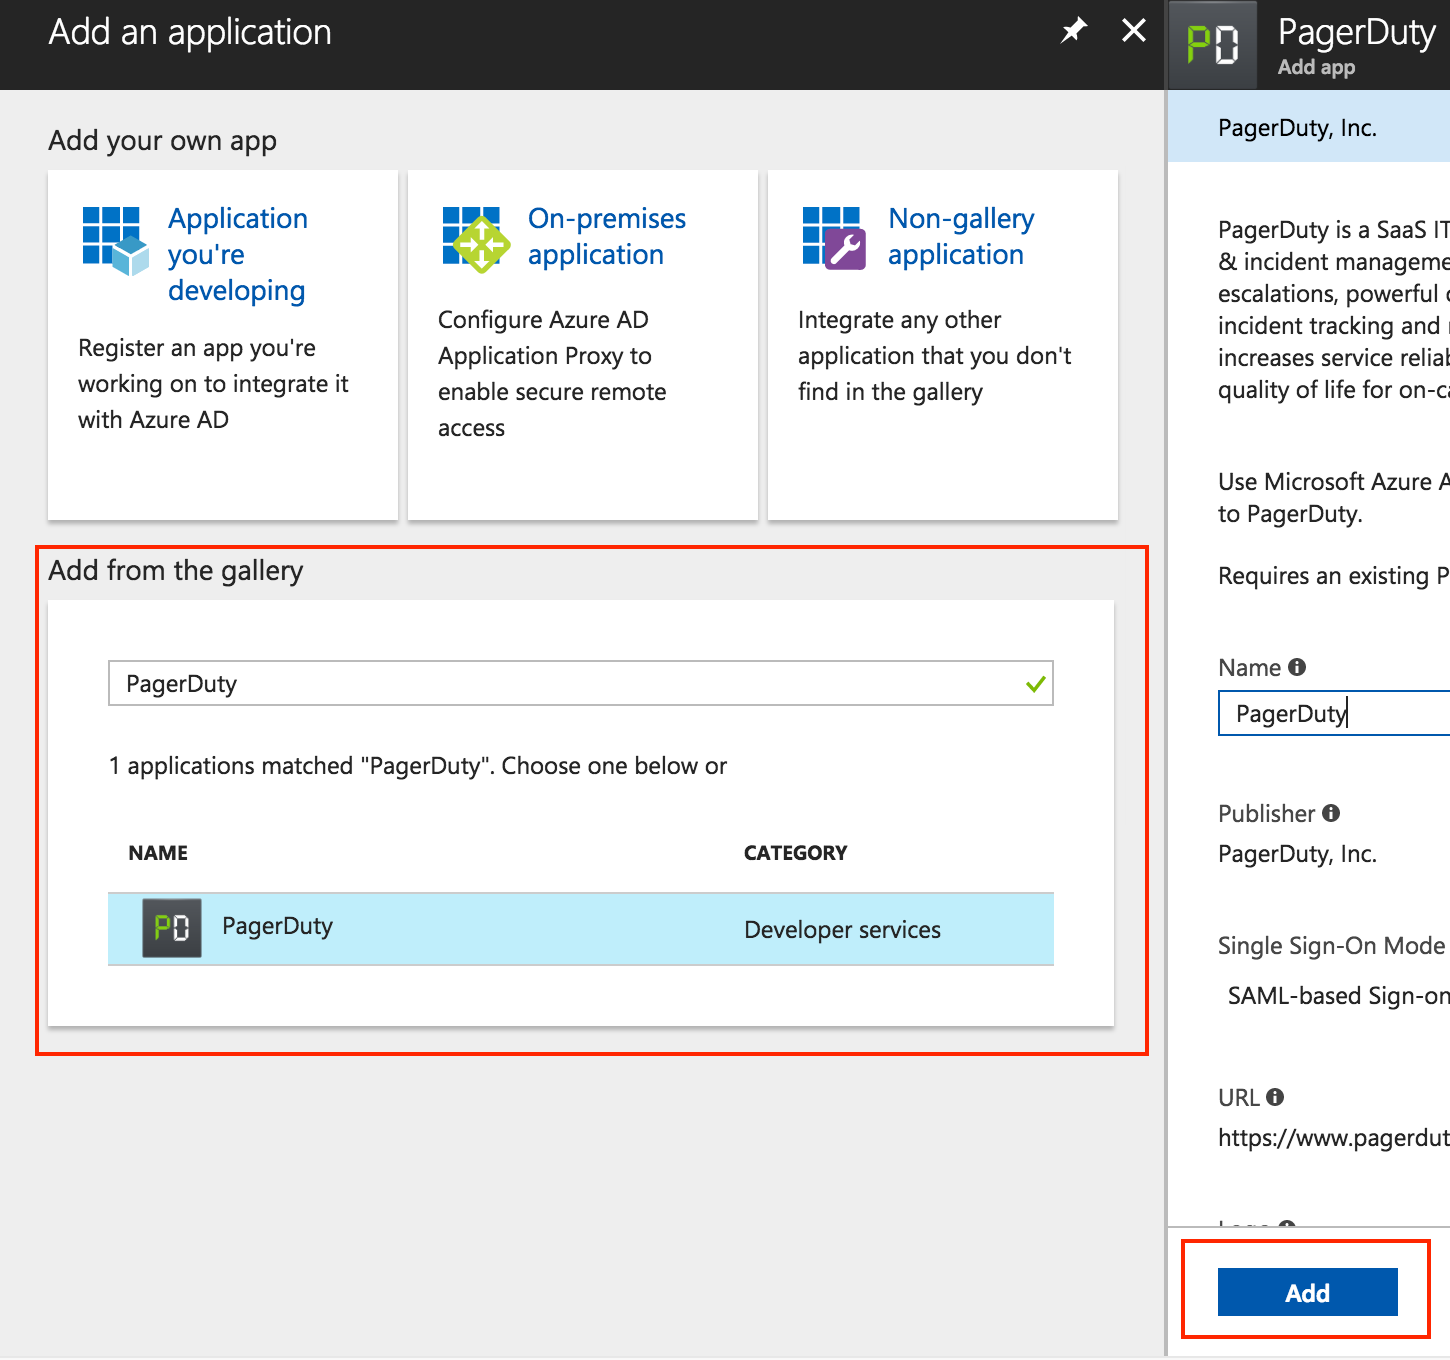
- In Add from the gallery, search for and select PagerDuty. Give it a name and click Add.

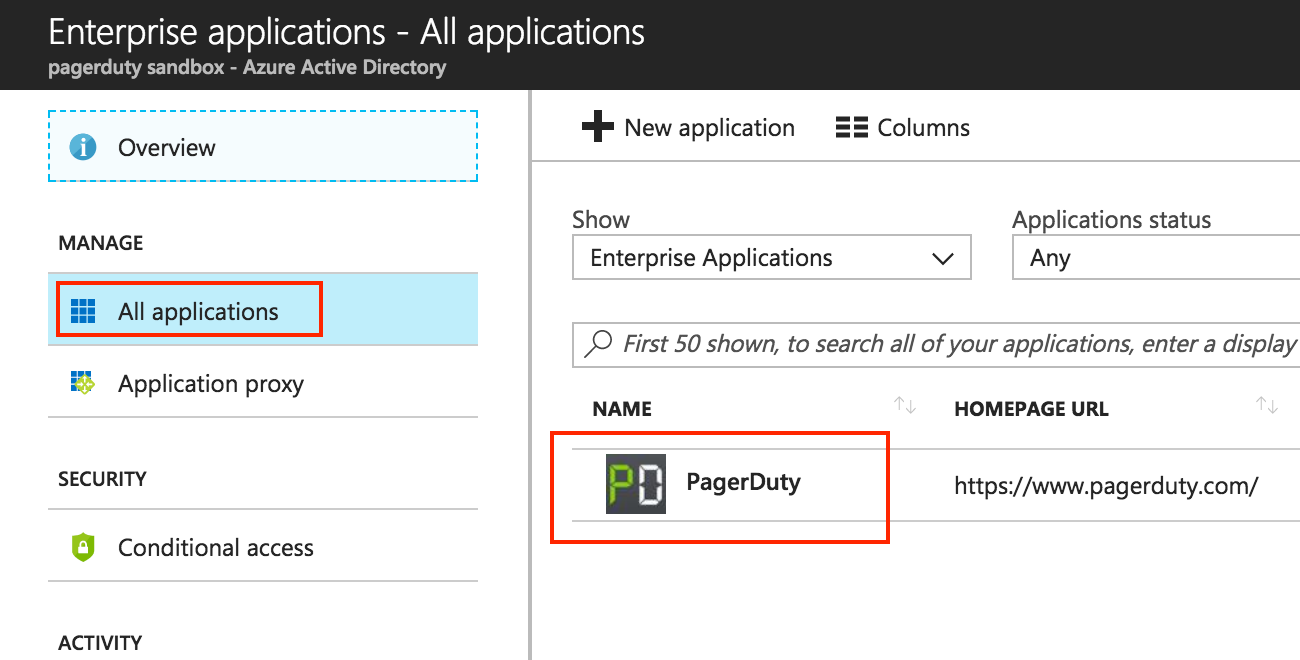
- Again, in the Azure Active Directory from the left menu, go to the All Applications and click on the new PagerDuty application.

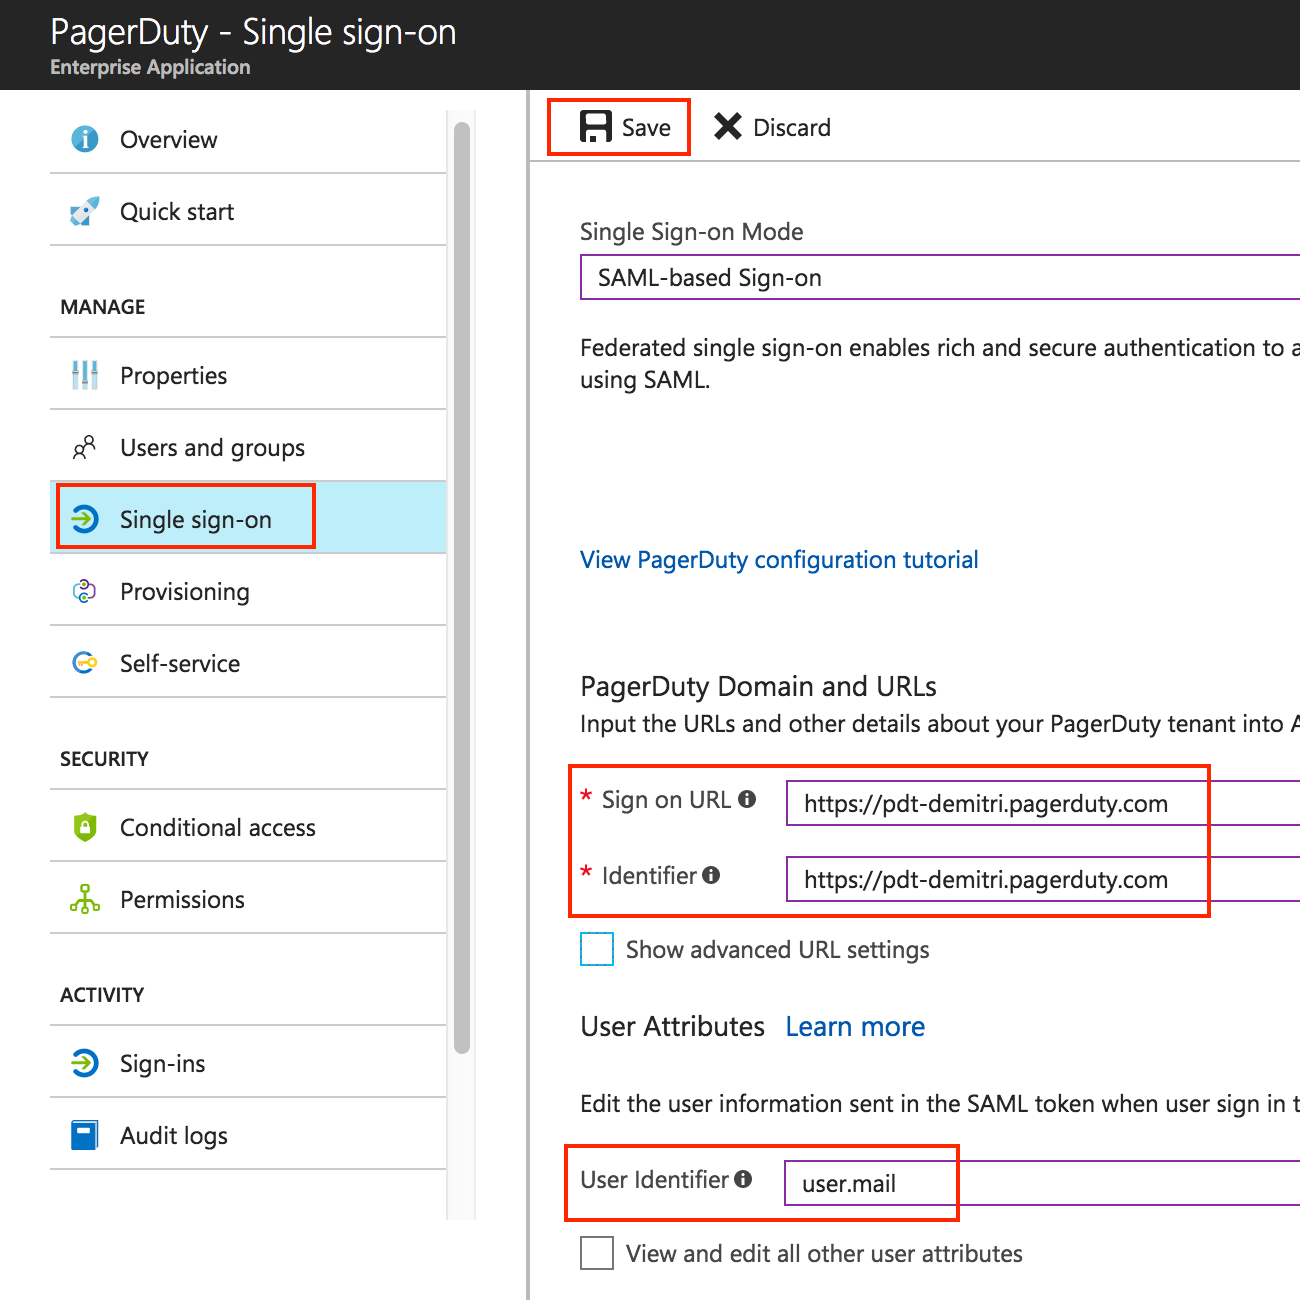
- Configure the settings as follows:
- Single Sign-on Mode: set to SAML-based Sign-on
- Set both Sign-on URL and Identifier to the base URL of your PagerDuty login page, https://(your-subdomain).pagerduty.com
- User Identifier: set this to user.mail.

- Thus, scroll down further to the User Attributes section and check the box View and edit all other user attributes.
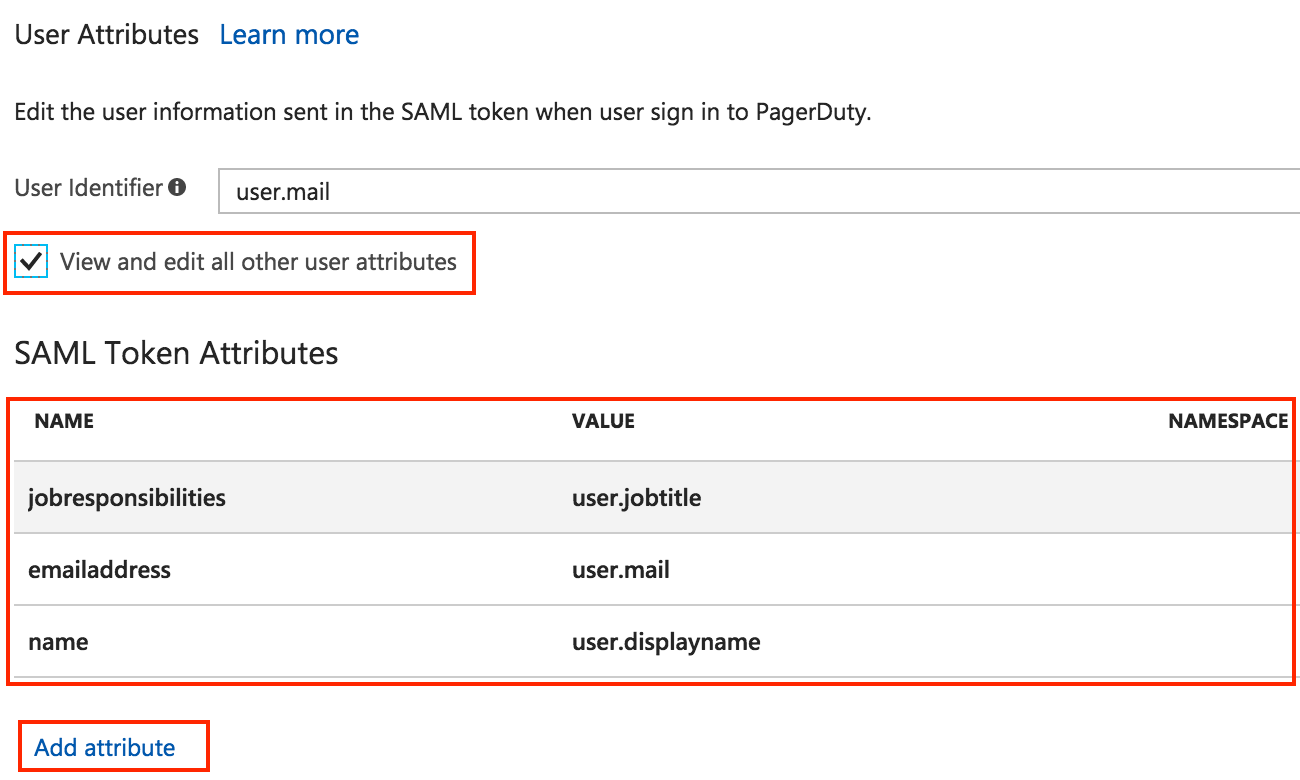
- To safeguard that user fields are correctly populated when auto-provisioning, configure the user attributes as follows:
- Set the Namespace field to empty.
- Set Name “name”, value
user.displaynamefor the user’s full name - Name “emailaddress”, value
user.mailfor the user’s email - Name “jobresponsibilities”, value
user.jobtitlefor the user’s job title

- Click on Save to save the current settings.
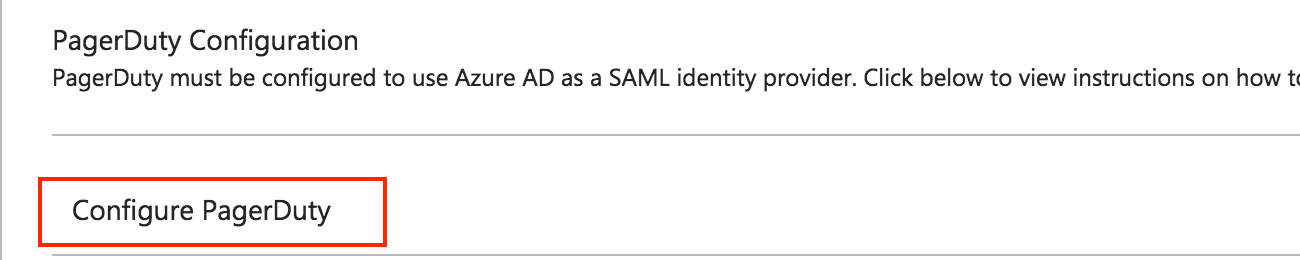
- Return to the single sign-on settings page and scroll down to the bottom of the page, to the PagerDuty Configuration section, and click on Configure PagerDuty to get additional information for setup.

- Follow the instructions on that page. In particular, gather the necessary information to put into the PagerDuty SAML settings page:
- X.509 SAML signing certificate,
- Login URL
- Logout URL
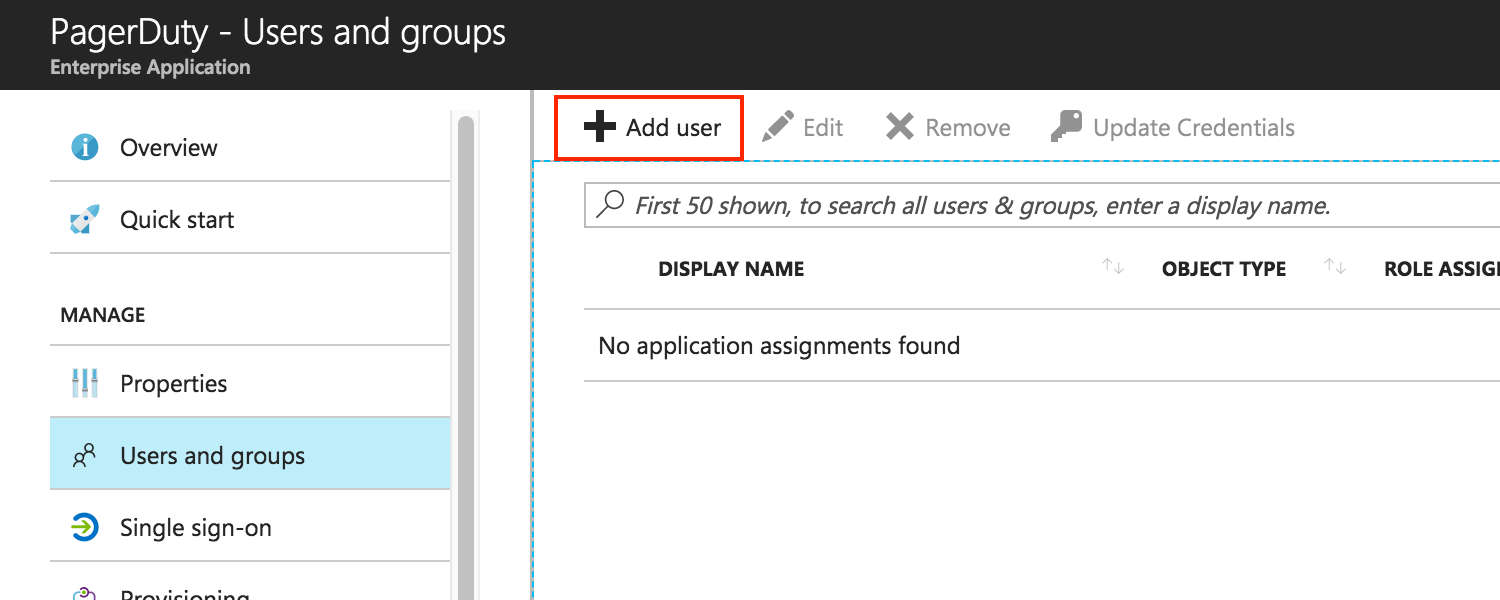
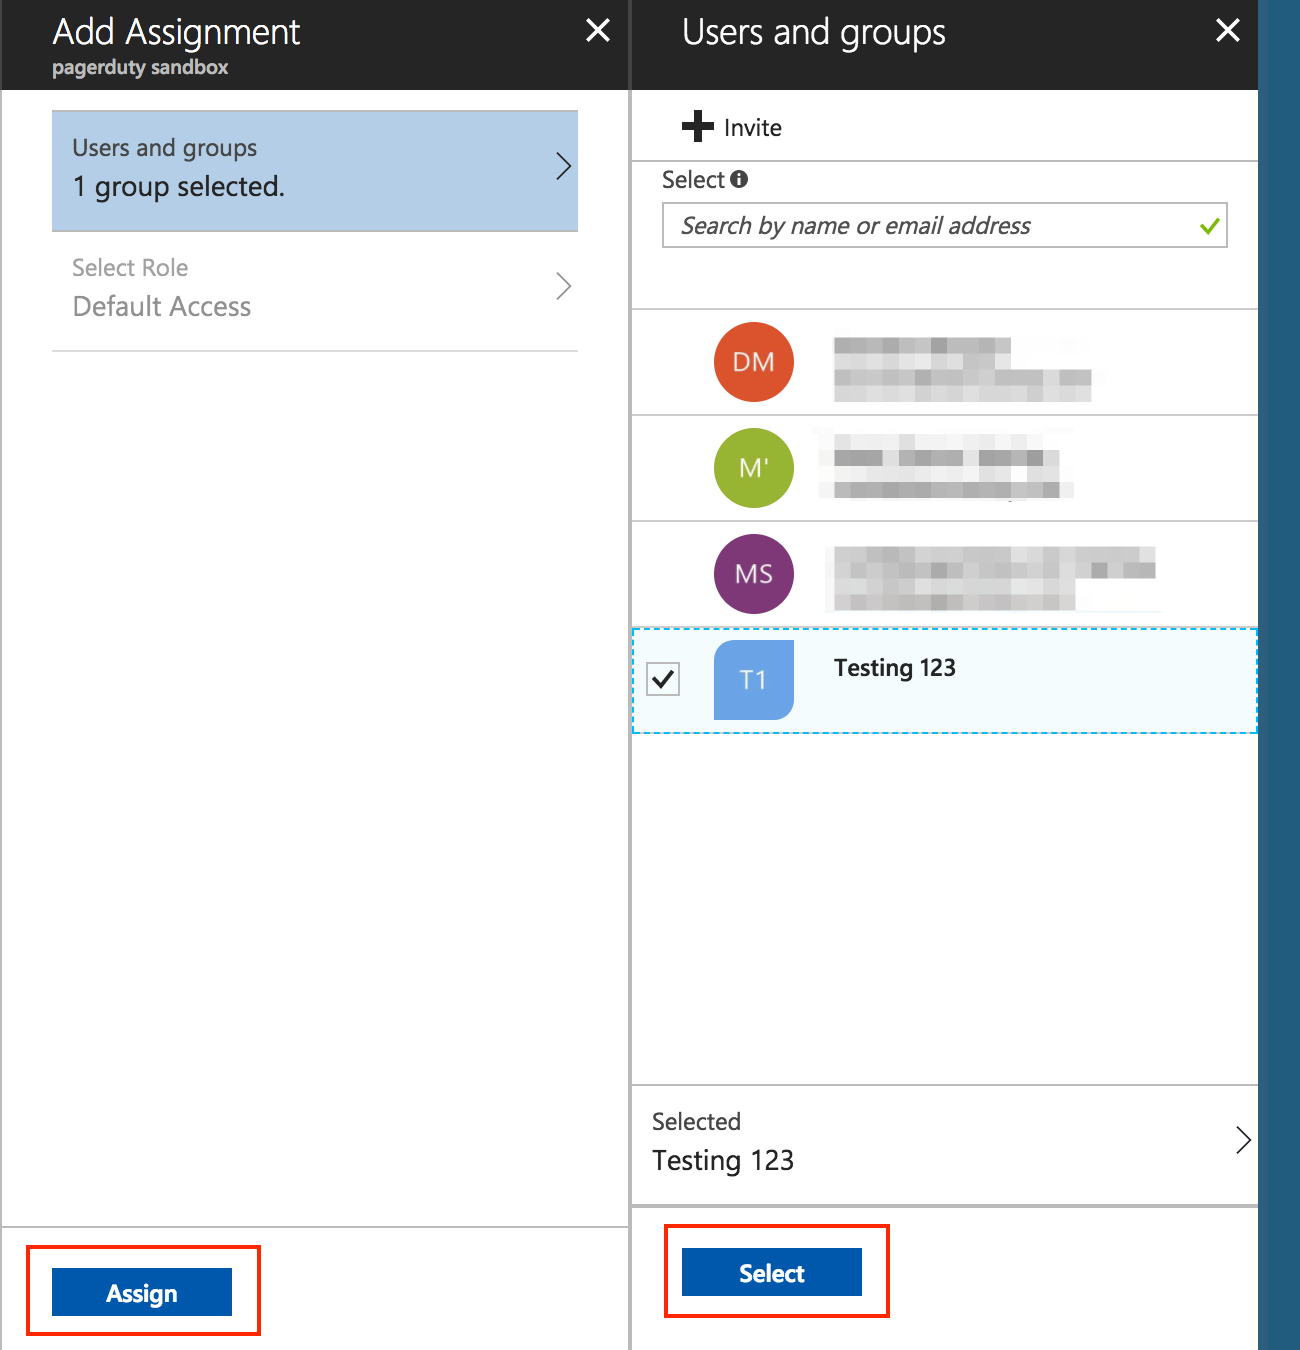
- After that, go to the Users and groups page of the PagerDuty app, and click Add user. Consequently, this will take you to a page where you can grant your Azure Active Directory users and groups access to PagerDuty.

- Here, select the users (round icons) and groups (flag-shaped icons) that you wish to grant access to PagerDuty, click Select, then click Assign.

Key Benefits
- Great user experience
- Users are signed into both on-site and cloud-based programs automatically.
- Users needn’t constantly insert their passwords.
- Easy to deploy and administer
- No additional components needed on-premises to make this work.
- As a result, it works with any method of cloud authentication – Password Hash Synchronization or Pass-through Authentication.
- It can be rolled out to some or all your users using Group Policy.
- First, Register non-Windows 10 devices with Azure AD without the need for any AD FS infrastructure, and this provides the capability you to use version 2.1 or later of the workplace-join client.
Check out our data analytics services to make your business better. With utmost satisfaction, we promise our clients the highest quality of work. Visit Loginworks Softwares to learn more.
We hope you enjoyed this post; we would be very grateful if you could help spread it by emailing it to a friend or sharing it on Twitter or Facebook. Thank you!
I excel when it comes to making bespoke data dashboards and visualizations that users and clients absolutely love. Sharing about things I enjoy doing is my hobby, whether it's about a project, collaboration, feedback, or just simple how-to guides about visualization.
If you have something to ask or share, I'd love to hear from you!
- Business Intelligence Vs Data Analytics: What’s the Difference? - December 10, 2020
- Effective Ways Data Analytics Helps Improve Business Growth - July 28, 2020
- How the Automotive Industry is Benefitting From Web Scraping - July 23, 2020