Developing an App and publishing it is the first step. You want thousands of users to download and use your application. The user retention of your app depends upon how clearly the user understands your application and its usage. So, how about adding an app intro for the first time visitor of your app to showcase the features of your application.
App intro helps the user to understand why he is using the application and how this app will benefit him. This will increase the user engagement to your application. Furthermore, it also increases the user experience with your application.
In this article, we will be going through how we can make a sliding intro screen and further customize the animations in it.
Jump to Section
WHAT YOU SHOULD ALREADY KNOW
To understand this article you should be familiar with:
- Basic knowledge of JAVA and Android.
- Views, widgets, and Layouts in XML
- Android Adapters
- ViewPager
- Shared Preferences
WHAT YOU SHOULD HAVE
To make this app you should have:
- The latest version of Android Studio Installed on your PC or Laptop.
- An Android smartphone or you can use Android emulator.
WHAT YOU WILL LEARN
In this article you will learn:
- Making a standard intro screen
- Customizing color of dots
- Handling views movement on page swipe
APP OVERVIEW
In this application, we are going to create an intro screen by using ViewPager. We can slide through the different screens that tell the features of the application. After this, we will make customizations with the swipe behavior.
This is how the finished app will look like:
 fig 1: Different background for each layout
 Fig 2: Common background for each layout
If you are in hurry and need the well-commented code, get it on GitHub.
1: SETTING UP THE PROJECT
1.1: SET UP A NEW ANDROID PROJECT
- Start Android Studio and Click on “new project”.
- Give your application a name.
- Click next and choose Target android device.
- Next, choose an empty activity to keep things simple.
- Finally, name your Activity and click finish to build the project.
1.2: SET UP THE COLOR RESOURCES
Open colors.xml located under res ⇒ values and add the below color values.
colors.xml
<?xml version="1.0" encoding="utf-8"?>
<resources>
    <color name="colorPrimary">#3F51B5</color>
    <color name="colorPrimaryDark">#303F9F</color>
    <color name="colorAccent">#FF4081</color>

    <!-- Screens background color-->
    <color name="bg_screen_one">#90a4ae</color>
    <color name="bg_screen_two">#a1887f</color>
    <color name="bg_screen_three">#ff8a65</color>
    <color name="bg_screen_four">#81c784</color>
    <color name="bg_screen_five">#64b5f6</color>

    <!-- dots inactive color -->
    <color name="dot_inactive_color">#515151</color>

    <!-- dots active colors -->
    <color name="dot_active_color">#000000</color>

</resources>
1.3: SET UP DIMENSION RESOURCES
Add the below dimensions to dimen.xml located under res ⇒ values.
dimen.xml
<resources>
    <!-- Default screen margins, per the Android Design guidelines. -->
    <dimen name="activity_horizontal_margin">16dp</dimen>
    <dimen name="activity_vertical_margin">16dp</dimen>
    <dimen name="dots_height">30dp</dimen>
    <dimen name="dots_margin_bottom">20dp</dimen>
    <dimen name="img_height_width">120dp</dimen>
    <dimen name="screen_title">30dp</dimen>
    <dimen name="screen_desc">16dp</dimen>
    <dimen name="desc_padding">40dp</dimen>
</resources>
1.4: DEFINE THE STRING RESOURCES
Open strings.xml located under res ⇒ values and add below string values.
strings.xml
<resources>
<string name="app_name">Intro screen</string>
<string name="next">NEXT</string>
<string name="finish">FINISH</string>
<string name="skip">SKIP</string>
<string name="walking">Walking</string>
<string name="walking_desc">Go for a walk after meal for better digestion</string>
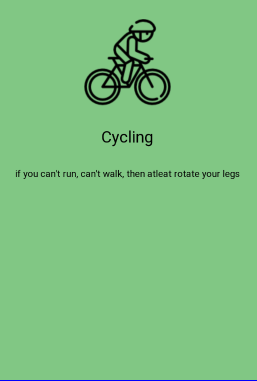
<string name="cycling">Cycling</string>
<string name="cycling_desc">if you can\'t run, can\'t walk, then atleat rotate your legs</string>
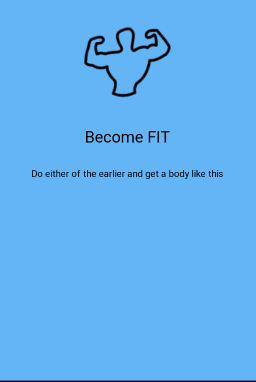
<string name="fit">Become FIT</string>
<string name="fit_desc">Do either of the earlier and get a body like this</string>
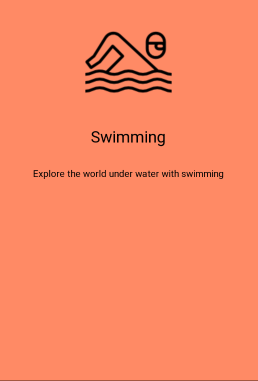
<string name="swimming">Swimming</string>
<string name="swimming_desc">Explore the world under water with swimming</string>
<string name="running">Running</string>
<string name="running_desc">Daily running keeps body in shape and inrease stamina</string>
</resources>
1.5: DEFINE THE STYLE OF YOUR APP
Open styles.xml located under res ⇒ values and add below styles value.
The title bar is not encouraged on the intro screen. We have to make it fullscreen.
Hence, change the style from DarkActionBar to NoActionBar Like done below:
We will make our own toolbar whenever we will need it.
styles.xml
<resources>

    <!-- Base application theme. -->
    <style name="AppTheme" parent="Theme.AppCompat.Light.NoActionBar"> <!-- Changed from Theme.AppCompat.Light.DarkActionBar -->
        <!-- Customize your theme here. -->
        <item name="colorPrimary">@color/colorPrimary</item>
        <item name="colorPrimaryDark">@color/colorPrimaryDark</item>
        <item name="colorAccent">@color/colorAccent</item>
    </style>

</resources>
2: Create slide screens layout
Now we have to create five different layouts for each page of the intro slider. The difference in the code of these layouts is images, texts, and colors. Rest everything is same in all the five layouts.
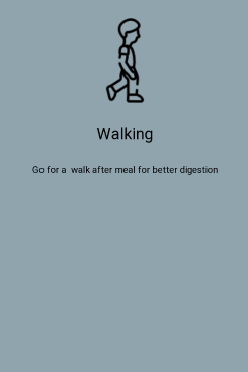
Right click on res ⇒ layout then New and click on Layout resource file. Name the file as screen_one.xml. Now in this layout, we will place an Imageview to display Image on the screen and two TextView, one for the title and one for a little description.
screen_one.xml
<?xml version="1.0" encoding="utf-8"?>
<LinearLayout xmlns:android="http://schemas.android.com/apk/res/android"
    android:layout_width="match_parent"
    android:layout_height="match_parent"
    android:background="@color/bg_screen_one"
    android:gravity="center_horizontal"
    android:orientation="vertical">

    <!-- image on the screen -->
    <ImageView

        android:layout_width="wrap_content"
        android:layout_height="wrap_content"
        android:layout_marginTop="@dimen/content_margin"
        android:src="@drawable/walk" />

    <!-- Title text -->
    <TextView
        android:layout_width="wrap_content"
        android:layout_height="wrap_content"
        android:layout_marginTop="@dimen/content_margin"
        android:text="Walking"
        android:textAppearance="@style/TextAppearance.AppCompat.Headline" />

    <!-- Desc text -->
    <TextView
        android:layout_width="wrap_content"
        android:layout_height="wrap_content"
        android:layout_marginTop="@dimen/content_margin"
        android:text="Go for a walk after meal for better digestion"
        android:textAppearance="@style/Base.TextAppearance.AppCompat.Body1" />

</LinearLayout>
screen_two.xml
<?xml version="1.0" encoding="utf-8"?>
<LinearLayout
xmlns:android="http://schemas.android.com/apk/res/android"
xmlns:app="http://schemas.android.com/apk/res-auto"
xmlns:tools="http://schemas.android.com/tools"
android:layout_width="match_parent"
android:layout_height="match_parent"
android:gravity="center_horizontal"
android:orientation="vertical"
android:background="@color/bg_screen_two">
<!-- image on the screen -->
<ImageView
android:layout_width="128dp"
android:layout_height="128dp"
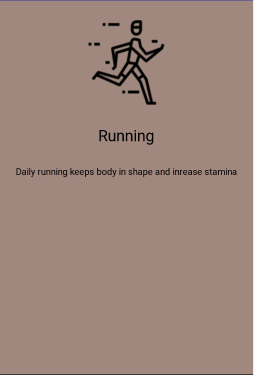
android:src="@drawable/runner"
android:layout_marginTop="@dimen/content_margin"/>
<!-- Title text -->
<TextView
android:layout_width="wrap_content"
android:layout_height="wrap_content"
android:layout_marginTop="@dimen/content_margin"
android:text="Running"
android:textAppearance="@style/TextAppearance.AppCompat.Headline"/>
<!-- Desc text -->
<TextView
android:layout_width="wrap_content"
android:layout_height="wrap_content"
android:layout_marginTop="@dimen/content_margin"
android:text="Daily running keeps body in shape and inrease stamina"
android:textAppearance="@style/Base.TextAppearance.AppCompat.Body1" />
</LinearLayout>
screen_three.xml
<?xml version="1.0" encoding="utf-8"?>
<LinearLayout
    xmlns:android="http://schemas.android.com/apk/res/android"
    xmlns:app="http://schemas.android.com/apk/res-auto"
    xmlns:tools="http://schemas.android.com/tools"
    android:layout_width="match_parent"
    android:layout_height="match_parent"
    android:gravity="center_horizontal"
    android:orientation="vertical"
    android:background="@color/bg_screen_three">

    <!-- image on the screen -->
    <ImageView
        android:layout_width="128dp"
        android:layout_height="128dp"
        android:src="@drawable/swimmer"
        android:layout_marginTop="@dimen/content_margin"/>

    <!-- Title text -->
    <TextView
        android:layout_width="wrap_content"
        android:layout_height="wrap_content"
        android:layout_marginTop="@dimen/content_margin"
        android:text="Swimming"
        android:textAppearance="@style/TextAppearance.AppCompat.Headline"/>

    <!-- Desc text -->
    <TextView
        android:layout_width="wrap_content"
        android:layout_height="wrap_content"
        android:layout_marginTop="@dimen/content_margin"
        android:text="Explore the world under water with swimming"
        android:textAppearance="@style/Base.TextAppearance.AppCompat.Body1" />

</LinearLayout>
screen_four.xml
<?xml version="1.0" encoding="utf-8"?>
<LinearLayout
    xmlns:android="http://schemas.android.com/apk/res/android"
    xmlns:app="http://schemas.android.com/apk/res-auto"
    xmlns:tools="http://schemas.android.com/tools"
    android:layout_width="match_parent"
    android:layout_height="match_parent"
    android:gravity="center_horizontal"
    android:orientation="vertical"
    android:background="@color/bg_screen_four">

    <!-- image on the screen -->
    <ImageView
        android:layout_width="128dp"
        android:layout_height="128dp"
        android:src="@drawable/bicycle"
        android:layout_marginTop="@dimen/content_margin"/>

    <!-- Title text -->
    <TextView
        android:layout_width="wrap_content"
        android:layout_height="wrap_content"
        android:layout_marginTop="@dimen/content_margin"
        android:text="Cycling"
        android:textAppearance="@style/TextAppearance.AppCompat.Headline"/>

    <!-- Desc text -->
    <TextView
        android:layout_width="wrap_content"
        android:layout_height="wrap_content"
        android:layout_marginTop="@dimen/content_margin"
        android:text="if you can't run, can't walk, then atleat rotate your legs"
        android:textAppearance="@style/Base.TextAppearance.AppCompat.Body1" />

</LinearLayout>
screen_five.xml
<?xml version="1.0" encoding="utf-8"?>
<LinearLayout
    xmlns:android="http://schemas.android.com/apk/res/android"
    xmlns:app="http://schemas.android.com/apk/res-auto"
    xmlns:tools="http://schemas.android.com/tools"
    android:layout_width="match_parent"
    android:layout_height="match_parent"
    android:gravity="center_horizontal"
    android:orientation="vertical"
    android:background="@color/bg_screen_five">

    <!-- image on the screen -->
    <ImageView
        android:layout_width="128dp"
        android:layout_height="128dp"
        android:src="@drawable/muscle"
        android:layout_marginTop="@dimen/content_margin"/>

    <!-- Title text -->
    <TextView
        android:layout_width="wrap_content"
        android:layout_height="wrap_content"
        android:layout_marginTop="@dimen/content_margin"
        android:text="Become FIT"
        android:textAppearance="@style/TextAppearance.AppCompat.Headline"/>

    <!-- Desc text -->
    <TextView
        android:layout_width="wrap_content"
        android:layout_height="wrap_content"
        android:layout_marginTop="@dimen/content_margin"
        android:text="Do either of the earlier and get a body like this"
        android:textAppearance="@style/Base.TextAppearance.AppCompat.Body1" />

</LinearLayout>
3: Make preference holder class
You must know about shared preferences, by which we can store user preferences and some values in the preference files. This will help us to keep track whether the application is launched for the first time or not.
Make a class PrefManager for SharedPrefernces as below:
PrefManger.java
package com.codes29.introscreen;

import android.content.Context;
import android.content.SharedPreferences;

public class PrefManager {

    Context context;
    SharedPreferences sharedPreferences;
    SharedPreferences.Editor editor;

    //Shared Prefernce name
    private static final String PREF_NAME="IntroScreen";

    //key for first time launch
    private static final String IS_FIRST_LAUNCH="IsFirstLaunch";

    // int 0 is for making the prefernce file private
    private int MODE_PRIVATE=0;

    PrefManager(Context context){
        this.context=context;
        sharedPreferences=context.getSharedPreferences(PREF_NAME,MODE_PRIVATE);
        editor=sharedPreferences.edit();
    }

    // call in intro activity to set false after first launch
    public void setIsFirstLaunch(boolean isFirstLaunch){
        editor.putBoolean(IS_FIRST_LAUNCH,isFirstLaunch);
        editor.commit();
    }

    //return set value, if no value is set then return the default value
    public boolean isFirstLaunch(){
        return sharedPreferences.getBoolean(IS_FIRST_LAUNCH,true);
    }
}
4: Create custom pager adapter
Now, we are gonna create the pager adapter which will add the pagination kind of effect in our view pager.
Create a java class IntroAdapter and write the following changes in the code:
IntroAdapter.java
import android.content.Context;
import android.support.v4.view.PagerAdapter;
import android.view.LayoutInflater;
import android.view.View;
import android.view.ViewGroup;

import com.codes29.introscreen.R;

public class IntroAdapter extends PagerAdapter {

    Context context;
    LayoutInflater layoutInflater;

    public IntroAdapter(Context context){
        this.context=context;
    }

    //Array of screen layouts
    public int[] layouts={
            R.layout.screen_one,
            R.layout.screen_two,
            R.layout.screen_three,
            R.layout.screen_four,
            R.layout.screen_five
    };


    // Returns total number of screens
    @Override
    public int getCount() {
        return layouts.length;
    }

    // assign the view to the object
    @Override
    public boolean isViewFromObject(View view, Object object) {
        return view == object;
    }

    // Returns the layout at the given position of the view pager
    @Override
    public Object instantiateItem(ViewGroup container, int position) {
        layoutInflater = (LayoutInflater) context.getSystemService(context.LAYOUT_INFLATER_SERVICE);

        View view= layoutInflater.inflate(layouts[position],container,false);
        container.addView(view);

        return view;
    }

    // stop slide on last screen
    @Override
    public void destroyItem(ViewGroup container, int position, Object object) {
       View view = (View) object;
       container.removeView(view);
    }
}
5: create intro activity
Now, we have to create another activity which will contain the above slide screens and the ViewPager to make the slide effect.
We will set the intro adapter to the view pager in this activity only to give the sliding effect
We will check if the application is launched for the first time. If yes then the intro activity will launch.
If the app has been opened prior, then it will directly move to the MainActivity.
Create a new intro activity with the following steps:
- Right click on the app
- Click on New>Activity>Empty Activity
- Name it as IntroActivity activity.
- Click finish.
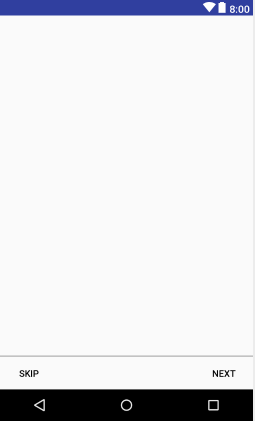
5.1: Now open the activity_intro.xml and add the following:
- view pager
- skip and next buttons
activity_intro.xml
<?xml version="1.0" encoding="utf-8"?>
<RelativeLayout
    xmlns:android="http://schemas.android.com/apk/res/android"
    xmlns:tools="http://schemas.android.com/tools"
    android:layout_width="match_parent"
    android:layout_height="match_parent"
    tools:context="com.codes29.introscreen.IntroActivity">

    <android.support.v4.view.ViewPager
        android:id="@+id/view_pager"
        android:layout_width="match_parent"
        android:layout_height="match_parent" />

    <LinearLayout
        android:id="@+id/layoutDots"
        android:layout_width="match_parent"
        android:layout_height="@dimen/dots_height"
        android:layout_alignParentBottom="true"
        android:layout_marginBottom="@dimen/dots_margin_bottom"
        android:gravity="center"
        android:orientation="horizontal"/>

    <View
        android:layout_width="match_parent"
        android:layout_height="1dp"
        android:alpha=".5"
        android:layout_above="@id/layoutDots"
        android:background="@android:color/black" />

    <Button
        android:id="@+id/btn_next"
        android:layout_width="wrap_content"
        android:layout_height="wrap_content"
        android:layout_alignParentBottom="true"
        android:layout_alignParentRight="true"
        android:background="@null"
        android:text="Next"
        android:textColor="@android:color/black" />

    <Button
        android:id="@+id/btn_skip"
        android:layout_width="wrap_content"
        android:layout_height="wrap_content"
        android:layout_alignParentBottom="true"
        android:layout_alignParentLeft="true"
        android:background="@null"
        android:text="Skip"
        android:textColor="@android:color/black" />

</RelativeLayout>
5.2: Connect everything in java file of intro activity
In the IntroActivity.java file we will be doing the following:
- Check if the app is launched for the first time.
- Make the status bar transparent.
- Find the xml views in java.
- Set the intro adapter to the view pager.
- Add the dots indicator.
- Click listener on next and skip button.
IntroActivity.java
package com.codes29.introscreen;

import android.content.Intent;
import android.graphics.Color;
import android.os.Build;
import android.support.v4.view.ViewPager;
import android.support.v7.app.AppCompatActivity;
import android.os.Bundle;
import android.text.Html;
import android.view.View;
import android.view.ViewParent;
import android.view.Window;
import android.view.WindowManager;
import android.widget.Button;
import android.widget.LinearLayout;
import android.widget.TextView;

public class IntroActivity extends AppCompatActivity implements View.OnClickListener {

    private ViewPager viewPager;
    private LinearLayout dotsLayout;
    private Button btnNext, btnSkip;
    private IntroAdapter introAdapter;
    private TextView[] mDots;
    private PrefManager prefManager;
    private int currentItem;

    @Override
    protected void onCreate(Bundle savedInstanceState) {
        super.onCreate(savedInstanceState);

        // Check if the app is launched first time before setting layout
        prefManager=new PrefManager(this);
        if (!prefManager.isFirstLaunch()){
            launchMainScreen();// goto main activity and finish current
        }

        setContentView(R.layout.activity_intro);

        transparentStatusBar();// make status bar transparent

        findViews();// find xml views in java

        setClickListener();// set on click listeners

        setupViewPager();// setup the viewpager, set adapter and page listener

        addDotsIndicator(0);// called for the first launch, after this handled in page listener
    }

    private void launchMainScreen() {
        prefManager.setIsFirstLaunch(false);
        startActivity(new Intent(IntroActivity.this,MainActivity.class));
        finish();
    }

    private void transparentStatusBar() {

        if (Build.VERSION.SDK_INT >= Build.VERSION_CODES.LOLLIPOP) {
            Window window = getWindow();
            window.addFlags(WindowManager.LayoutParams.FLAG_DRAWS_SYSTEM_BAR_BACKGROUNDS);
            window.setStatusBarColor(Color.TRANSPARENT);
        }

        if (Build.VERSION.SDK_INT >= 21) {
            getWindow().getDecorView().setSystemUiVisibility(View.SYSTEM_UI_FLAG_LAYOUT_STABLE | View.SYSTEM_UI_FLAG_LAYOUT_FULLSCREEN);
        }
    }

    private void setupViewPager() {
        introAdapter = new IntroAdapter(this);
        viewPager.setAdapter(introAdapter);
        viewPager.addOnPageChangeListener(pageChangeListener);
    }

    private void findViews() {
        viewPager = findViewById( R.id.view_pager );
        dotsLayout = findViewById( R.id.layoutDots );
        btnNext = findViewById( R.id.btn_next );
        btnSkip = findViewById( R.id.btn_skip );
    }

    private void setClickListener() {
    btnSkip.setOnClickListener(this);
    btnNext.setOnClickListener(this);
    }

    public void addDotsIndicator(int position){
        // Adding TetView dynamically
        mDots=new TextView[introAdapter.getCount()];

        /* Remove aprvious views when called next time
         if not called then views will keep on adding*/
       dotsLayout.removeAllViews();

       // Set bullets in each dot text view
       for (int i=0; i< mDots.length; i++){
           mDots[i]= new TextView(this);
           mDots[i].setText(Html.fromHtml("•"));// Html code for bullet
           mDots[i].setTextSize(35);
           mDots[i].setTextColor(getResources().getColor(R.color.dot_inactive_color));

           dotsLayout.addView(mDots[i]);
       }

       if (mDots.length>0){
           // change color of the current selected dot
           mDots[position].setTextColor(getResources().getColor(R.color.dot_active_color));
       }
    }

    ViewPager.OnPageChangeListener pageChangeListener= new ViewPager.OnPageChangeListener(){

        @Override
        public void onPageSelected(int position) {

            currentItem=position; // currentItem used to get current position and then increase position on click on next button

            addDotsIndicator(position);

            // change the next button text to "next" / "finish"
            if (position==introAdapter.getCount()-1){
                // last page, make it "finish" and make the skip button invisible
                btnNext.setText(getString(R.string.finish));
                btnSkip.setVisibility(View.INVISIBLE);
            }else {
                // not last page, set "next" text and make skip button visible
                btnNext.setText(getString(R.string.next));
                btnSkip.setVisibility(View.VISIBLE);
            }
        }

        @Override
        public void onPageScrolled(int position, float positionOffset, int positionOffsetPixels) {

        }

        @Override
        public void onPageScrollStateChanged(int state) {

        }
    };

    @Override
    public void onClick(View v) {
        switch (v.getId()){
            case R.id.btn_next: if (currentItem<introAdapter.getCount()-1){
                                    ++currentItem; // increase the value by 1
                                    viewPager.setCurrentItem(currentItem); // set the layout at next position
                                }else
                                    launchMainScreen(); // launch main screen on last page
                                break;

            case R.id.btn_skip: launchMainScreen();
                                break;


        }

    }
}
6: Run the Application
This is what I got!

Important Note: In the above gif, after closing and starting the app again, the application goes to the main activity. It skips the intro page but at the same moment the gif restarts. Hence, there is an illusion that intro screen is started again. The code is working fine!
7: Layouts sliding on the same background
There is another way in which we can customize the above intro slider. Here, we are using a different background for each slide screen. But if you want to keep a single background image and want that only the content to slide over it, then it can also be done very easily.
This is what I got with the single background Image:
To achieve this, remove the backgrounds that we have set in the LinearLayout of all the screen layouts i.e; screen_one, screen_two, screen_three, screen_four, and screen_five.
After this, add a background image to the drawable folder of the project.
open the activity_intro.xml and set the background of the root RelativeLayout like done below:
<RelativeLayout
    ...
    android:background="@drawable/commonbg3"
    tools:context="com.codes29.introscreen.IntroActivity">
After this, when you run the application it will look like above.
This practice is encouraged when you have same content in all the screen like we have.
Wrap Up
Furthermore, it is up to your choice, which one you would like to go for. This is only the basic structure that we have got till now. You can see more effects on my upcoming article where I’ll be going to create effects on page change transition. Meanwhile, you can check out what various killer transition effects we can make using the PageTransformer. Moreover, if you like it, please do like and share. Spread the knowledge among peers!
Thank you!
- LinkedIn Scraper | LinkedIn Data Extractor Software Tool - February 22, 2021
- Is Web Scraping Legal? - February 15, 2021
- What Is Data Scraping? - February 10, 2021