
Jump to Section
Introduction
First of all, I would like to give the brief description about WinRunner. It is a powerful automated testing tool developed by Mercury Interactive Company since it is basically used for functional regression testing. Also, It automates the testing process. Hence, to ensure that the applications performing as we expected or Not. It records operations as you perform them manually in your applications build and generates a test with required observation as checkpoints. In addition, you can run your test on application build and analyze the result manually with respect to the corresponding manual test case. Then, WinRunner enables you to adapt and reuse your tests for regression and protecting your effort in test creation.
We are going to discuss various techniques and modes to record (like context sensitive and analog) a test case using win runner. So, we will understand how one can use WinRunner effectively to make the testing job easy.
The salient features of WinRunner that makes it different from other tools are
- WinRunner is a functional testing tool.
- As a result, it supports various technologies like VB, JAVA, Power Builder, DotNet, VC++, HTML, Delphi, Activex and ERP/Siebel technologies for automated functional testing.
- It runs on a windows family operating systems only.
- WinRunner converts our manual function tests into test script language (TSL) programs.
To open WinRunner tool on the desktop, proceed this way:
First of all, you need to follow these steps as follows,
- Start->Programs->WinRunner->WinRunner

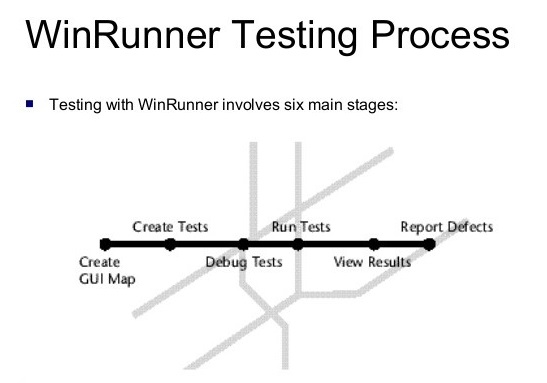
TESTING PROCESS
Testing with WinRunner includes four main stages-
- Selecting manual functional test cases to be automated:
First of all the automation test process starts with the selection of manual test cases to be automated by a testing Engineer. - Creating automated test scripts in TSL:
After completing the first stage then, create the test using both recording and programming. Therefore recording tests, insert checkpoints where you want to check the behavior of the application under test(AUT). - Running Automated test scripts on the build:
While running test cases, WinRunner emulates a user by entering mouse and keyboard input into your application. So, Each time the WinRunner encounters a checkpoint in the test, it compares the current response of your application to its expected response. - Analyzing automated test scripts results: When a test run ends, Furthermore, the test engineer can examine the result. While WinRunner lists all the major events that occurred during the run such as checkpoints.
 Manual Test case
 Manual Test case
- Test case ID: Tc_xxx
- Test case name: Verify OK button
- Precondition: user ID and Password fields should take values.
Test procedure :
| Step No | Action | Input Required | Expected |
| 1. | Focus to Login | OK button disabled | |
| 2. | Enter user ID | Valid value | OK button disabled |
| 3. | Enter Password | Valid value | OK button disabled |
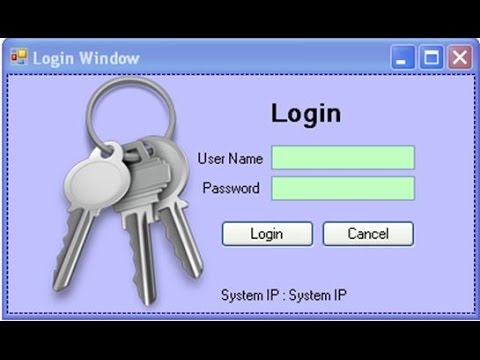
Test Script
#Login

set_window ("login", 8);

button_check_info("OK","enabled",0); #check point

edit_set("userid","asdf");

button_check_info("OK","enabled",0); #check point

password_edit_set("password","yusufmalik@785");

button_check_info("OK","enabled",1); #check point

button_press("ok");
Test script definition
Finally, every automated test script program consists of navigational statements to operate build and checkpoints. To conduct required functional observation with respect to the corresponding manual functional test case. So, the scripting language tests script language for automating a manual test case. Because it is mercury interactive C-like Test scripting language. Therefore you create a test script by recording or programming TSL statements.
Add-in Manager
First of all, you need an Add-in manager window, as shown in the figure. After that, list out all WinRunner supported technologies with respect to purchased Add-in licenses. So, this window will open while launching WinRunner on our desktop.
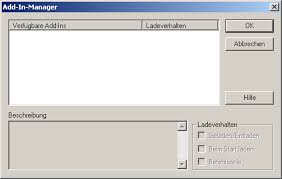
WinRunner also allows you to create automation test on selected technologies, which are used to implement your software build, in Add-in Manager. In above picture, a test engineer already selected ActiveX controls, PowerBuilder, and VisualBasic options. For this reason, WinRunner supports tests creation on your software build which is developed using selected technologies.
- Select Add-ins to load: This part in Add-in Manager dialog which displays the Add-ins you can load WinRunner. Although, The Add-ins you selected would automatically appear the next time you start WinRunner.
- Time progress Indicator: This part in Add-in Manager dialog displays the remaining time to load Add-ins until that dialog closes.
- Show on Startup: Basically, this part in Add-in Manager dialog indicates that you can display that dialog every time you start WinRunner.
- Add-in License: WinRunner 8.0 includes the Activex controls, PowerBuilder, Visual Basic.Net, and Web test Add-ins. You can also purchase and install additional External Add-ins, if you use a seat license and install external add-ins, you must also install special add-in license on your computer. Then, click the Add-in License button to install your Add-in licenses on your computer.
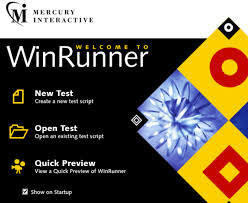
The WinRunner welcome screen
After selecting Add-in technologies in Add-in Manager, The tester should continue loading WinRunner, therefore it returns a welcome screen.
The WinRunner welcome screen has four option displayed:
- Create a new test: It is used to start test creation on the build.
- Open an existing test: With this option, you can open previously created test.
- View a Quick preview of WinRunner: This option enables you to see the preliminary help of WinRunner tool for test creation and execution.
- Exit: With this option, you can close the current instance due to WinRunner.
WinRunner Editor Buttons
Once the WinRunner is launched on the desktop, the test engineer can open corresponding stable build for test creation and execution. While in this test creation and execution of the build, test engineers use the following buttons regularly.
A. Record Button: Basically this button is used to start recording of manual operations on our application build. Hence it is an initial point to create an automation test script.
B. Verify button: It specifies run mode to run the automation test script on the application build.
C. FromTop_button: It is used to run the automation program from the first statements.
D. FromArrow_Button: This button is basically used to run the Automated programs from selective statements.
E. Stop_Button: Stop_Button is generally used to stop recording and running of Automation test script.
Recording Modes
Basically, It allows you to record the manual operations in two types of modes namely Context Sensitive mode and analog mode.
A. Context Sensitive Mode: It is the default mode in WinRunner. For this reason, WinRunner records mouse and keyboard operations with respect to objects and windows in your application build.
Then, it records the operations you perform on your application by identifying graphical user interface GUI objects.
.TEST->Record-Context sensitive mode
OR
.Click on the toolbar’s record button once to record in Context sensitive mode
OR
.F2 as the short key can be used to switch to the context-sensitive recording mode
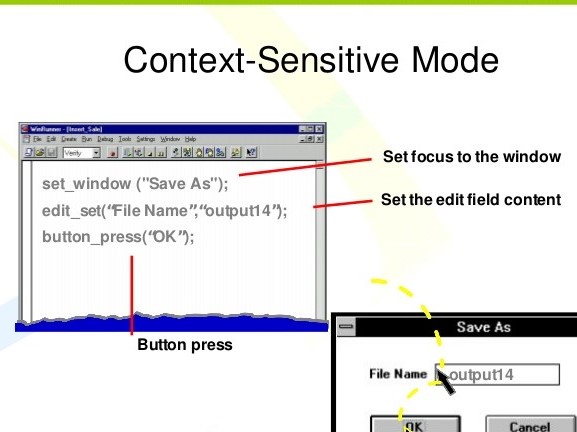
Furthermore, If you start recording in context-sensitive mode, Then WinRunner displays the following script as shown here for manual operation.
Script:
#FlightReservation

set_window("FlightReservation",4);

Menu_Select_Item("File_OpenOrder...");

#OpenOrder

set_window("open order",1);

Button_set("open order","ON");
Edit_set("Edit",6);

Button_press("OK");
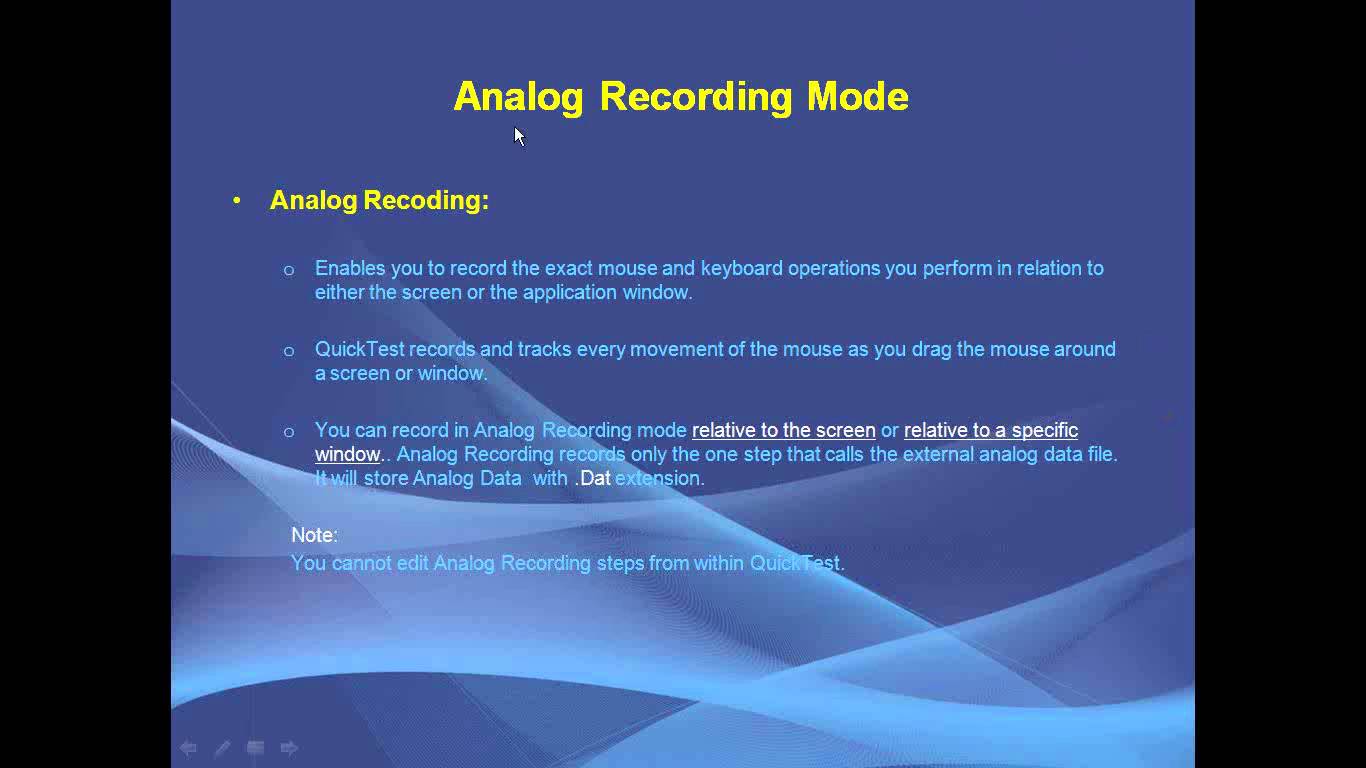
B. Analog Mode:
In this mode, The WinRunner records mouse pointer movements on the desktop. Especially analog Recording Option Records Keyboard input, mouse click, and the precise x- and y- coordinates traveled by the mouse pointer across the screen. To select analog mode, follow any one of the navigation paths
-click start recording button twice
OR
-Test Menu->Record-Analog
OR
-F2 as short key to switch over from context Sensitive mode to analog mode
Stop Recording
If all required actions or operations are recorded, you can go to stop recording using any of the following options.
-Test Menu->Stop Recording
Or
-Click on the Toolbar’s stop button
Or
-CTRL+F3 as the short key
Run Modes
There are various run modes, which are as follows, However, some of which are described in the following table:
.Run Mode->
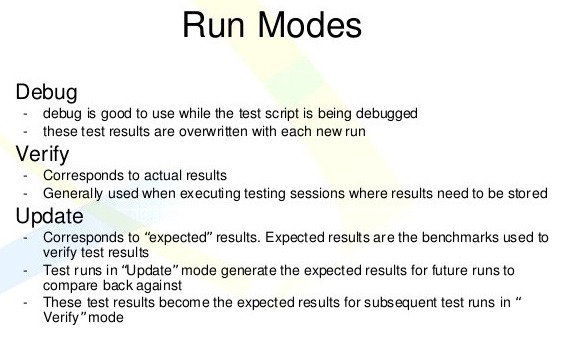
Verify run Mode
Description->While running in verify Run Mode, WinRunner compares the automation test scripts specified expected values with build actual values.
Update Run Mode
Description-> At the time of running in an update run mode WinRunner takes default values same as expected values of checkpoint in your automation test script.
Debug Run Mode
Description-> When we run Debug Run Mode, WinRunner runs the automation programme statements while statements for debugging.
TSL Functions in Contexts sensitive Mode
Generally, the test script you create with is written in text script language(TSL). TSL is a C-Like programming language which is specially designed for testing. Hence, It is a high-level language and easy to use because it provides all the concepts of conventional programming languages with functions to improve test efficiency using WinRunner. Therefore, This enables you to modify record test script or to write sophisticated test scripts. However, there are four types of TSL Functions. Each type of function addresses a different requirement.
Analog Functions:
basically, these functions perform mouse and keyboard input operations with respect to screen coordinates.
Context Sensitive Function:
These functions perform operations on GUI objects, some of them are:
| Manual Operation | Equivalent Function in TSL |
| Focus to a Window | set_window(“window name”,time); |
| click push button | button_press(“Button name”); |
| Fill a textBox | Edit_set(“edit box name”, “typed text”); |
| Fill a Password Box | Password_edit_set(“Password box name”,”encrypted password”); |
| An Item in a List box, Select | while in, List_select_item(“List box item”, “selected item”); |
| Select a Radio Button | Button_set(“Radio Button name”,”ON”) ; |
| A checkbox, Select | button_set(“checkbox name”, ON/OFF); |
| Select a Menu Option | Menu_select_item(“menu_name;option name”) ; |
Standard Functions:
These Functions Perform basic programming language operations, such as basic input and output, control flow, mathematical, and most of all, array functions.
Customization Functions:
These functions configure the testing tool according to your requirements, like much as add functions to the generator functions, So we create custom GUI Checkpoints.
Checkpoints in WinRunner
Basically, checkpoints define a verification or condition on a testable functionality of software build. So, It is a functional testing tool and it provides facilities to automate the following coverage of an application.
.Behavioral coverage / GUI coverage
.Error Handling coverage
.input domain coverage
.Manipulations coverage
.Backend coverage
.Functionality order coverage
To Automate these coverages, WinRunner provides various type of checkpoints.
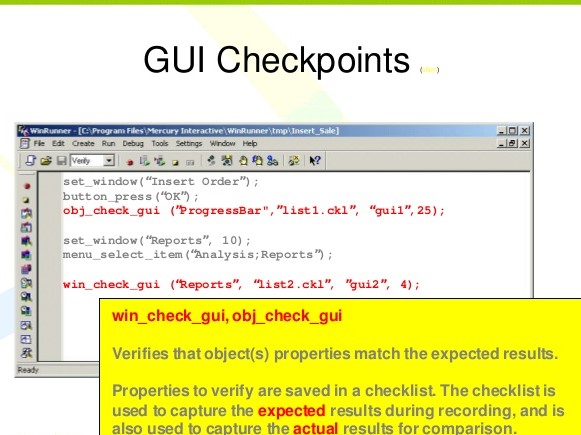
GUI Checkpoints
To verify properties of objects in a software build, we can use this checkpoint. Generally, this checkpoint can be used for verifying properties of objects in a software build, this checkpoint consists of three sub-options-
-for the single property;
-Object window;
-for multiple objects.
Case study: Mapping between some object type and testable properties shown in the following table.
| Object Type | Testable Properties |
| Push Button | Enabled, Focused |
| Radio Button | Enabled Status(ON/OFF) |
| Check Box | Enabled Status(ON/OFF) |
| List or Combo | Enabled, Count, Value |
| Menu | Enabled, Count |
| Edit Or Test Box | Enabled,Focused,Range,value,Regular,Expression,Date. |
| Table Grid | Row Count, Column Count, Cell Content |
Bitmap CheckPoint
A bitmap is the binary representation of an image. Therefore, we can use this checkpoint to compare images in versions of our build application. Since, this checkpoint only supports static image due to the images with dynamism, for Example-
.Logo Testing
.Graphs Comparison
.Images Comparison
.Digital signature Comparison,etc.
Database CheckPoint:
First of all, we should know that- to Automate backend testing, test Engineer generally use this checkpoint in WinRunner. Hence, at the time of backend testing, test engineer validates the impact of front-end operations of backend tables in terms of data validation and data integrity. While Data validation means correctness of inserting new values into a database table. Data integrity means correctness of changes in existing values.
These days every application demands its own database for storing various information. At the time of testing the application, the database of that application should also be tested to ensure that the values entered into the database are correct. While, in WinRunner, For Checking databases, we have a feature called database checkpoint. Since Database CheckPoint consists of three sub-options.
.Default Check
.Custom Check
.Runtime record Check
Conclusion
Last but not the least, automated testing with WinRunner addresses these problems by dramatically speeding up the testing process. Finally, you can create test scripts that check all aspects of your application, and then run these tests on each new build. So it simulates a human user by moving the mouse cursor over the application, clicking Graphical User Interface (GUI) objects, and entering keyboard input—but WinRunner does this faster than any human user.
- COVID-19: How We Are Dealing With It as a Company - March 23, 2020
- Agile Testing – The Only Way to Develop Quality Software - February 8, 2019
- How to Perform System Testing Using Various Types Techniques - May 16, 2018