Hello everyone, I hope you all are doing well. Today in this tutorial we will be going to talk about different types of pickers available in iOS through which we can make a great application.
There are different types of picker present in the different applications like – Date Picker, Time Picker, Contact Picker etc. through which user can easily select the particular thing from the list appears on the screen and which reduces the sign up time and efforts used to manually typing it which is quite an old style now.
Here, we are going to work on two different types of pickers which are Date Picker and Contact Picker that are quite useful and are common in the iOS application these days.
Jump to Section
Initial Setup
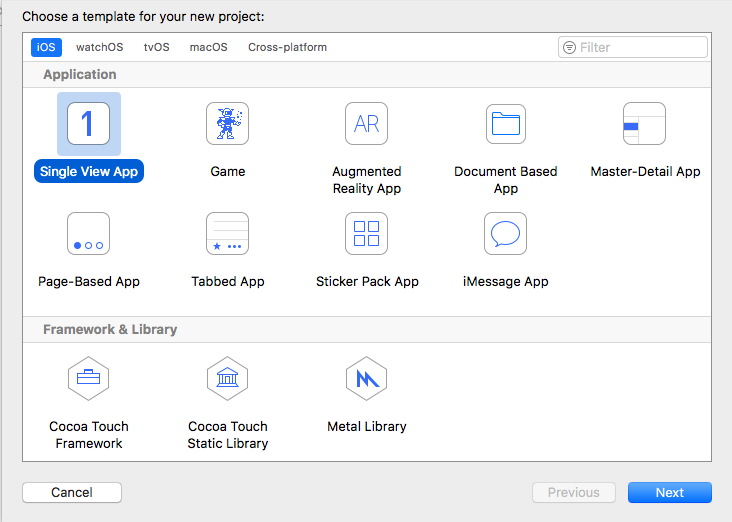
Let’s first quickly enter into the XCode application and click on the create a new application. Later select the single view application from all the options to appear on the screen as shown below.
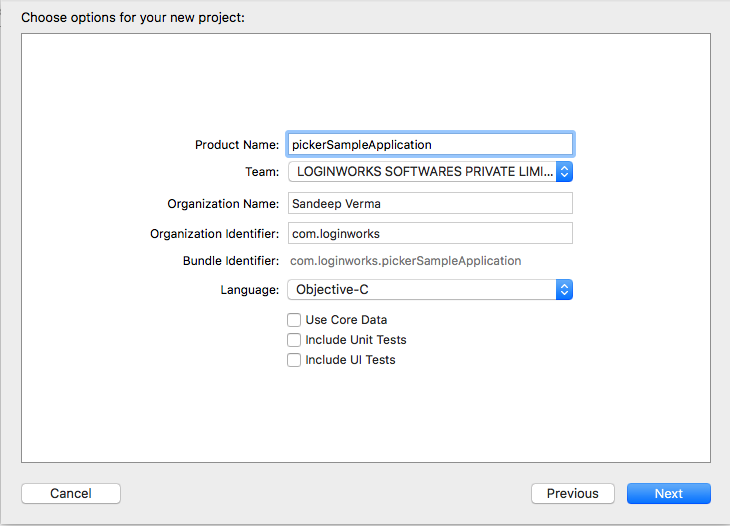
Now, in the next step after you click on the single view application you need to give a name to your iOS app and for this application, I am going to use “pickerSampleApplication“. You can choose a name as per your wish.
Designing the Interface
Now, we will be going to design the initial phase of the application. The things we require here are mentioned below:
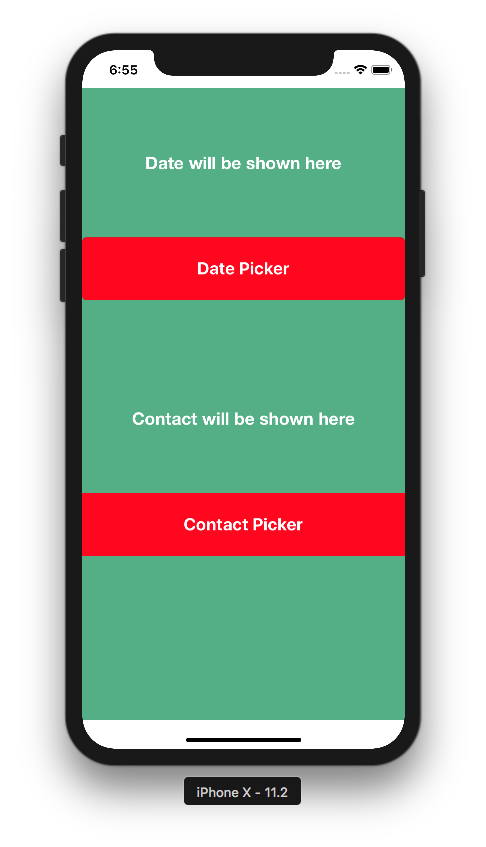
- UILabel – Through which we will be going to show the selected date to the user on that label. Set the constraints as Top spacing to view, center horizontally, equal width and equal height and add a height in the ratio of 0.1 to your view.
- UITextField – With the help of this field we will be going to enable the date selection picker and will allow the user to pick a particular date. Set the constraints as top to the label and center horizontally to view, equal width and equal height to the label.
- UILabel – Now with the help of this label, we will be going to show the particular contact name and its number which will be selected by the user itself using contact picker. Set the constraints as top to the text field, center horizontally to the text field, equal width and equal height to the text field.
- UIButton – This will be going to allow the user to select a particular contact from the default contact list appears in iOS devices. Give constraints to it as top height to label, center horizontal, equal height and equal width to the previous text field.
Connection with Outlets
Now, as we have added the required object in the view. We can now create the connection between the objects and outlets.
Now select each object one by one and drag and drop the object to view controller. h file by hitting control and mouse left click and give it a name as shown.
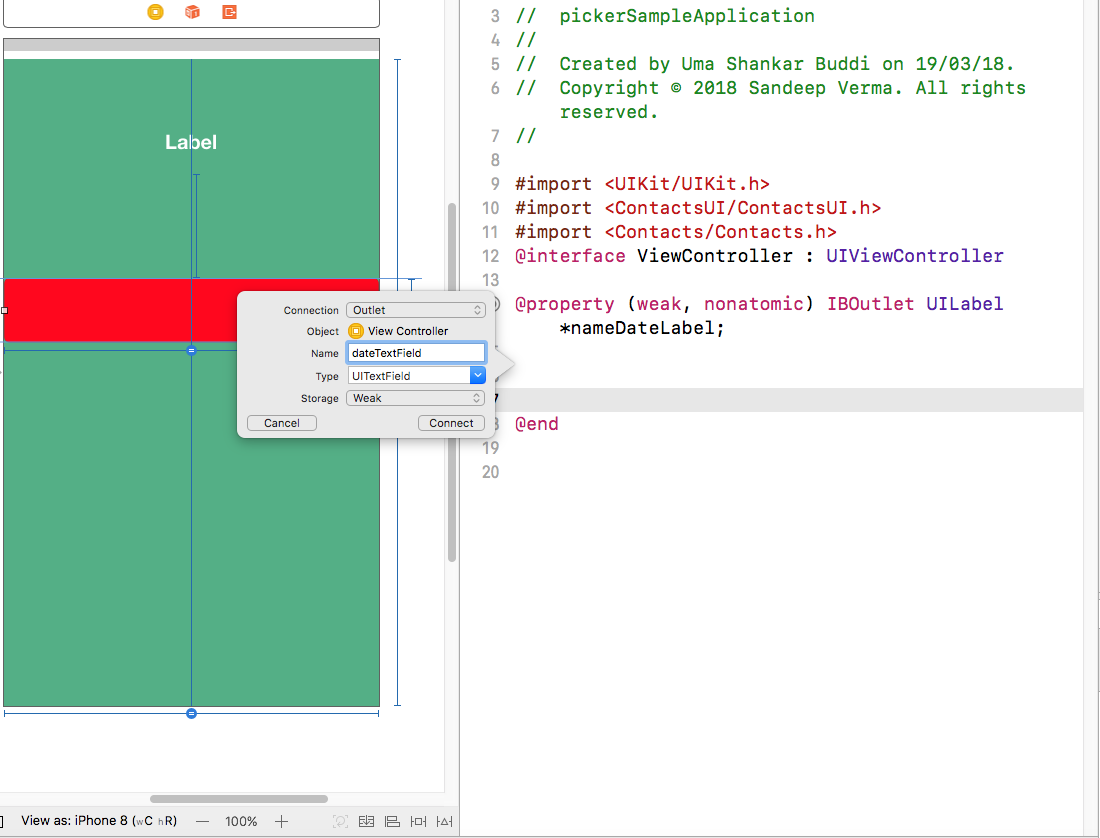
Later after connecting all the objects the viewcontroller.h file will look like this.
#import <UIKit/UIKit.h>

@interface ViewController : UIViewController

@property (weak, nonatomic) IBOutlet UILabel *nameDateLabel;

@property (weak, nonatomic) IBOutlet UITextField *dateTextField;

@property (weak, nonatomic) IBOutlet UILabel *contactLabel;

- (IBAction)contactPicker:(id)sender;

@end
Adding the Framework to the project
Now we need to add the contact framework in the project and to do it head into the Linked Frameworks and Libraries section. Add the following framework to your project as shown below.
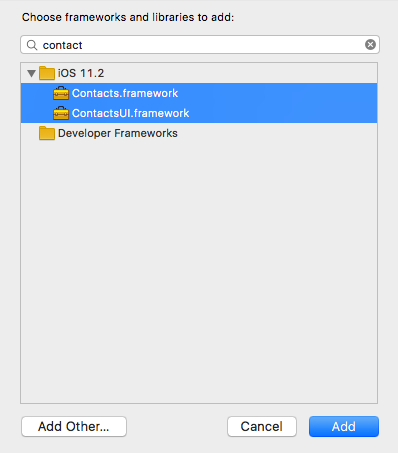
As you can see I am going to use these two frameworks in the application. So that we can access the contact library of the iOS device.
Now, all we need to do is to import the frameworks into the view controller. h file.
To do this add the frameworks as shown below:
#import <MobileCoreServices/MobileCoreServices.h>

#import <Contacts/Contacts.h>

#import <ContactsUI/ContactsUI.h>
Time For Some Code
Here all we need to do is to perform some simple yet important coding in the viewcontroller.m file.
First, go to the file and initialize a date picker and later add the functionality to it as mentioned.
Step 1
@implementation ViewController{

    UIDatePicker *datePicker;

}

- (void)viewDidLoad {

    [super viewDidLoad];

    /* we will be going to initialize our date picker */

    datePicker=[[UIDatePicker alloc]init];

    datePicker.datePickerMode=UIDatePickerModeDate;

    [self.dateTextField setInputView:datePicker];

    UIToolbar *toolBar=[[UIToolbar alloc]initWithFrame:CGRectMake(0, 0, 320, 44)];

    [toolBar setTintColor:[UIColor grayColor]];

/* Here we are adding a done button so that we can close our picker after date selection */

    UIBarButtonItem *doneBtn=[[UIBarButtonItem alloc]initWithTitle:@"Done" style:UIBarButtonItemStylePlain target:self action:@selector(ShowSelectedDate)];

    UIBarButtonItem *space=[[UIBarButtonItem alloc]initWithBarButtonSystemItem:UIBarButtonSystemItemFlexibleSpace target:nil action:nil];

    [toolBar setItems:[NSArray arrayWithObjects:space,doneBtn, nil]];

    [self.dateTextField setInputAccessoryView:toolBar];

 }
As you can see in the above code. I have added a toolbar item here as we need to close the picker after the user hits the done button in the toolbar.
Step 2
Now at this point, we need to create the desired function which is ShowSelectedDate which we are calling after clicking in the done button.
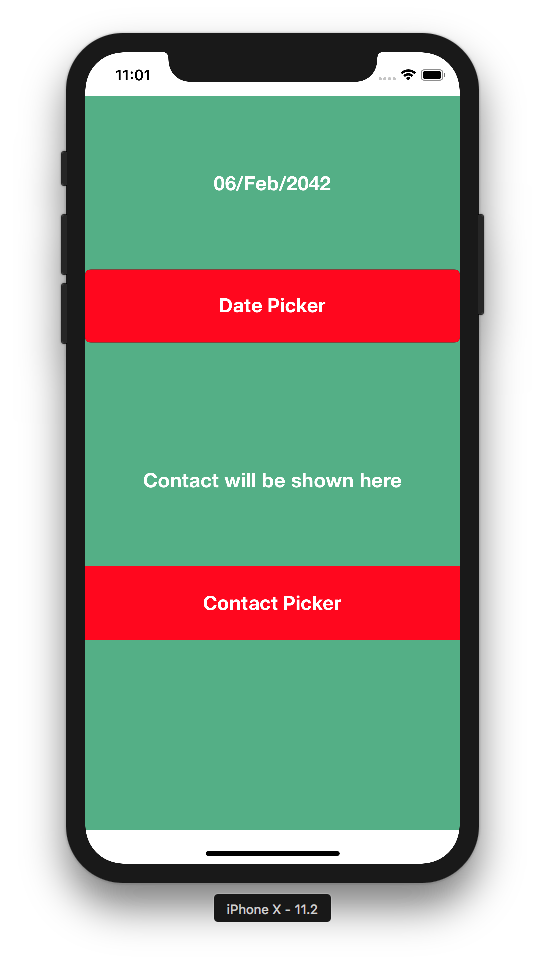
-(void)ShowSelectedDate

{

    /* here we are adding the format which will be shown to the selected date */

    NSDateFormatter *formatter=[[NSDateFormatter alloc]init];

    [formatter setDateFormat:@"dd/MMM/YYYY"];

    self.nameDateLabel.text=[NSString stringWithFormat:@"%@",[formatter stringFromDate:datePicker.date]];

      [self.dateTextField resignFirstResponder];

}
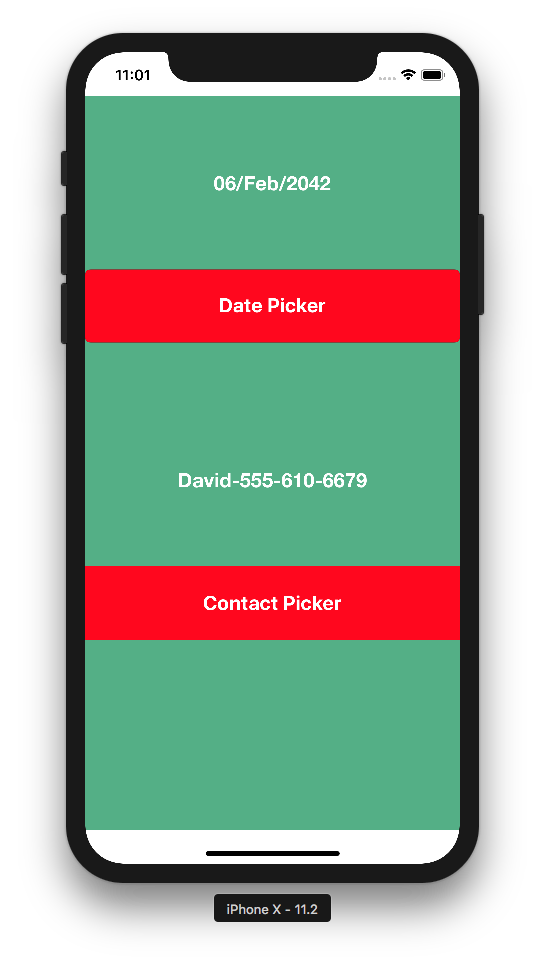
Add the above method in your viewcontroller.m file, later if you run the project then you will see the screen like this.
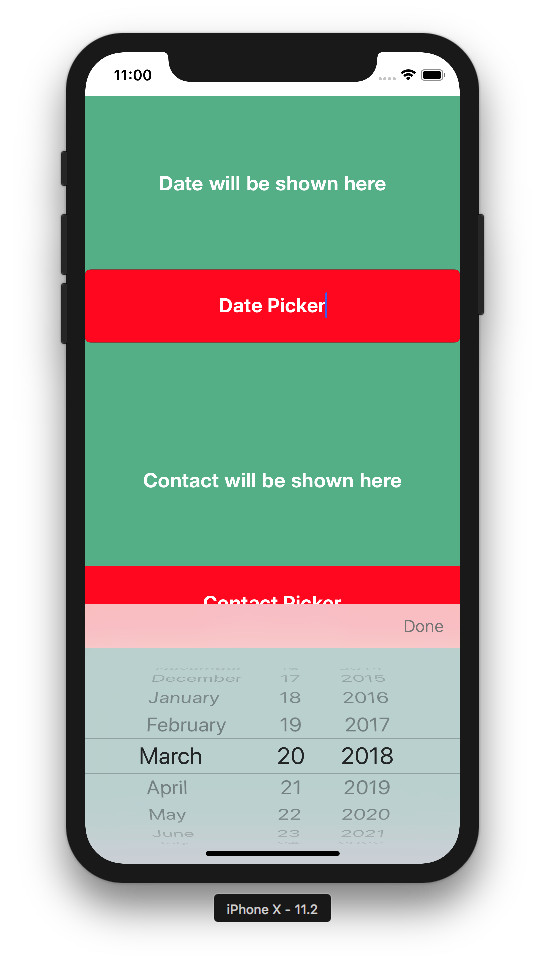
If you click on the Date Picker field, the picker will appear which is similar to this as shown.
Step 3
Now that we have added the code for the date picker. Let’s head to the contact picker action button. Add the delegate method in the viewcontroller.h file
#import <UIKit/UIKit.h>

#import <ContactsUI/ContactsUI.h>

#import <Contacts/Contacts.h>

@interface ViewController : UIViewController<CNContactViewControllerDelegate,CNContactPickerDelegate>
These two delegate methods will be going to call the contact view picker and will perform the action required by us.
Step 4
On the other hand, add the following code to your contact action button as shown below. This will be going to call the default contact list available in iOS Devices.
CNContactPickerViewController *contactPicker = [[CNContactPickerViewController alloc] init];

  contactPicker.delegate = self;

    contactPicker.displayedPropertyKeys = @[CNContactGivenNameKey,CNContactPhoneNumbersKey];

    CNContact *contact;

    [contact valueForKey:@"familyName"];

    NSString *name =[contact valueForKey:@"givenName"];

    NSString *number =[contact valueForKey:@"digits"];

    NSLog(@"name : %@",name);

    NSLog(@"number : %@",number);

    [self presentViewController:contactPicker animated:YES completion:nil];
Later, after doing this add the two delegates methods below the button action as shown:
-(void) contactPicker:(CNContactPickerViewController *)picker didSelectContact:(CNContact *)contact{

    NSArray <CNLabeledValue<CNPhoneNumber *> *> *phoneNumbers = contact.phoneNumbers;

    CNLabeledValue<CNPhoneNumber *> *firstPhone = [phoneNumbers firstObject];

    CNPhoneNumber *number = firstPhone.value;

    NSString *digits = number.stringValue;

    NSString *name = [contact valueForKey:@"givenName"];

    NSLog(@"digits : %@",digits);

    NSLog(@"name : %@",name);

    self.contactLabel.text = [NSString stringWithFormat:@"%@-%@",name,digits];

}

-(void)contactPickerDidCancel:(CNContactPickerViewController *)picker {

    NSLog(@"Cancelled");

}
Now re-run the project and see the action.
As a result, if you click on the contact picker button the default contact list will appear like this
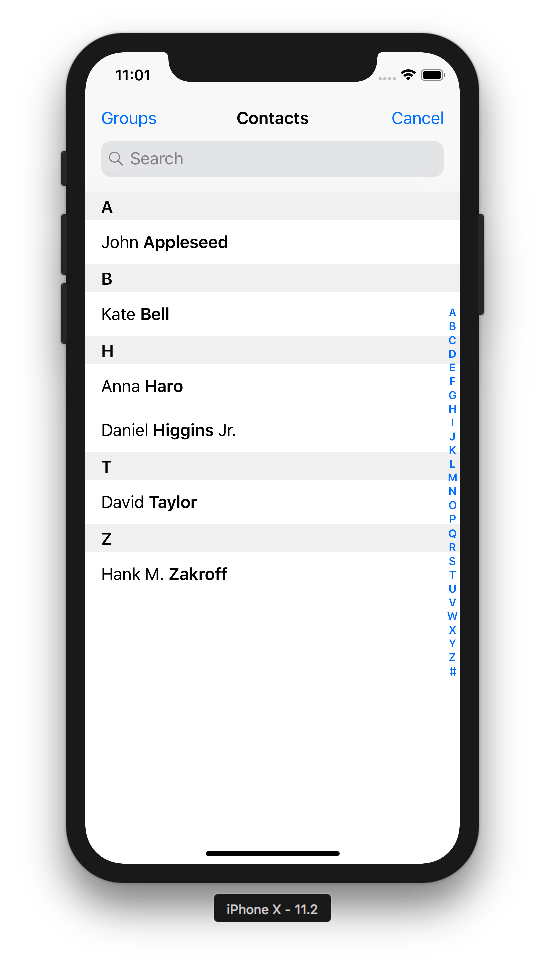
Similarly, after you select the particular contact. It will show the name and contact number on the label which we have added earlier in the application as shown
Conclusion
That’s it we have successfully implemented the two different types of pickers in our project. You can use more pickers in your applications and can reduce the typing efforts done by the user itself.
I hope you will find this tutorial useful. Thank You.
- LinkedIn Scraper | LinkedIn Data Extractor Software Tool - February 22, 2021
- Is Web Scraping Legal? - February 15, 2021
- What Is Data Scraping? - February 10, 2021