


As you already know that how to run the Appium code on real Android devices, but what if you don’t have a real Android device or you need to execute you Appium code on Emulator???
Confused! No need to worry about it, it’s not that much difficult! You just need to follow some simple steps one by one and then you will be able to run your code on the emulator. Once, you know the process completely that how to use Emulator for your code and how to complete the configuration part, then trust me there is no need to wait for the real Android devices to execute your code.
So, let’s get started with the process, but before we are going to start with it you need to know something first that what actually a virtual Android device is, how can you create a virtual Android device and how you can complete the configuration part in your code to execute your code.
What is an Android Virtual Device (AVD)?
An Android Virtual Device (AVD) is an Android Emulator which is used to represent a specific android device. It allows us to test the application as it can simulate the real device capabilities. Android Emulator allows you to test the application without having a physical device.
Advantages
- The emulator can maintain the original configuration of a real Android device.
- Most of the emulators are available on Windows and Linux platform.
- We can configure emulator as per our need like version, screen size, RAM etc. but for this, you need to check that emulator should allow you to do so.
- If you do something wrong in the configuration part of your emulator, then you do not have to worry about it. You can create a new virtual device or can edit the configuration, which is not possible in real devices.
How to create an Android Virtual Device?
You should have Android SDK installed on your system in order to create a virtual device. If you already installed it then it’s good but if you don’t install it then you need to install it first.
Steps to create an Android Virtual Device
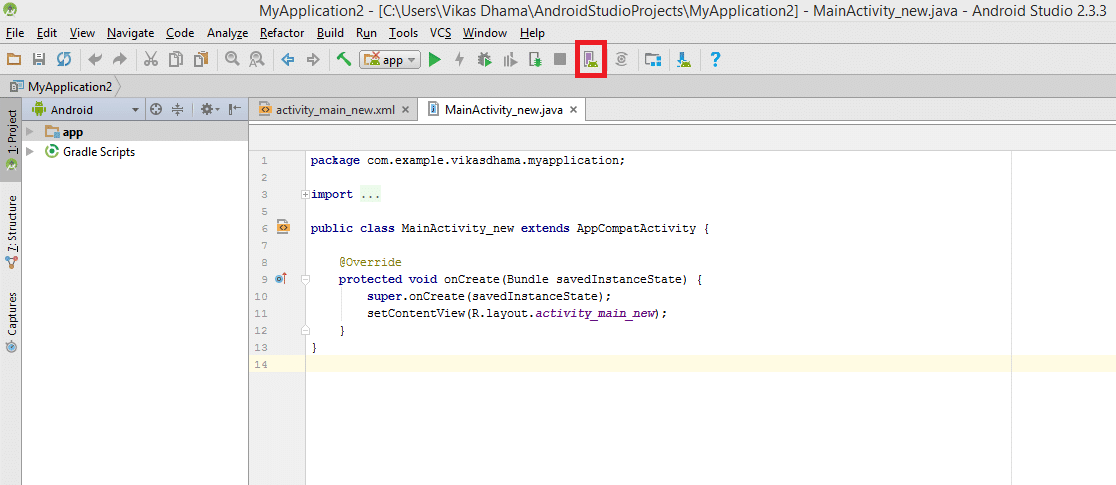
Step 1
- Launch Android SDK and click on AVD icon as shown in the image below.
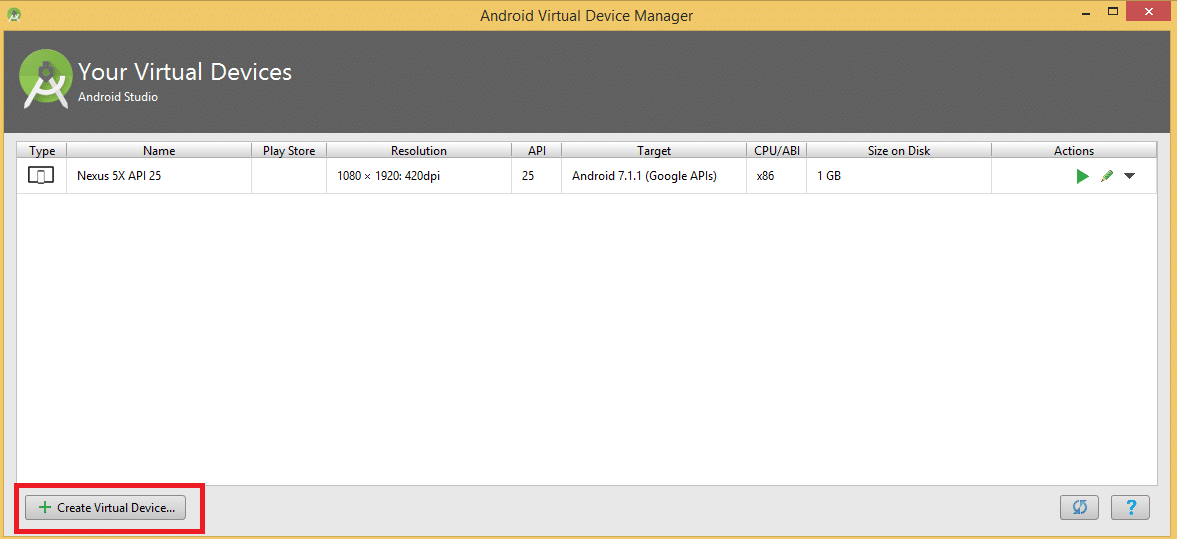
Step 2
- A new window will appear with a list of already created virtual devices and if there is no such device in the list click on create virtual device button.
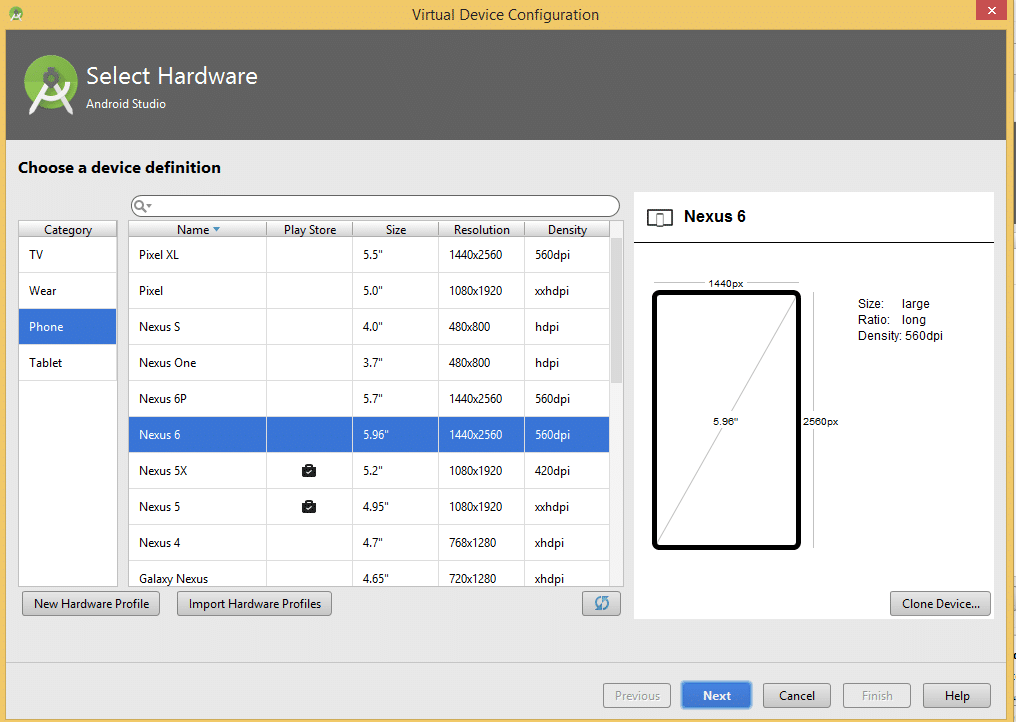
Step 3
- After clicking on the create virtual device button, a window will appear where you need to select the hardware configuration of your virtual device. Select the configuration as per your need and click on next.
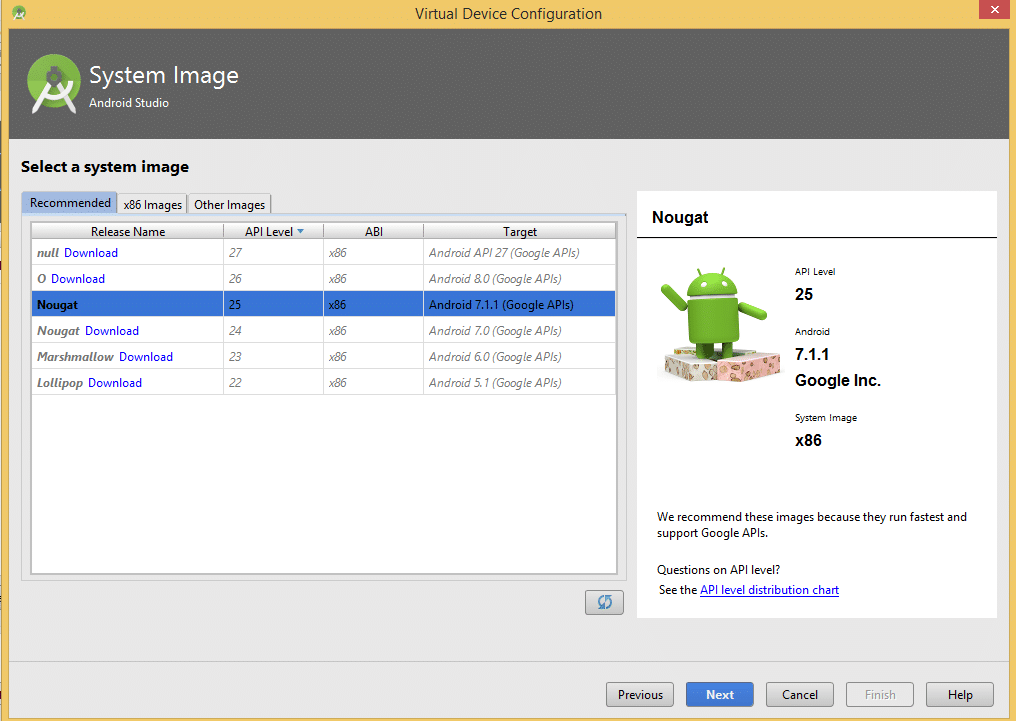
Step 4
- Now the system will display you the recommended system image for your virtual device, here you choose a system image which best suits your need. You can choose the default image or if you want then you can download any other system image and choose it and click on next button.
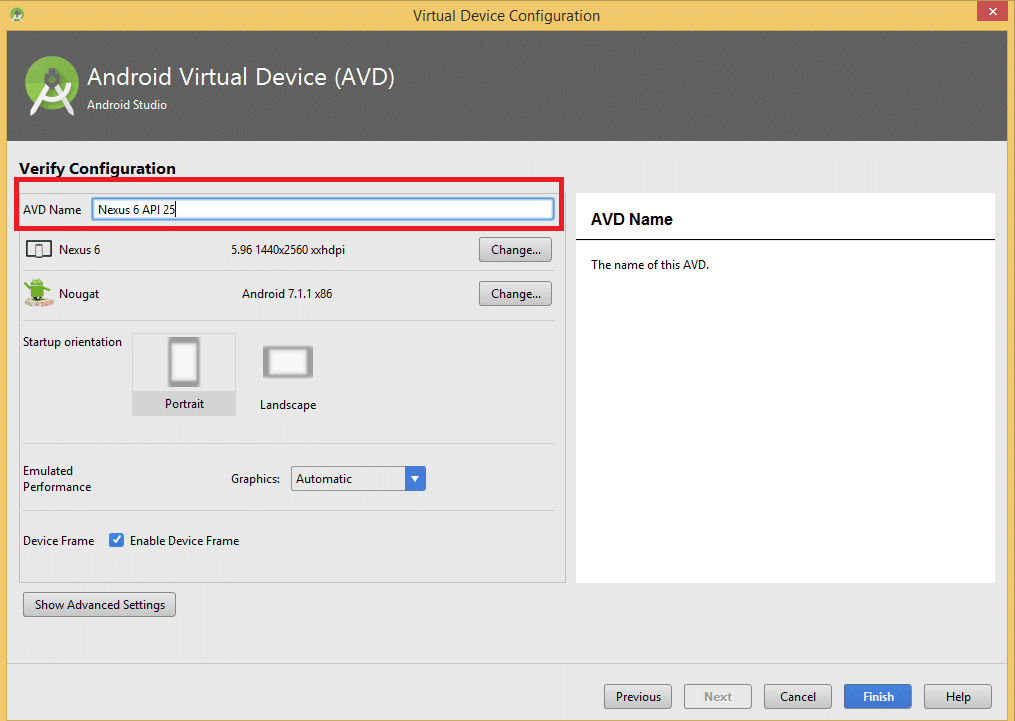
Step 5
- Now, you will see a window providing you the default name for your virtual device, if you want to change the name you can do it here and it will also give you the option to change your hardware and system image along with the orientation of the device. If you want to make some changes you can do it here and then click on finish.
Step 6
- After clicking on the finish a window will appear displaying a list of your created virtual devices along with the details of the resolution, API, android version etc. In the Actions column, there is a play button click on it in order to run your virtual device.
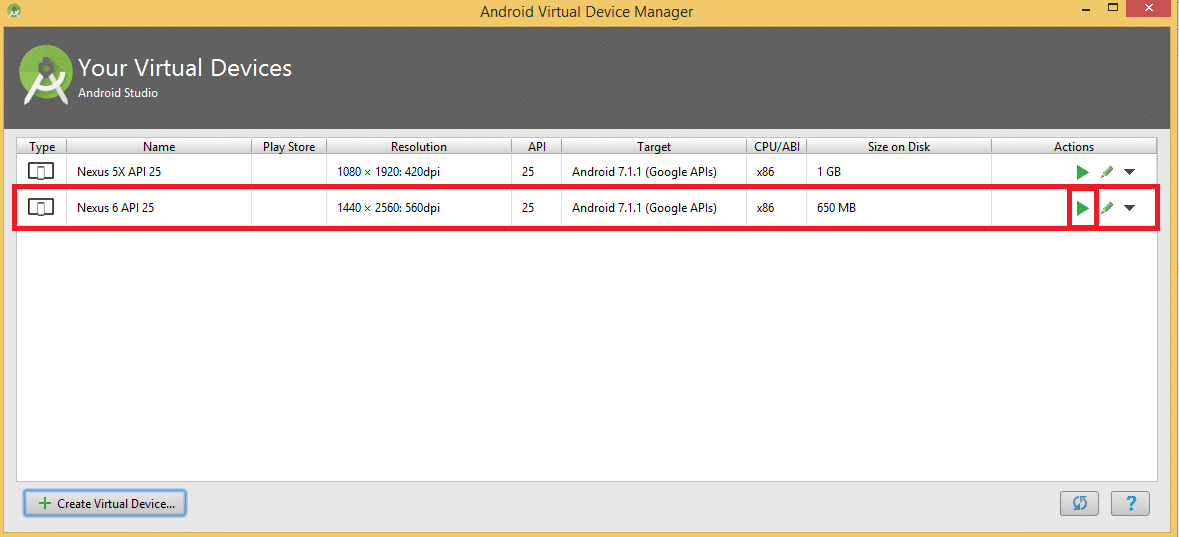
Step 7
- After clicking on this play button wait for some time as it will take some time to start your virtual device. Once, your device has been started, you will be able to run your Appium code on this device by making some necessary change in the configuration part of your test script.
How to configure the virtual device in Appium code?
In order to run your code on the virtual device first, you need to set the desired capabilities for the virtual device in your Appium code. Desired Capabilities are nothing but a way to intimate the Appium server that what kind of session we want. It is just a combination of Key and Value, which gives us more control on the server during automation.
So, let’s start with defining the desired capabilities for the Android Virtual device, in order to run your Appium code successfully on the emulator.
I am giving you the example to automate calculator app on the virtual device, below is the code by which you can set the capabilities for your virtual device.
Desired Capabilities Setting for Emulator
DesiredCapabilities capabilities = new DesiredCapabilities();
capabilities.setCapability("BROWSER_NAME", "Android");
capabilities.setCapability("VERSION", "7.1.1");
capabilities.setCapability("deviceName","Android Emulator");
capabilities.setCapability("platformName","Android");
capabilities.setCapability("avd","Nexus_5X_API_25");
capabilities.setCapability("appPackage","com.android.calculator2");
capabilities.setCapability("appActivity","com.android.calculator2.Calculator");
driver = new AppiumDriver<WebElement>(new URL("https://127.0.0.1:4723/wd/hub"), capabilities);
There are two things in the above-mentioned code which you need to find out, the version of your device and the AVD name.
In order to get the version of your virtual device, you need to follow the same procedure as you follow in your real devices.
Go To Settings >> About Phone >> Android Version.
Copy that version number and paste it in this line of code as I did.
capabilities.setCapability("VERSION", "7.1.1");
AVD name is that name which you have given while creating the virtual device. Give that name in the below-mentioned line of code.
capabilities.setCapability("avd","Nexus_5X_API_25");
Use same app package and app activity name as mention above, but before that make sure calculator app is there on your virtual device. Now, let’s perform a basic operation on this app by dividing two numbers and verify the result for the division function.
WebElement four=driver.findElement(By.name("4"));

four.click();

WebElement div=driver.findElement(By.name("/"));

div.click();

WebElement two=driver.findElement(By.name("2"));

two.click();

WebElement equal=driver.findElement(By.name("="));

equal.click();

WebElement results=driver.findElement(By.tagName("EditText"));

assert results.getText().equals("2"):"Actual value is : "+results.getText()+" did not match with expected value: 2";
Now, run the Appium node server and before executing your code, please make sure that the Android Virtual Device is running. But, there is one thing which you need to take care of, that is running your code on the virtual device will consume a lot of disk space, it can slow down the processing speed of your system. So, it is highly recommended that, if you want to use a virtual device then, you should have a system with good configuration and processing speed.
That’s all you need to do guys, these simple steps will allow you to run your Appium code without the real devices. So, go and get started!