Hello everyone, in this tutorial we will be going to learn more about the X-Code built-in feature through which we can easily create a universal application using two different storyboards.
As we know that sometimes it requires a lot of efforts to make an application which can work on all devices, whether it is an iPhone or iPad. So in this tutorial, you can save your time and get rid of all the issues related to multiple devices. Let’s get started now.
Jump to Section
Initial Launch
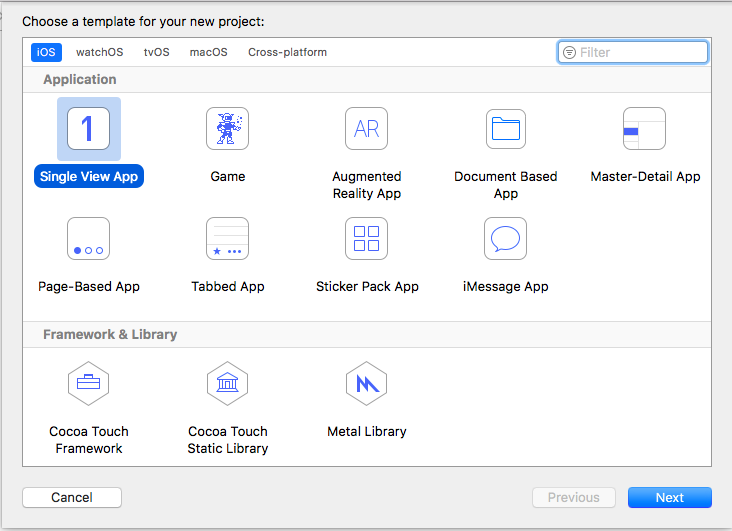
First of all, we will be going to run XCode and from the list of the type of application, we need to select the single view application and then hit on next as shown below.
Then later going to create a new application using it. So head into the Xcode and hit on the create a new application and then give a unique name to your project.
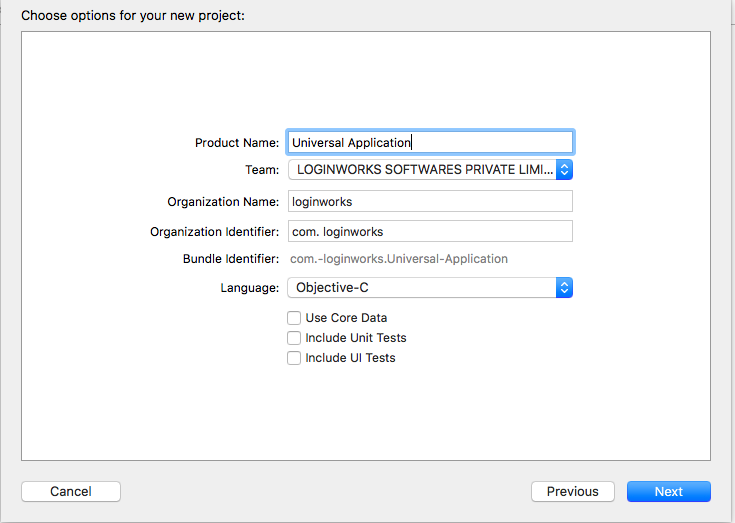
For my application, I am going to use the name as Universal Application as you can see it in the given snapshot above.
Now in the next step, we will be going to create two different storyboards one for iPhone as Main_iPhone.storyboard and for iPad as Main_iPad.storyboard
Designing StoryBoard
Now at this point, we will be going to create our first storyboard which is for iPhone.
Step 1
We will be going to the interface designing and then adding an image view from the interface tool and later giving the constraints to it as shown below.
Centre Horizontal, Centre Vertical, Equal Width and Equal Height.
Later after doing this, we need to add a button on the top of the image.
Step 2
Add a button on the top of the image view so that we can perform some action when the button gets clicked.
Step 3
Give constraints to button as:
Top contraint to view controller, Centre Horizontal, Equal Width, and Equal Height.
Now after doing all this, set a custom color to the button, I am going to use green color for mine you can choose yours.
Step 4
Now we need to create the connection with the outlet and view controller.
Outlet Connection
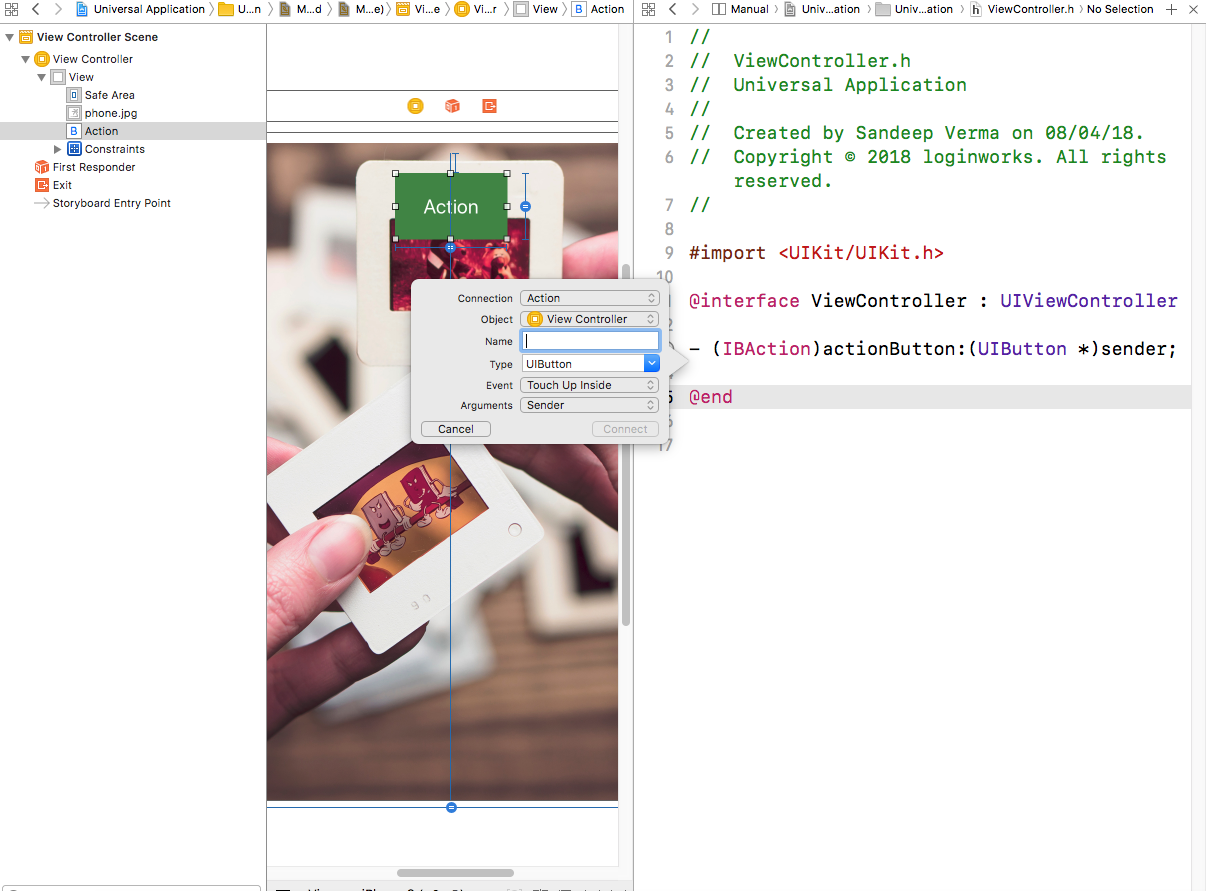
First, we will be going to connect our button to our view controller and to do this head into the main storyboard and by using the assistant manager open the view controller .h file.
Drag and drop the button and create the action as shown.
Now, as we have connected the button with our view controller, we can give some code to perform some action.
Coding Time
Head to your view controller.m file and search for the action button which you have created earlier.
Now at this point, there is a question comes into our mind that, should we use a single view controller class for both iPhone and iPad? Or different class for both? Let us first understand that, it is easier to use separate files for both the different platforms.
If the design and functionality of view controllers are similar to the one in the above example, then you can use a single view controller class for both platforms. But we need to make sure that our code handles the differences between iPad and iPhone.
In iOS, there is an SDK which allows us to make use of the UI_USER_INTERFACE_IDIOM to create different code paths to act as device-specific functionality. These macros lets you easily determine the device type. If the device is an iPhone or iPod, the value returned from the macro will be UIUserInterfaceIdiomPhone. And if the device is an iPad, the value returned is UIUserInterfaceIdiomPad. A typical conditional statement would look like the following:
Add the following code to your button action:
- (IBAction)actionButton:(UIButton *)sender {

    if (UI_USER_INTERFACE_IDIOM() == UIUserInterfaceIdiomPhone)

    {

        // Place iPhone/iPod specific code here...

        UIAlertController *alert = [UIAlertController alertControllerWithTitle:@"Hurray" message:@"This is an iPhone" preferredStyle:UIAlertControllerStyleAlert];

        UIAlertAction *action = [UIAlertAction actionWithTitle:@"Okay" style:UIAlertActionStyleDefault handler:nil];

        [alert addAction:action];

        [self presentViewController:alert animated:YES completion:nil];

    }

    else {


        // Place iPad-specific code here...

        UIAlertController *alert = [UIAlertController alertControllerWithTitle:@"Hurray" message:@"This is an iPad" preferredStyle:UIAlertControllerStyleAlert];

        UIAlertAction *action = [UIAlertAction actionWithTitle:@"Okay" style:UIAlertActionStyleDefault handler:nil];

        [alert addAction:action];

        [self presentViewController:alert animated:YES completion:nil];

    }

}
This code will be going to handle almost everything. As you can see that there are two types of alert shown there because when the user opens the app on iPhone then the alert will be shown for iPhone and another will be for iPad.
Time to Run the Project
Now if we run our project then initially it will be going to show the code only for iPhone not for iPad as we have implemented the action for iPhone only, not for iPad.
So, head into the Main_iPad.storyboard and perform the same functionality for iPad also and then later after adding the button in it add the same button action with the same viewcontroller action which we have created earlier.
Also, don’t forget to define both storyboard types for iPhone and iPad because the default type is always iPhone so we need to define them in our info section of the XCode project.
Now, again run the application and you will see both the alert working according to the device type:
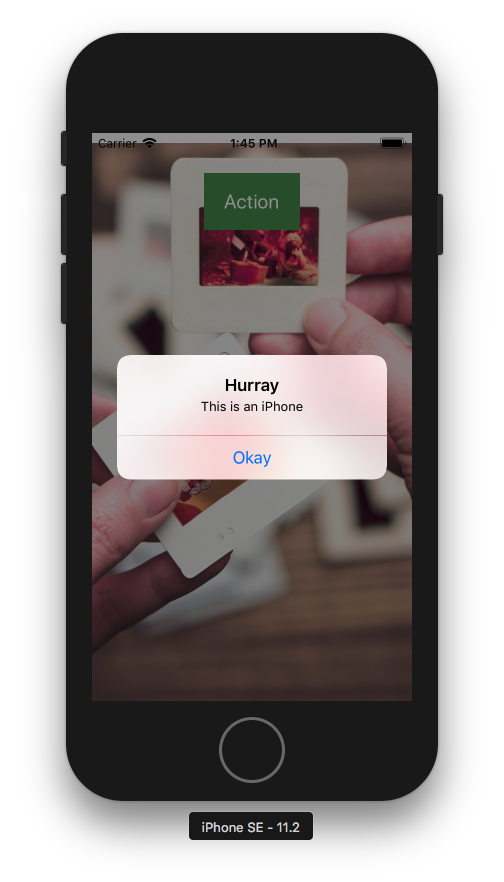
Result 1
If we run the application on iPhone you will see the alert as shown below:
UIAlertController *alert = [UIAlertController alertControllerWithTitle:@"Hurray" message:@"This is an iPhone" preferredStyle:UIAlertControllerStyleAlert];

        UIAlertAction *action = [UIAlertAction actionWithTitle:@"Okay" style:UIAlertActionStyleDefault handler:nil];

        [alert addAction:action];

        [self presentViewController:alert animated:YES completion:nil];
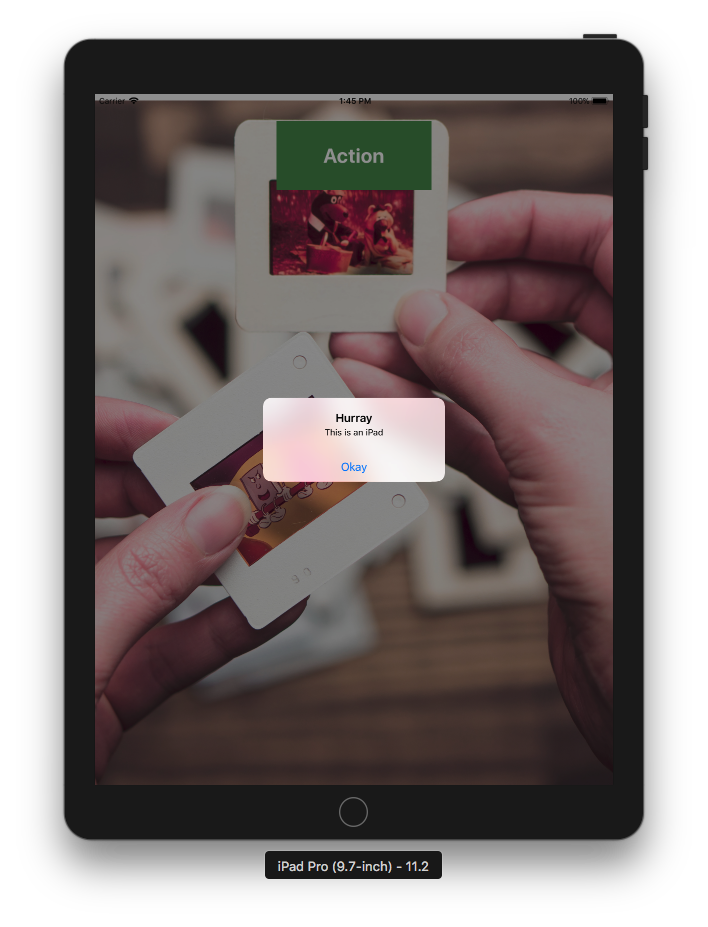
Result 2
If we run the application on iPad you will see the alert as shown below:
  UIAlertController *alert = [UIAlertController alertControllerWithTitle:@"Hurray" message:@"This is an iPad" preferredStyle:UIAlertControllerStyleAlert];

        UIAlertAction *action = [UIAlertAction actionWithTitle:@"Okay" style:UIAlertActionStyleDefault handler:nil];

        [alert addAction:action];

        [self presentViewController:alert animated:YES completion:nil];
Conclusion
That’s it we have successfully implemented the use of UI_USER_INTERFACE_IDIOM in our application through which we can create the universal application that performs a different action according to the different requirement.
We can also do the same thing for the launch screen and can use multiple launch screen for our application. I hope you will find this tutorial useful and it will help you gain some knowledge about the universal application for both iPhone and iPads.
If you want more tutorials like this then let me know in the comments below and we will make more tutorials like this. Thank you!
- LinkedIn Scraper | LinkedIn Data Extractor Software Tool - February 22, 2021
- Is Web Scraping Legal? - February 15, 2021
- What Is Data Scraping? - February 10, 2021