Hey everyone, today in this tutorial we will be going to make a very interesting application which is related to Apple watch OS development.
Yes, you heard the right thing. As we know that the iOS app development plays an important role in the field of mobile app development, WatchOS development, Mac OS Development and more.
We have already created a lot of applications related to iPhone app development but today, we will be going to move ahead towards the WatchOS Development for Apple Watches.
Jump to Section
Environment Setup
Let’s first create the setup of the initial environment through which we will be going to create our first application. Follow the steps below as shown:
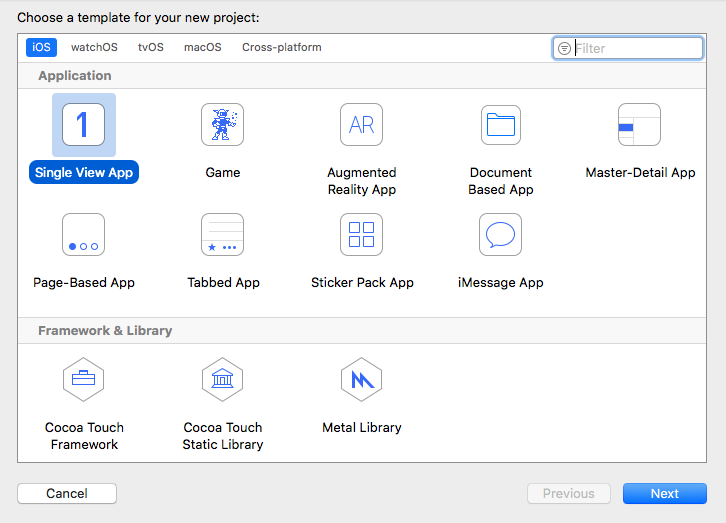
Open Xcode then click on the ‘create a new application’ and select ‘single view application’ from the types of list available as shown.
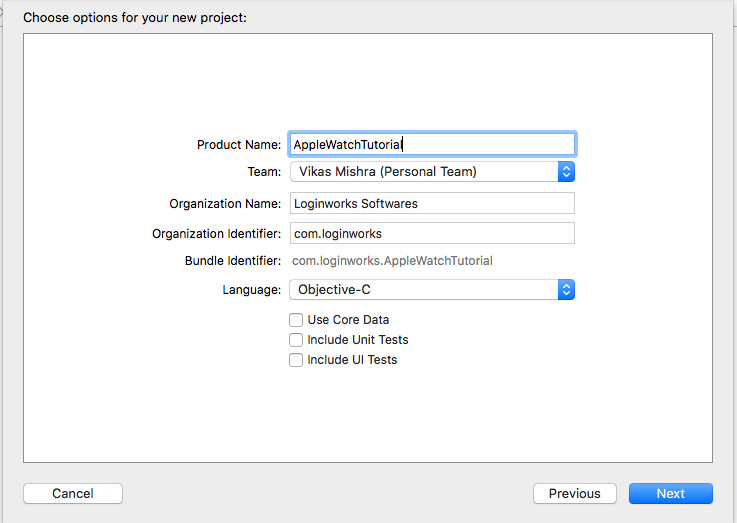
After this step, you need to head to the next screen where you can enter the name for your application and click on ‘next’ to save it on a particular path.
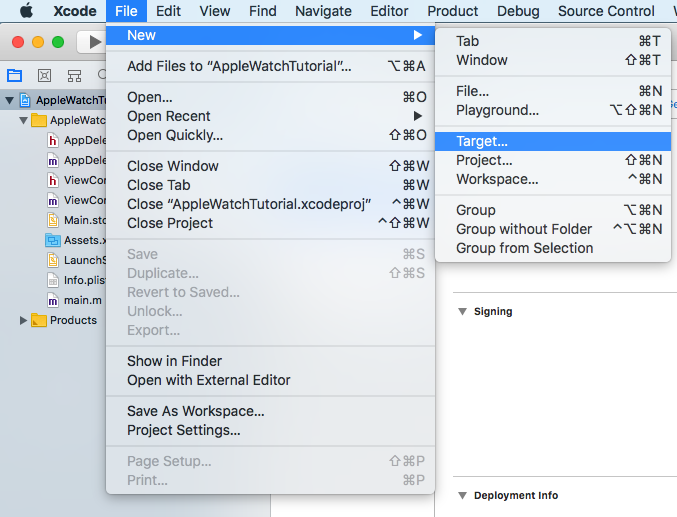
Now, as we have done with the initial part, we only need to create the required files for the WatchOS development. For this step, head into the file section and then select a new target from it as shown below.
Now, after doing this another window will appear, from which you need to select a template on which you want to make the application. From that section select ‘WatchOS area’ and application type will be ‘WatchKit App’ as shown below.
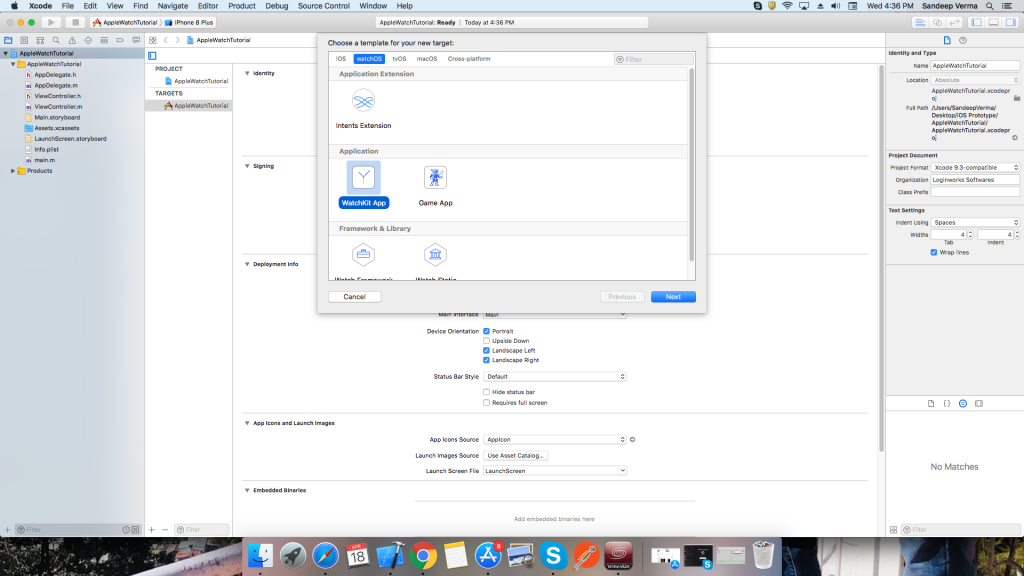
It will be going to ask you a confirmation when you will click next in the previous section click ok and you now have the environment ready for WatchOS application.
For now, we will be going to make a simple timer application. Let’s move ahead now and enter into designing phase.
Interface Designing
Now, we can move ahead and design our user interface for the WatchOS, first drag and drop one UILabel from the object library.
Then after doing this, select two UIButtons from the library, and add them below the label you have previously added.
Give names to button one by one. The first button will be your Start Button through which time can be started.
Another will be the Reset Button through which the timer will get stopped.

If you follow all the steps then your design will look identical to this image which is shown above.
As you can see that I have added a green color to my buttons just to highlight them.
Connect Objects and Outlets
Now we can move forward and connect the objects with the viewcontroller which is InterfaceController.h file.
First, connect the label through which we will be going to display the timer running on the screen of WatchOS as shown in the snapshot below.
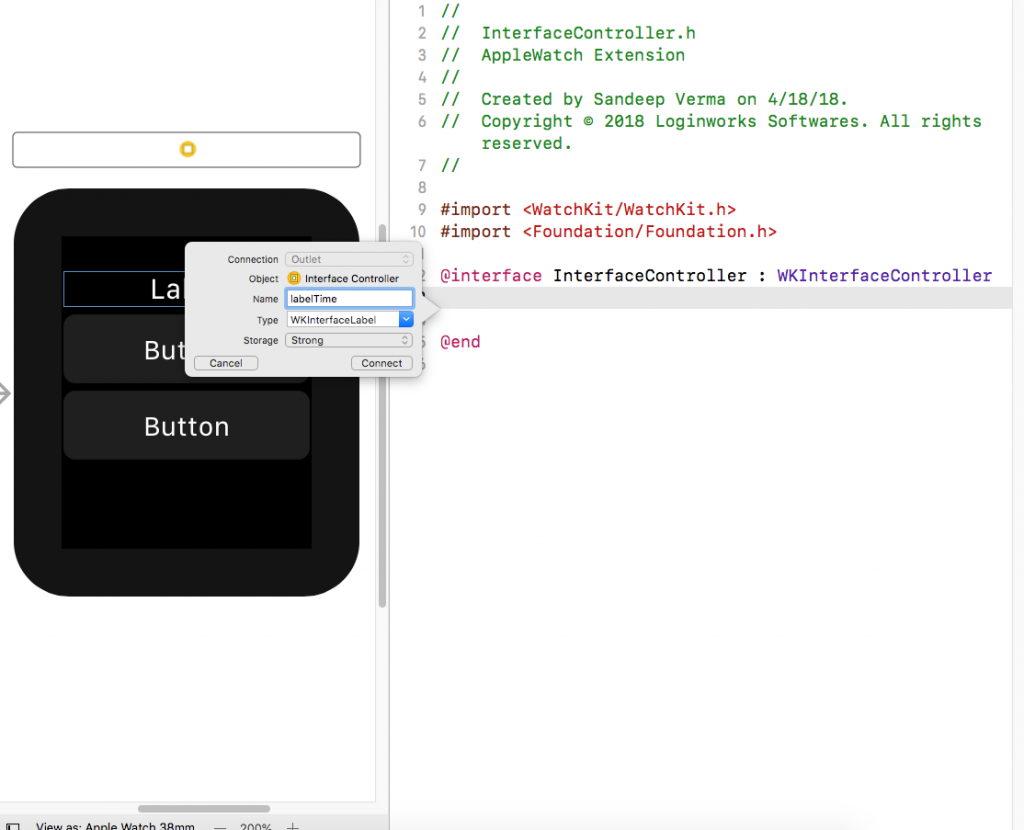
Second, connect the two buttons one at a time and create their actions as well as Outlets so that we can change their name later according to the requirement.
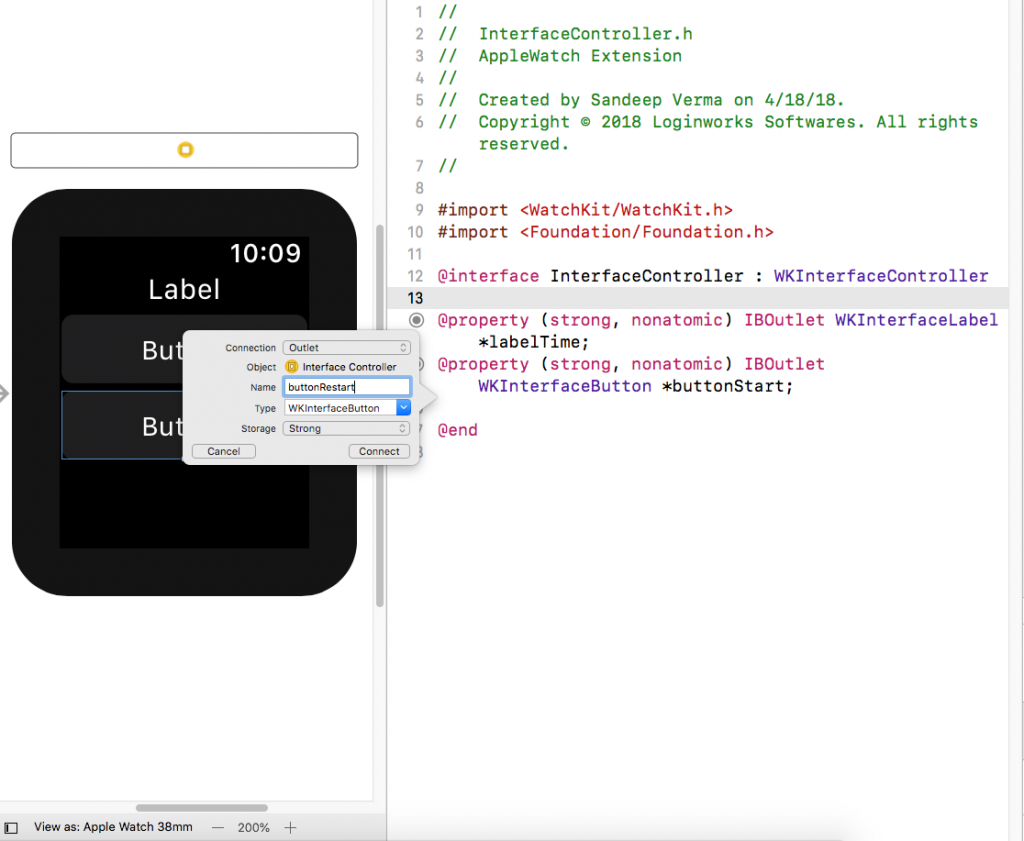
Create a function as “updateTime” to update the time as we will be going to use it soon in our application. After doing all this, your file will look similar to this as shown.
#import <WatchKit/WatchKit.h>

#import <Foundation/Foundation.h>

@interface InterfaceController : WKInterfaceController

@property (strong, nonatomic) IBOutlet WKInterfaceLabel *labelTime;

@property (strong, nonatomic) IBOutlet WKInterfaceButton *buttonStart;

@property (strong, nonatomic) IBOutlet WKInterfaceButton *buttonRestart;

- (IBAction)buttonStartAction;

- (IBAction)buttonResetAction;

-(void)updateTime;

@end
Now, we can do some functionality to make the application working.
Coding Time
We now going to create a simple and quite effective code through which we can run our custom timer in the WatchOS application. Now, head to InterfaceController.m file and initialize few things as shown below.
- NSTimer – With this we will run our custom timer.
- BOOL – Through which we can check our running state of the timer.
- Int – It will be used to count the value of the timer running at the particular time.
@interface InterfaceController (){ NSTimer *newTimer; BOOL runningState; int countValue; }
Now after finishing this, add the required functionality inside your awakeWithContext method and set the label text in the timer format as shown.
runningState= NO;

    countValue = 0;

    labelTime.text = @"00:00:00";
This will be going to set the value of the counter to zero. The initial state of running state to No and label text to “00:00:00”
Adding Action to Buttons
Now add the required code inside the buttons which are the start and restart button. We will check if the state of button is No then we will perform the timer action inside it as shown.
- (IBAction)buttonStartAction {

    if (runningState == NO) {

        runningState = YES;

        [buttonStart setTitle:@"Stop"];

                if (newTimer == nil) {

                       newTimer = [NSTimer scheduledTimerWithTimeInterval:0.01 target:self selector:@selector(updateTime) userInfo:nil repeats:YES];

             }

       } else {

           [self stopTheTimer];

     }

}
Using few Methods
We need to add code for the button which is Restart Button, inside which we will stop the timer and will change the value of label back to zero.
- (IBAction)buttonResetAction {

    [self stopTheTimer];

      countValue = 0;

    labelTime.text = @"00:00:00";

}
Two methods which are used to update the timer and to stop the timer are mentioned below.
-(void)updateTime{

    countValue++;

      int minutes = floor(countValue/100/60);

    int seconds = floor(countValue/100);

    int miliSec = countValue % 100;

     if (seconds >= 60) {

        seconds = seconds % 60;

    }

     labelTime.text = [NSString stringWithFormat:@"%02d:%02d:%02d",minutes,seconds,miliSec];

}

- (void)stopTheTimer {

     runningState = NO;

    [newTimer invalidate];

    newTimer = nil;

    [buttonStart setTitle:@"Start"];

}
Here, it is we have now added the required functionality inside our application. We can now check whether the application is working according to the requirement or not.
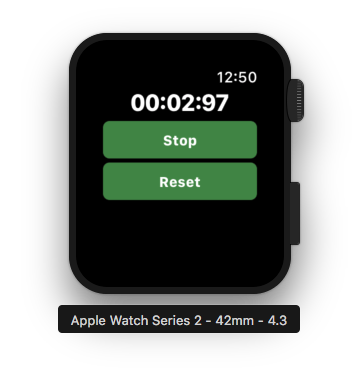
You have to start the simulator and select the iPhone 7 plus + Apple watch 2 simulator from the list above in the simulator section inside the XCode. This in turns going to open the WatchOS Simulator for you where you can check your application.
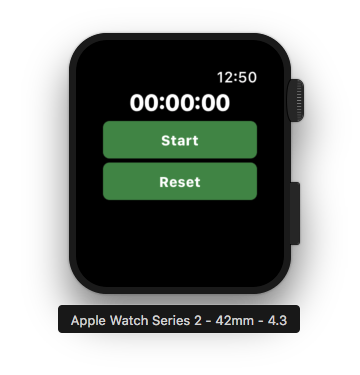
As you can see the application is working fine as expected in the image above. Click on the start button and it will turn the timer on as expected by us.
That’s it, follow all the steps above and you will also end up with a good entry level application like this.
Summing Up
This was our first application made using the Apple’s WatchOS development Kit. There are a lot more objects we can use to develop even more interesting applications.
I hope you will find this tutorial interesting. Thank You!
- LinkedIn Scraper | LinkedIn Data Extractor Software Tool - February 22, 2021
- Is Web Scraping Legal? - February 15, 2021
- What Is Data Scraping? - February 10, 2021
1 thought on “How to create an apple watch application in iOS with Objective-C?”