
You must had a successful launch of your Magento store. But in order to meet the cut-throat competition of eCommerce industry you have to make your store more user-friendly. So here Magento magic will work out for you. Magento has extensible multi-currency platform for users from different countries. This amazing magic of Magento is very useful for all the merchants.
Let’s dig deep into so that you can get an idea how to add this feature to your store.
Jump to Section
Magento Currency Converter
Magento currency converter converts the rates of the products that you are selling in your store.These changes are according to the countries the users reside in real time. You do not need to set any variable, only you require is it correct installation. Follow these simple steps, install it and enjoy the benefits.
Step 1: Login to Admin Panel
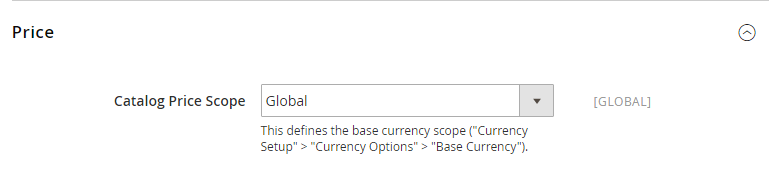
When you first installed Magento you are allowed to use only one currency by default. So from login to admin panel, you can add more. Let’s begin: After you login go to System menu it goes like this: Price>Catalog Price Scope>Global.
You need to click on configuration and then here are the currency setup options you can see. These options will appear on your left-hand side. Now the first one is Currency Option that you need to click on.
Step: 2 Choose the Currencies
Your next step is to choose the currencies.Now because Magento has inbuilt functionality for currencies that make it easy to create custom currency selector. Then you need to put the selected currency in the header. You will get the options of below currencies:
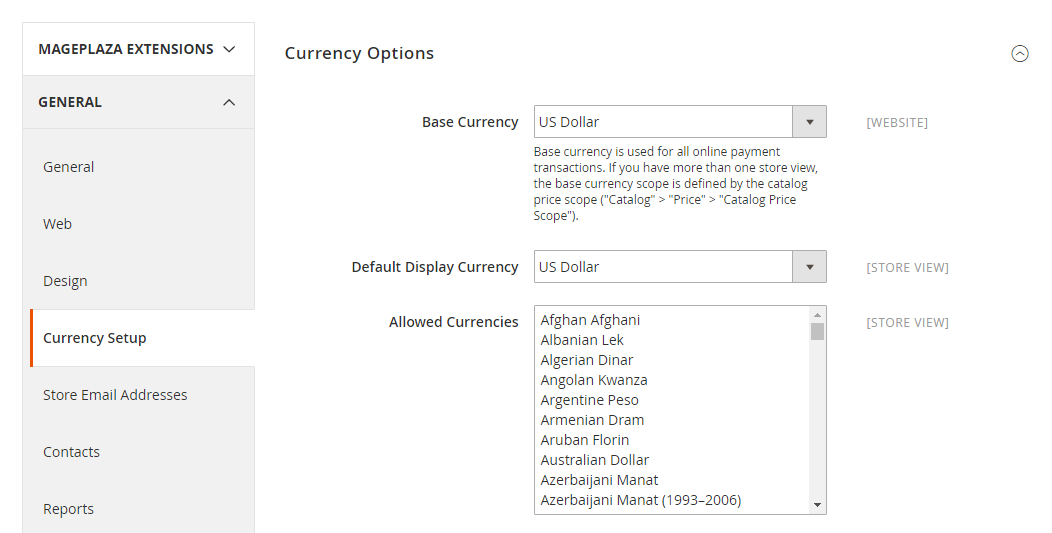
Base Currency
Base currency is the default currency that you used for payment transactions. This currency is set in the admin panel and directly associated with the prices of your products.
Currency Options>Base Currency>Default Display Currency>Allowed Currencies
If you will change the base currency then also the prices of your products will remain the same. For example, your base currency is a dollar and you set 20$ for your product. Then if you’ll change the base currency to pounds then also the price will remain same regardless of their value. But if you are selling in more than one currency and already change the base currency. Then you should fix the currency rates according to their current value.
Default Display Currency
Now next currency you need to select is the default currency. This used to show the prices of the products on the frontend of your store. This is the currency that will be visible to your customers when they first visit your store. From the allowed currencies options you can choose your default currency and it can be set up according to the view of your store.
Allowed Currencies
Now here comes the category of allowed currencies. In this you will get the long list from where you can choose the currencies that appear on the frontend of your store. Furthermore, in order to select more than one you need to press Ctrl button and then hold it. Then click it with the left button of the mouse on whatever currency you opt. If you want to allow more than one currency then a drop- down menu will appear on the front end of the store. From there customers can choose their currencies and make the payments. The prices will be re-calculated on the basis of the present rates that you have reset in the admin panel.
Note: If the currency rate is not mentioned then it will not appear on the frontend even if it gets enabled.
Step 3: Manage Currency Rates
Move on, your third step is to manage the currency rates. What you need to do is go to System, then click on Manage Currency Rates>Rates. If you want to allow more than one currency then you need to set their rates. Else they will not appear on the frontend. Below you can see a table carry base currency. In this row, the text is a field for each chosen currency.
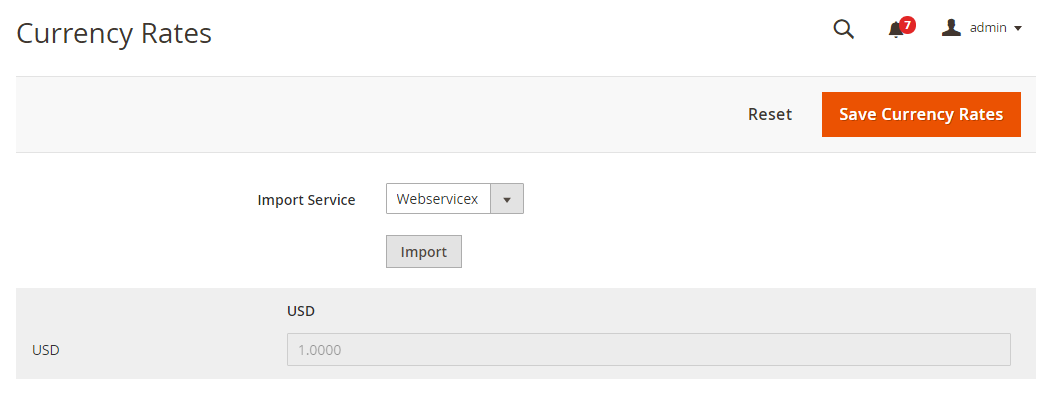
Hence you can configure the rates of currencies in different ways. First is, you can type the rate of respective currencies in the field in proportionate to the base currency. But for this obviously, you have to know the current conversion rates. These rates will remain unchanged until you type or they get updated automatically.
Step 4: Currency Setup
You can import the rates as well to get automatic updates. For that you need to go to Configuration>Currency Setup>Scheduled Import Settings from admin panel.
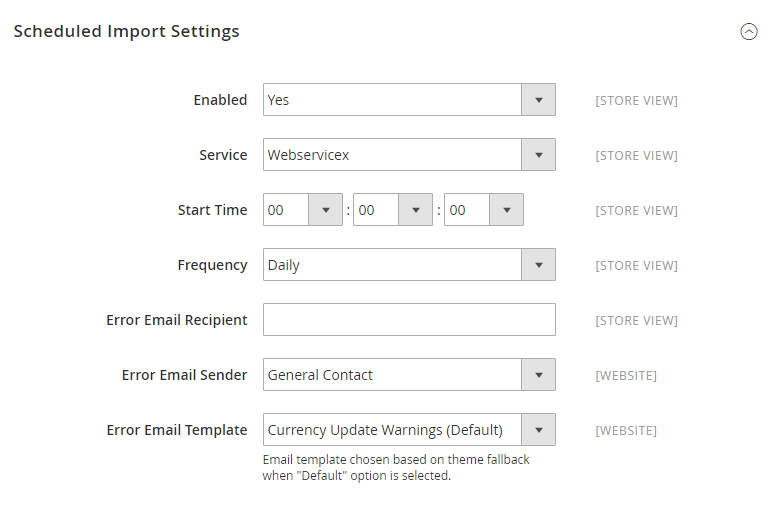
This is an easy way for you to get the current rates in just one click. You need to go to Import button exactly in the upper right corner of the panel. The moment you click on this button all the existing rates whether typed or imported will be updated automatically. In this way, all rates will be set and updated according to the current rates. This will be done with the help of Webservicex. At the last don’t forget to click on Save Currency Rates button to save the changes you have made.
Step 5: Set Symbols
Moving forward your next step is set Symbols. For this you need to follow: Manage Currency>Symbols.
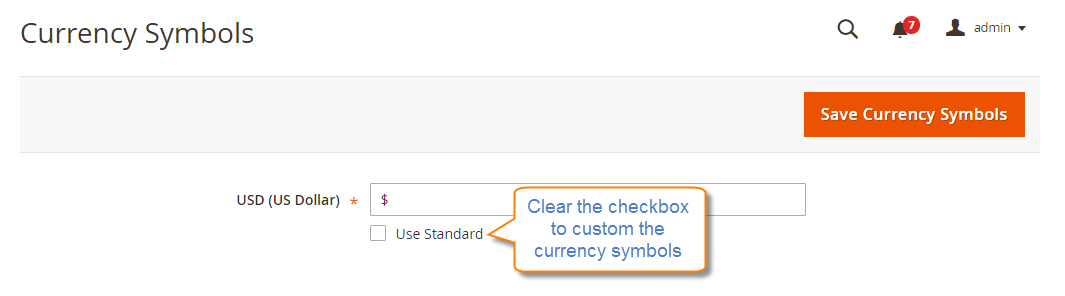 When you select the currencies the common symbol related to a particular currency will appear on the frontend. So with this superb feature, you can change the symbols of default currency that you choose. In the screenshot you can see a table with each allowed currency with its symbol. Therefore to change the symbol for a currency you need to unmark the Use Standard checkbox. This is for every selected currency and then click on Save Currency Symbols to save the settings.
Thus once you follow these steps for currency converter configuration your customers can select their respective currencies to make the payments. The prices will be adjusted according to the current rates set in the admin panel.
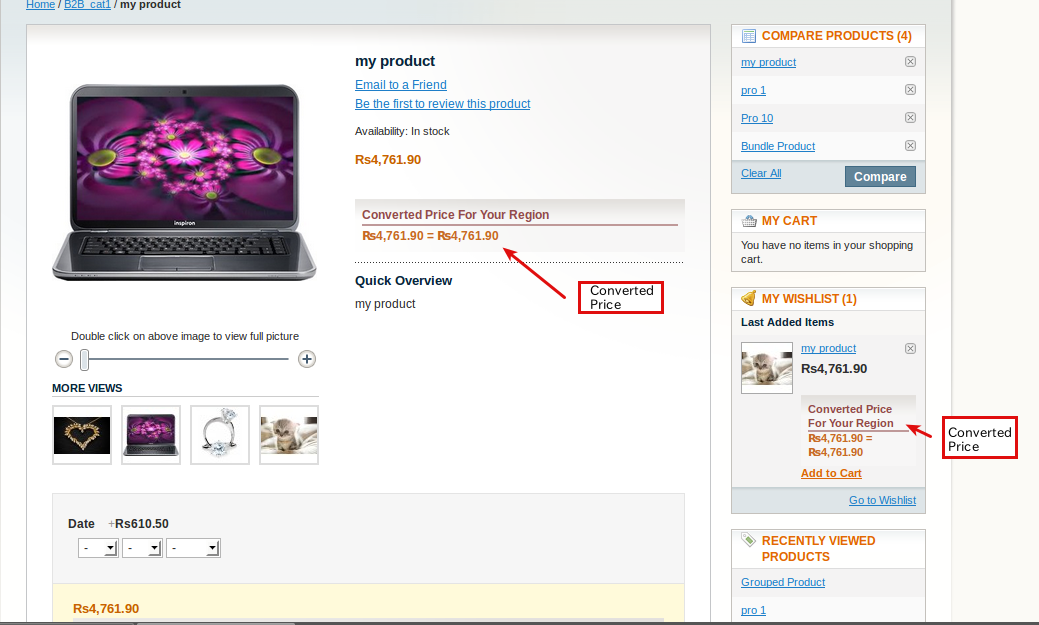
In this way, currency converter module in Magento helps you to understand how the currencies can be used. The rates will get automatic update and conversion will also become easy for your customers. This will enhance the user experience and increase your sales. Keep in mind!Customers love to purchase from the eCommerce store that gives them immediate conversion of rates in their own currencies.
- What Is Big Data Visualization? - January 22, 2021
- Five Benefits of Big Data Analytics for E-commerce - July 9, 2020
- Google Data Studio Vs. Tableau: Which One is More Suitable for Your Business? - June 25, 2020