Before starting let’s get acknowledged about AngularJS!
AngularJS allows us to work out every nice single page applications easily, particularly when we become well-versed with all the concepts. If we need to execute a single page application, it’s can be bit much to set up the important config, routing, components, services and more than makes up an Angular app.
Most of us look for something simple and easy to use.
Jump to Section
For something lightweight, the Best Solution is Vue.js!!!
Vue is easy to use a format which can be really easy and smooth to work on. Vue.js is a JavaScript framework, which is versatile, approachable and easy to use. For Vue.js development, you are only required to have a basic knowledge of HTML, CSS, and JavaScript.
It is a progressive framework for building user interfaces. It’s library is focused on the view layers and is very easy to understand and integrate with other libraries or existing applications. In order to explain you in a better manner let me make you aware with some of the highlights of Vue:
- Reactive Interfaces
- Declarative Rendering
- Data Binding
- Directives
- Template Logic
- Components
- Event Handling
- Computed Properties
- CSS Transitions and Animations
- Filters
The Vue.js library is very small in size and ensures that your project greduces to minimal with its use and your website loading gets a fast pace.
How To Install Vue.js?
To use CDN, no need to install NPM.
To use Vue-cli, install Node Package Manager (NPM).
There are different ways to include Vue.js:
- Add CDN by including tag in HTML file
- Install using Node Package Manager (NPM)
- Use Vue-cli to setup your project
Using Vue.js CDN
For thhis, create a HTML file. Let us suppose file name is myFirstApp.html.
Now in html file use below code for simple demonstration of Vue.js.
The output of this file show “Hello Vue!” in browser. In this example, Vue.js render data to the DOM using straightforward template syntax.
Using NPM
First install node.js and its installation on how to install node.js for different operating systems are as follows:
For Windows: https://nodejs.org/en/download/
For Ubuntu: https://nodejs.org/en/download/package-manager/
NPM is the beneficial installation method for large-scale Vue applications
After install nodejs, steps for installation process of Vue.js are as follows:
For local setup:
$ npm install vue
Using Vue-cli
To install Vue globally first, we need to install Vue-cli.
$ npm install -g vue-cli
Make sure that Node.js and the npm command is available on your system.
Second step to initiate a project:
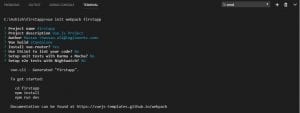
$ vue init webpack firstapp
We’re telling Vue to initiate a new project and use the webpack template.
We can give the project name firstapp and execute the commands on the command line in the accompanying screenshot:
The project is created in the folder firstapp. Change into that registry with the accompanying command:
$ cd firstapp
Again start installing the dependencies by using npm:
$ npm install
Subsequent to finishing the establishment of hub bundles you can begin the server being developed mode by utilizing the accompanying command:
$ npm run dev
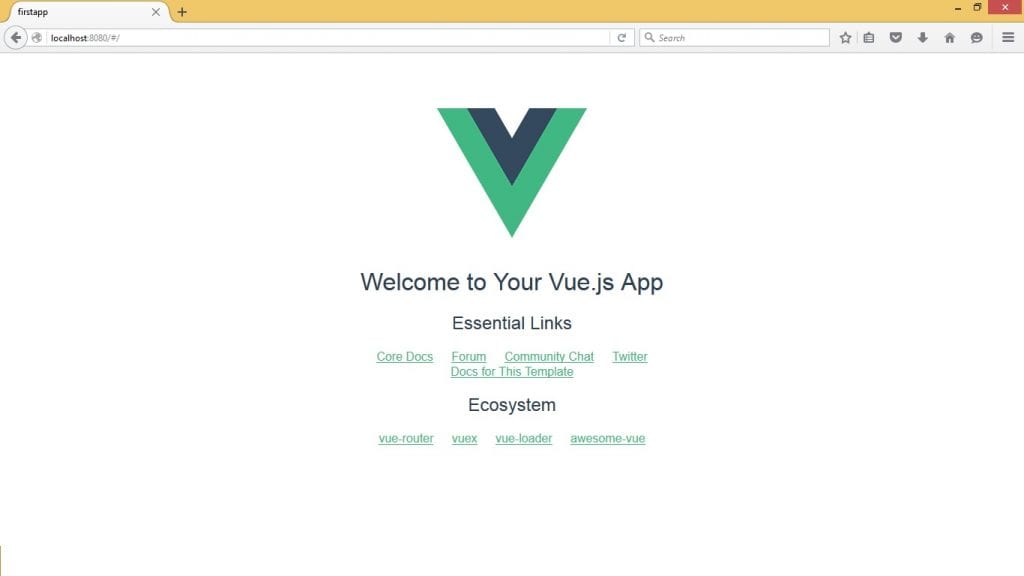
This will start the server on port 8080 and the application output will display in the browser automatically:
On the off chance that you need to work for production, you can run the accompanying order:
$ npm run build
Vue.js Project Structure
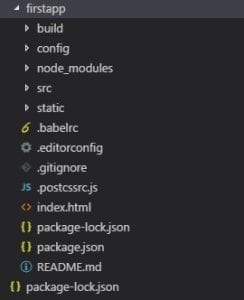
Let’s take a look at the vuejs initial project structure which is available in folder:
In the project root folder, you can find files and folders. We should analyze the most vital ones.
Dependencies In Vue
The package.json files contain all the dependencies of your project. By using the command npm install, before we have made sure that the dependencies listed in package.json are installed into the node_modules folder of the project.
Structure of index.html contains the accompanying HTML code:
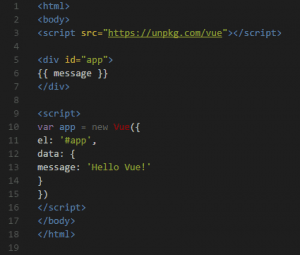
This index.html file is the starting point of Vue.js application and within the body element is available which has the id property set to string app. This component is utilized for the yield which is created by Vue.js.
import Vue from ‘vue’
import App from ‘./App’
import router from ‘./router’
Vue.config.productionTip = false
new Vue({
el: ‘#app’,
router,
template: ”,
components: { App }
})
On top of file you can find three import statements
import Vue from ‘vue’: Vue is the main class of Vue.js framework
import App from ‘./App’ : App is the root component
import router from ‘./router’ : To map components to the routes
The new keyword created a new instance of the main framework. The constructor takes a question as a parameter which contains accompanying three properties:
- el: By assigning the #app to this property we are defining that the output of the Vue application should be rendered to the element in index.html.
- template: The template contains the HTML source code which is used to generate the output.
- components: Vue.js components which are used in the template.
The template consists of only one element: <App/>, this is not a standard HTML element. This is the element which is assigned to App component. To use <App/> in the template the App component is also listed in the object which is assigned to the components property.
App.vue
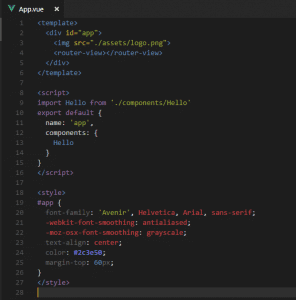
Code structure of App component implementation in file App.vue:
As in each Vue.js single-document segment, the App usage is part up into accompanying three sections:
- <template></template>: Component’s template code
- <script >: Component’s script code
- <style></style>: Component’ CSS code
The content segment is influencing a default to a fare of a protest declaring the segment named app. This subcomponent is utilized as a part of the layout code of an application and actualized in document hello.vue in folder components.
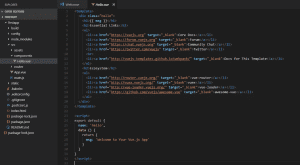
The execution of part Hello resembles the accompanying:
The segment setup question is traded as default. The part design question now established, contains an information strategy. This technique restores a question which speaks to the part’s model. Properties characterized in the model question can be utilized as a part of the segment’s layout by utilizing the addition sentence structure.
In the case of over the model, a protest has just a single property: msg. The string which is allocated to this property is incorporated into the segment’s layout by utilizing:
<h1>{{ msg }}</h1>
The interpolation syntax required twofold wavy props to incorporate model information in the format.
Utilizing Standard Directives
v-for
The v-for directive makes it possible to render an element multiple times based on data. One can utilize this order for emphasizing over an array and the cluster information to the output. To start with adding an array to the object which is returned by the information technique:
At that point utilize the v-for mandate to incorporate a rundown in the yield printing out the firstname and lastname estimation of each array element:
v-model
The v-model directive makes a two-route authoritative on an information component or a segment. Make a point to characterize a property in your data object which ought to be utilized as the coupling target:
Now, use the directive to bind a value of an input element to that property
With that binding setup we’re getting two impacts:
- Every time user has to enter a value in an input field, estimation of input_val is refreshed.
- If we change the value of input_val in our program, the esteem which is shown in the information component gets refreshed.
v-text
By utilizing the v-text directive the content substance of a component is set. We can utilize it as an option to the {{ … }} syntax if the entire content substance ought to be set. An example we can use this directive to output the input_val value to the user:
Summary
The complete code of the adjusted Hello component execution should now resemble the accompanying:
The outcome can be found in the accompanying screenshot:
Isn’t it easy? Just follow the simple steps and you are done!
- What Is Big Data Visualization? - January 22, 2021
- Five Benefits of Big Data Analytics for E-commerce - July 9, 2020
- Google Data Studio Vs. Tableau: Which One is More Suitable for Your Business? - June 25, 2020



Good Article Sir…..
Great Post sir ….
Like!! Really appreciate you sharing this blog post.Really thank you! Keep writing.